by Helen | Oct 20, 2019 | Croatia, Travel
In northern Istria, is the small village of Draguć, somewhere I’d never heard of, let alone been to, until this summer. That’s the beauty of Istria. It’s a small peninsula and so I guess that once people who visit have been to the big-hitters – Rovinj, Porec, Pula, Motovun, Grožnjan, Rabac, Opatija – they might think they’ve “done” Istria. Not at all. The surface hasn’t even been scratched. There’s no denying the places mentioned above are stunning and all are well worth a visit, if not an extended stay. But sometimes, it’s the little towns and villages, high up in the hills, or tucked away on winding coastal roads, that are the real jewels in the crown.
In the summer we were driving back from the eastern coast towards Pazin, and saw in the distance, a village perched at the top of a hill. We see lots of these and you can’t stop at them all, but my eagle-eyed sister felt there was something a bit special about this one and so did a quick Google search – resulting in the car being turned around.
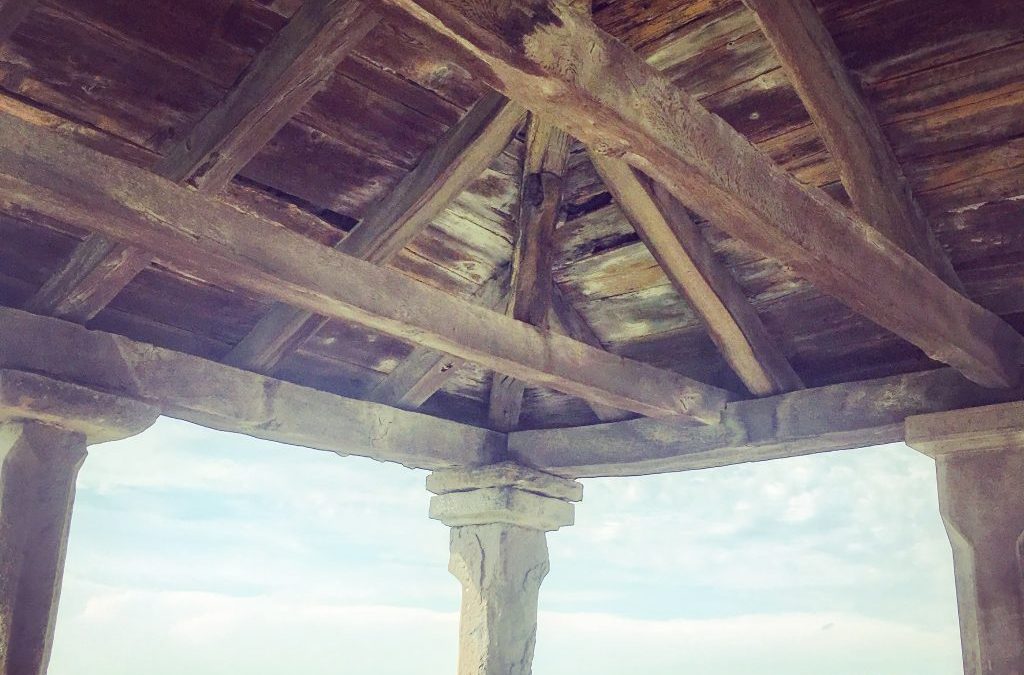
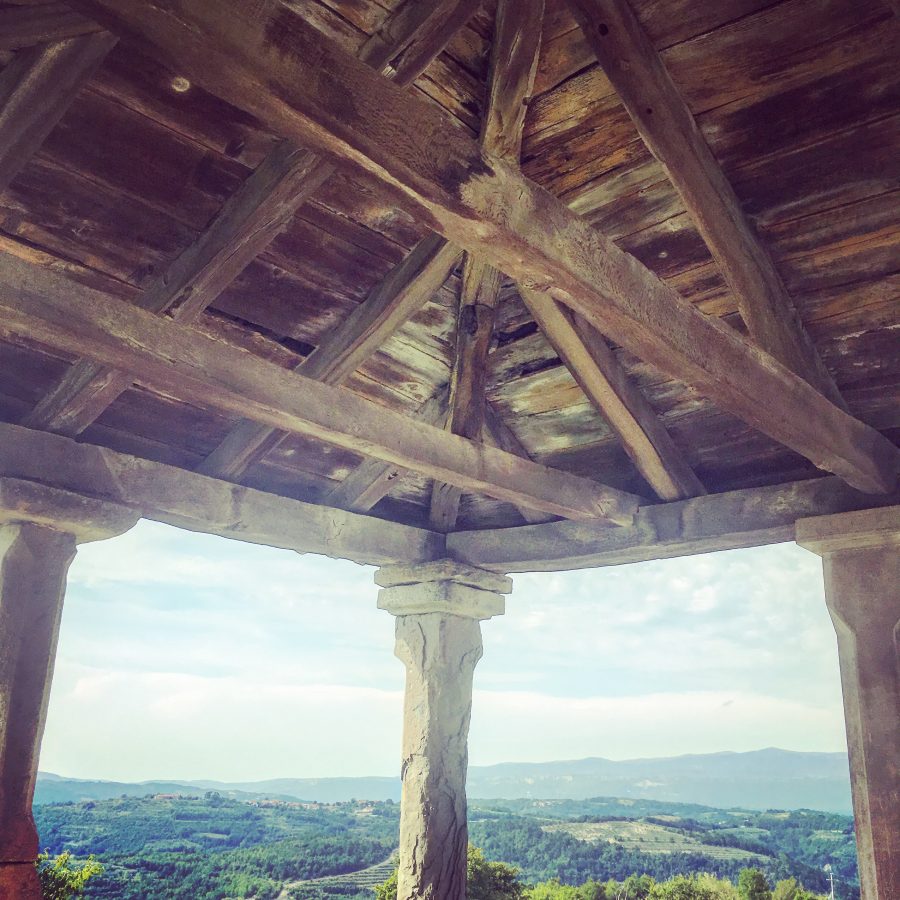
When we arrived, although it was the height of summer, it wasn’t thronged with tourists. A few people were wandering around, snapping away at the historic buildings, the Croatian cats curled up in planters, or stretched out on the cobbles, the painted shutters etc. All was quiet – and very, very beautiful. We’d read on Google about the House of Frescoes and were intrigued. Although it wasn’t quite what we’d imagined when we visited it – we thought it would literally be a house, full of frescoes – it was very informative and led to us stumbling upon something so spectacular that I still can’t believe we got up, so close and personal, to it.
The House of Frescoes was opened in the old school building in Draguć, a combined project of the Istrian Region, the Cerovlje Municipality, the Italian Veneto Region and the Croatian Ministry of Culture. They all recognized the importance of mural painting in Istria, a specific phenomenon of cultural heritage whose preservation and presentation requires significant effort and particular expertise. Although there is much more to the building, we were fascinated by the virtual tour of the churches in Istria, which were covered in ancient frescoes, quite a number being in the Draguć area. These churches, for obvious reasons, aren’t open to the general public as a matter of course, but you can have a guided tour, free of charge. Imagine that back in the UK – free of charge! And this was how we got to see inside the Church of St Roc, built at the beginning of the 16th century.
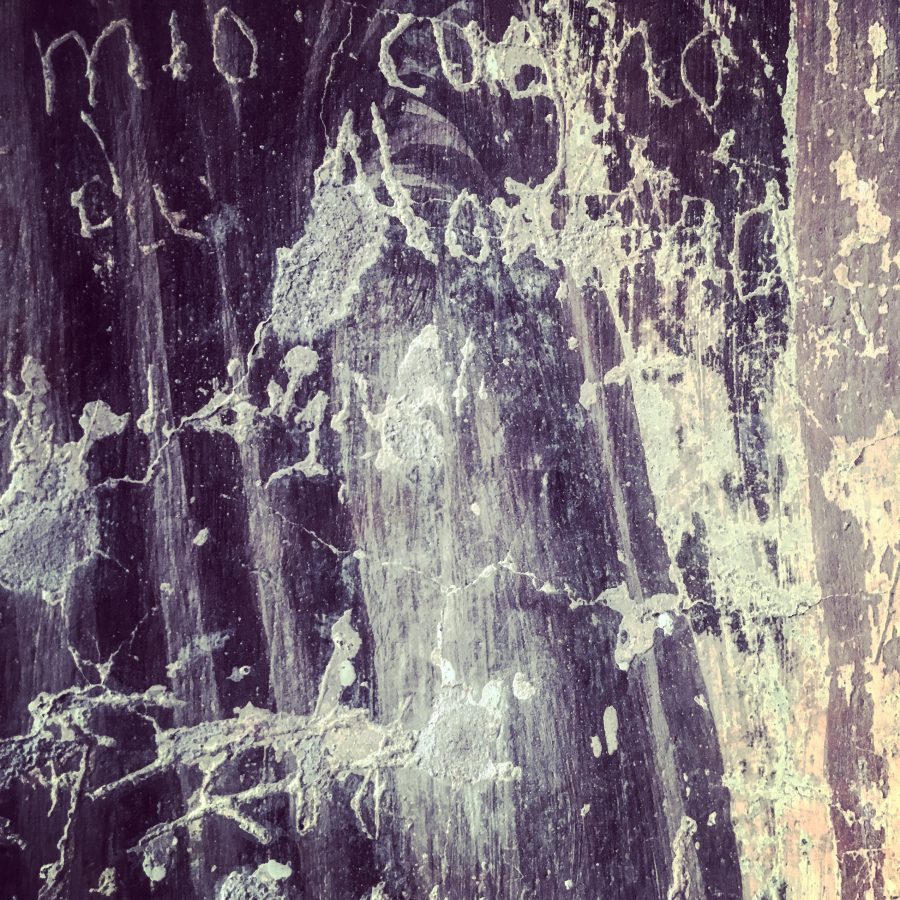
The interior is completely decorated with frescoes, painted between 1529 and 1537 by a local painter, Anthony from Padova – not Padova in Italy but Kašćerga, a small village you can see from the church door if looking out across the lake. Before our guide arrived we could only peer at the frescoes through the bars on the windows – and this was awesome enough. Once inside, our minds were blown!
The church is tiny – another small group had joined us, and with twelve of us inside, it was quite packed. So, for somewhere so small, to be covered from floor to ceiling in frescoes, was something else…
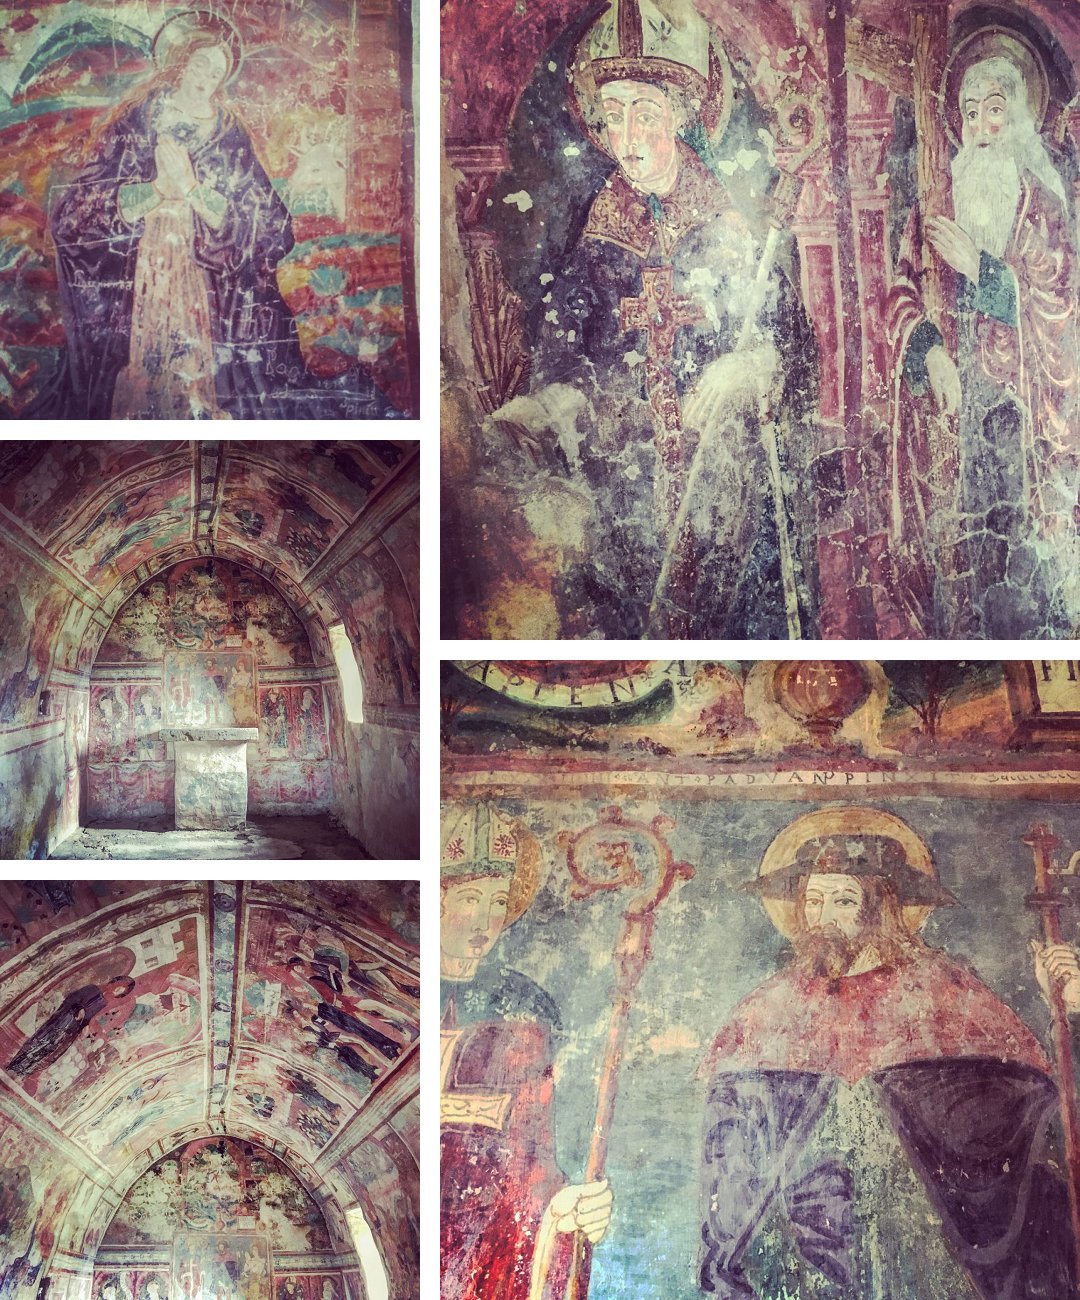
The fact that these ancient works of art are just there – no roping off, not behind glass, no photography restrictions, completely accessible to the public – is incredible. There is such a feeling of trust and a desire to share these masterpieces with people, and I think this instils in people a sense of responsibility and utmost respect.
This tiny church in a very small, hilltop village in the Istrian countryside could so easily be overlooked – so I guess the message is, get off the main roads and explore. Take those roads which look as if they might up in someone’s farmyard. They often do, but just as often, they end up somewhere like Draguć.
by Helen | Oct 19, 2019 | Renovation
Recently, we’ve had our latest Workaway couple staying with us, Kaiti and David, a couple from Oklahoma. Like the other couples who’ve come to stay with us, they are on a sabbatical, travelling and working and embracing the cultural highlights of other countries. They came to us via Ireland, Portugal, Spain, Italy and southern Croatia and brought with them a healthy dose of mid-western American humour, friendship and many an interesting tale, hugely changing our recent perceptions of our neighbours across the pond.
If you’ve seen any of our other posts about WorkAway, you’ll have a fair idea of what it’s about. Basically, people travelling and would-be hosts join an online scheme. The “workers” showcase their skills and the “hosts” describe their project and if it all works out – as it has done so far for us – compatible workers and hosts communicate. The deal is that the people travelling agree to do tasks – we always clarify these in detail, in advance – in exchange for food and accommodation. Between us, we decided to focus on The Well Room, specifically the floor, as David has had experience of floor laying.
However, our floor is not a normal floor. Our builder has always put this job to the back of the queue – and we now absolutely understand why. There are a number of issues with it :
- it is entirely made up of Istrian stone flags – all different sizes and different levels and different textures
- the stones do not join the walls smoothly – there’s much undulation, let’s say
- the glass cover of the well chamber is about 4cms high, but the stone step into the living room less, so somehow the difference would have be levelled
- we want to try and preserve the stones as much as possible, as future owners may find this a real feature and want to once again reveal them
We looked at the potential cost of laying a new wooden floor and it started to become a bit more prohibitive than we had originally anticipated. There was also the issue of fixing the batons to level the floor. Because of the uneveness of the flags, the batons would have had to be cut to various sizes to ensure that the boarding, onto which the flooring would be fixed, would be level. A bit of a nightmare in itself, which would have required mathematical precision. And, time. Time which we didn’t really have as Kaiti and David weren’t with us for that long. Then we considered laying self-levelling concrete – sounded like a solution until we quickly realised that this should probably have been done way back, when the house was still a building site. Not when it was 95% complete. And definitely not when we had people staying as the room would effectively been out of action meaning no access to the kitchen or downstairs bathroom. Next solution we considered was coir carpet. This would have worked well in this room, but the same problems were still there, specifically the uneven base. And, where on earth would we have sourced coir here? Doable, but not in this WorkAway timeframe.
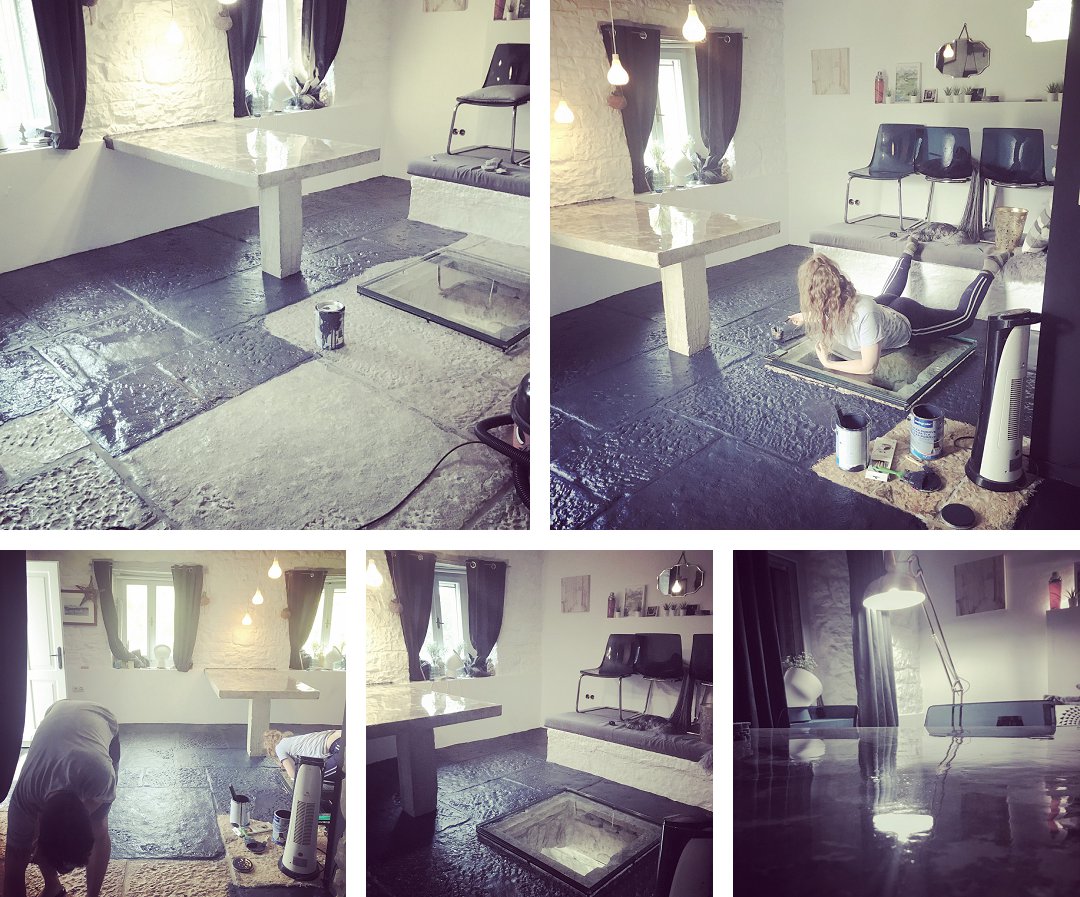
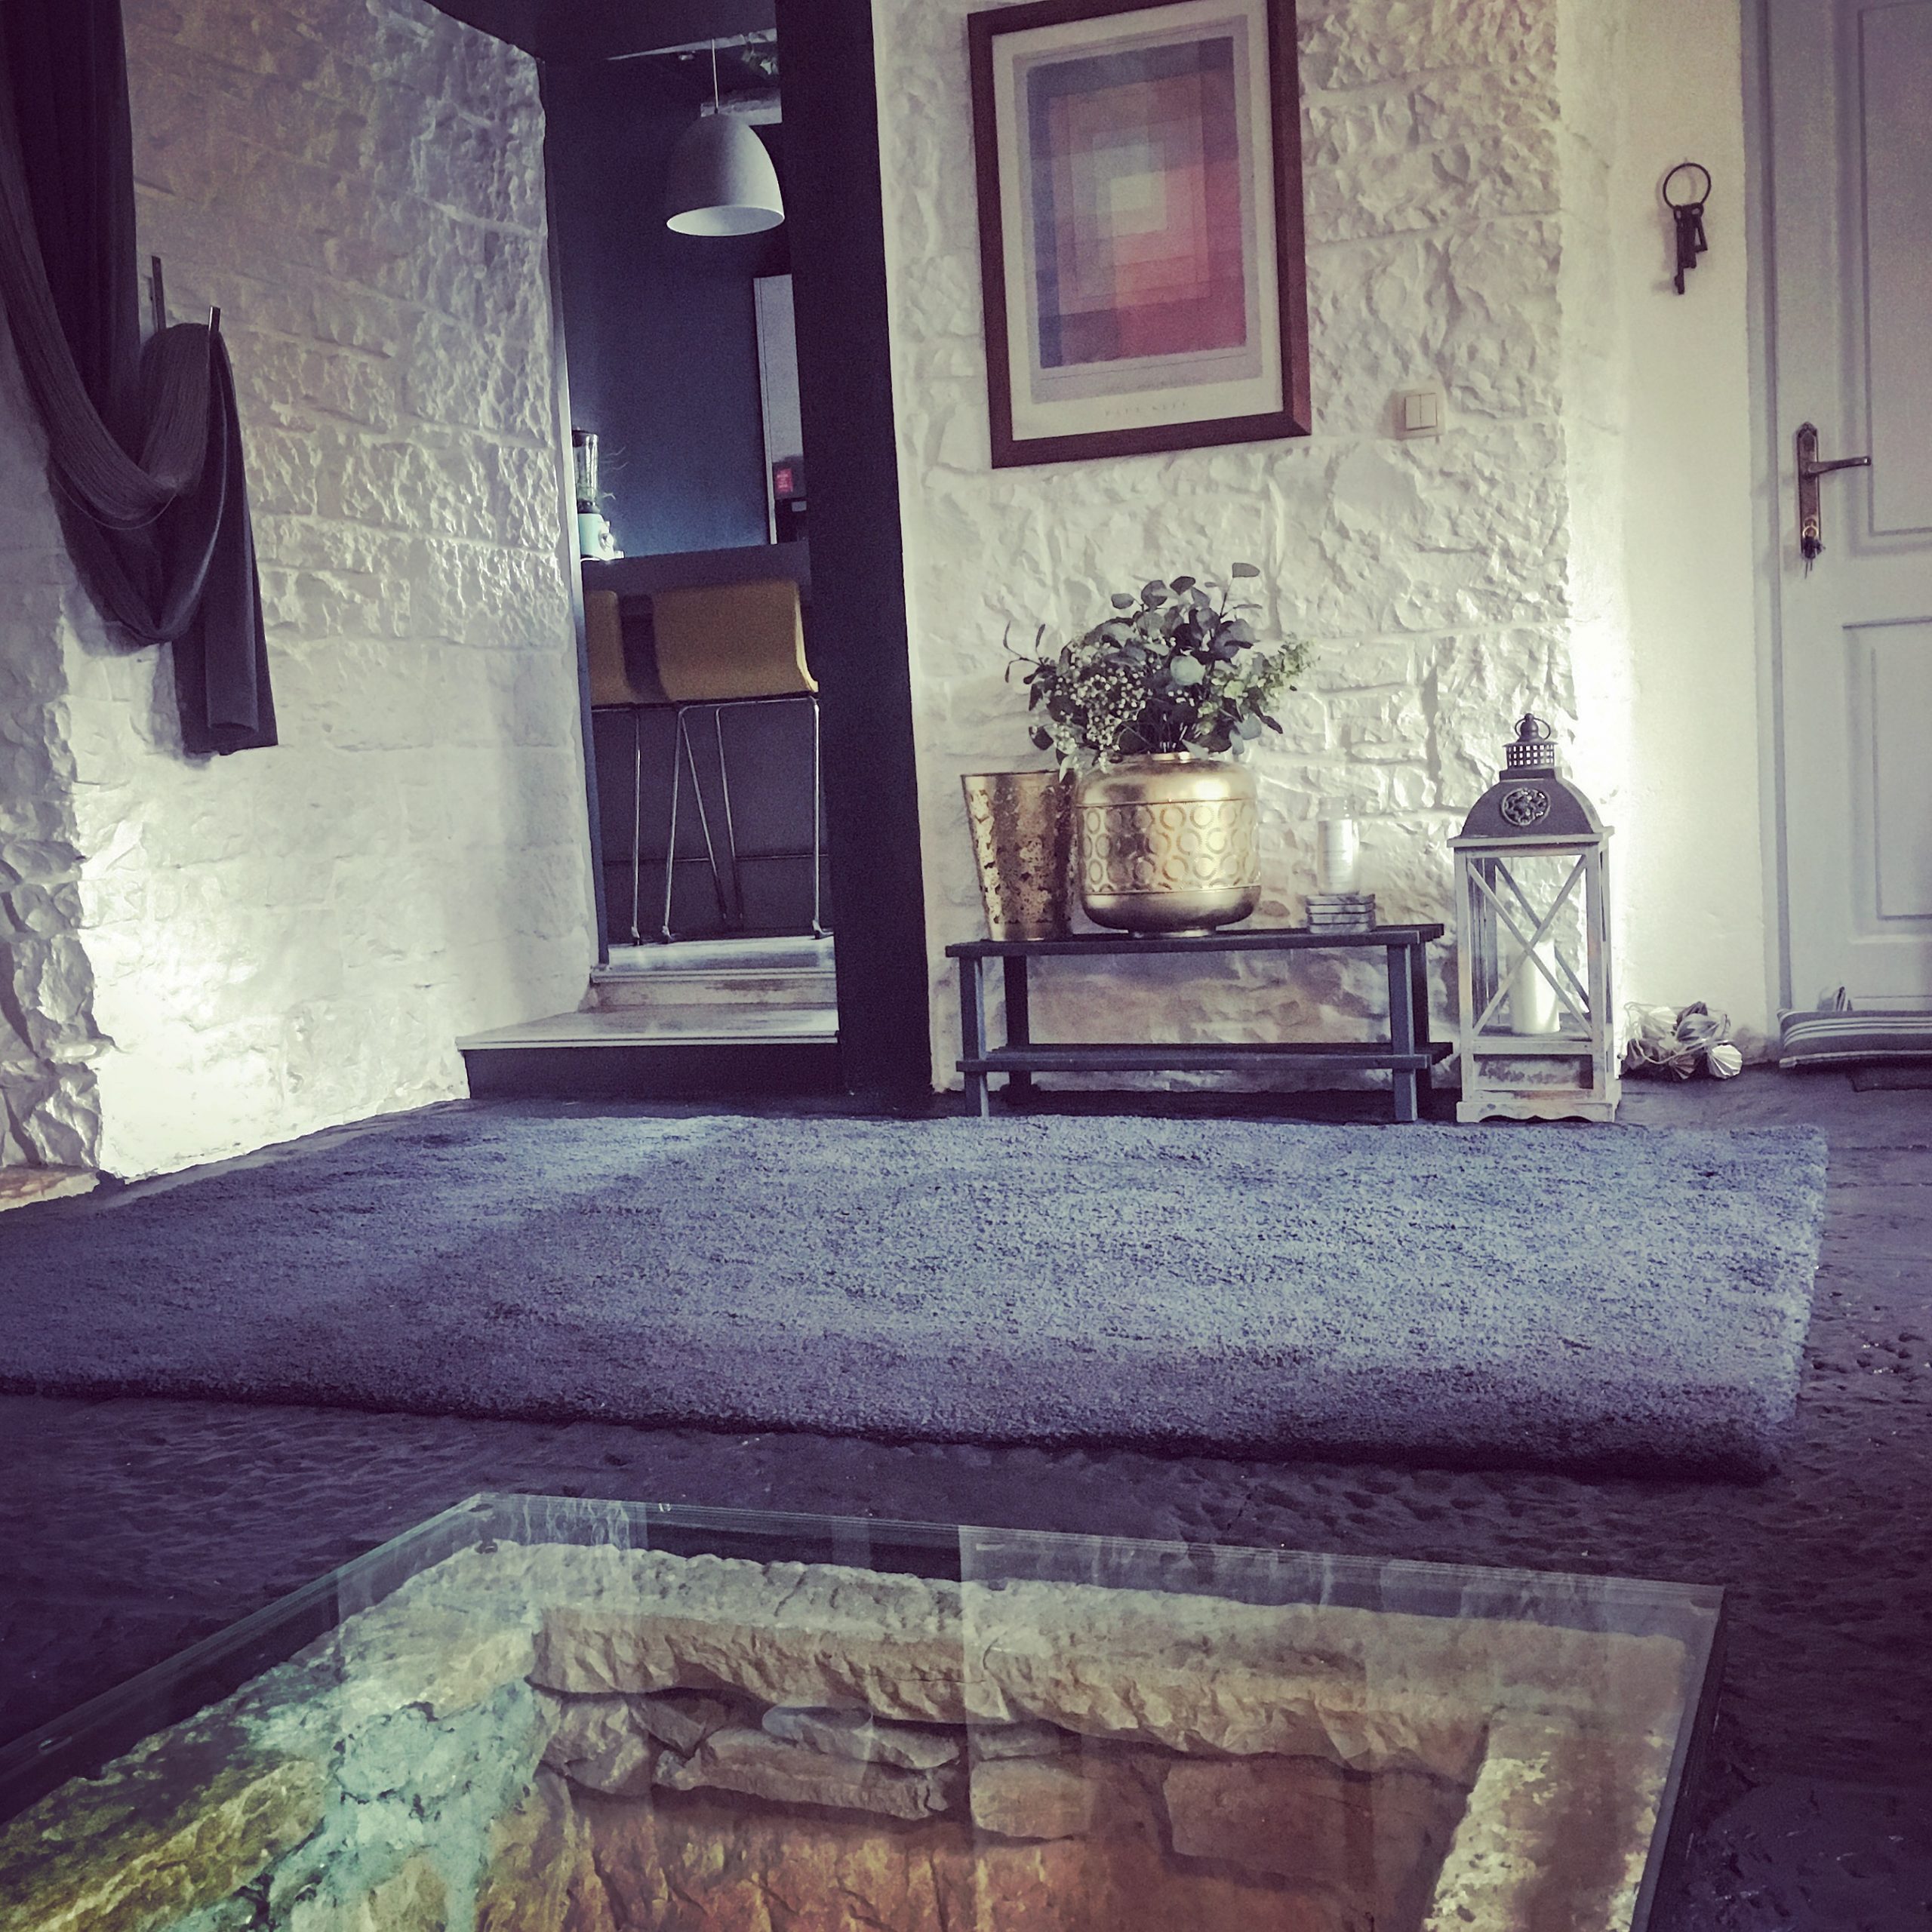
Suddenly, we realised that we were overthinking the floor situation, and we had the lightbulb moment. Back to the start… *PAINT* Yes, masonry paint. How much easier could the solution actually be? 5 litres of navy blue mixed and the floor covering was solved 🙂 However, before the floor was painted, another job was tackled – the concrete table. We’ve never found a suitable finish for this table and so it’s never been quite there. The plinth has also been left unfinished as we were waiting to make the decision on the floor.
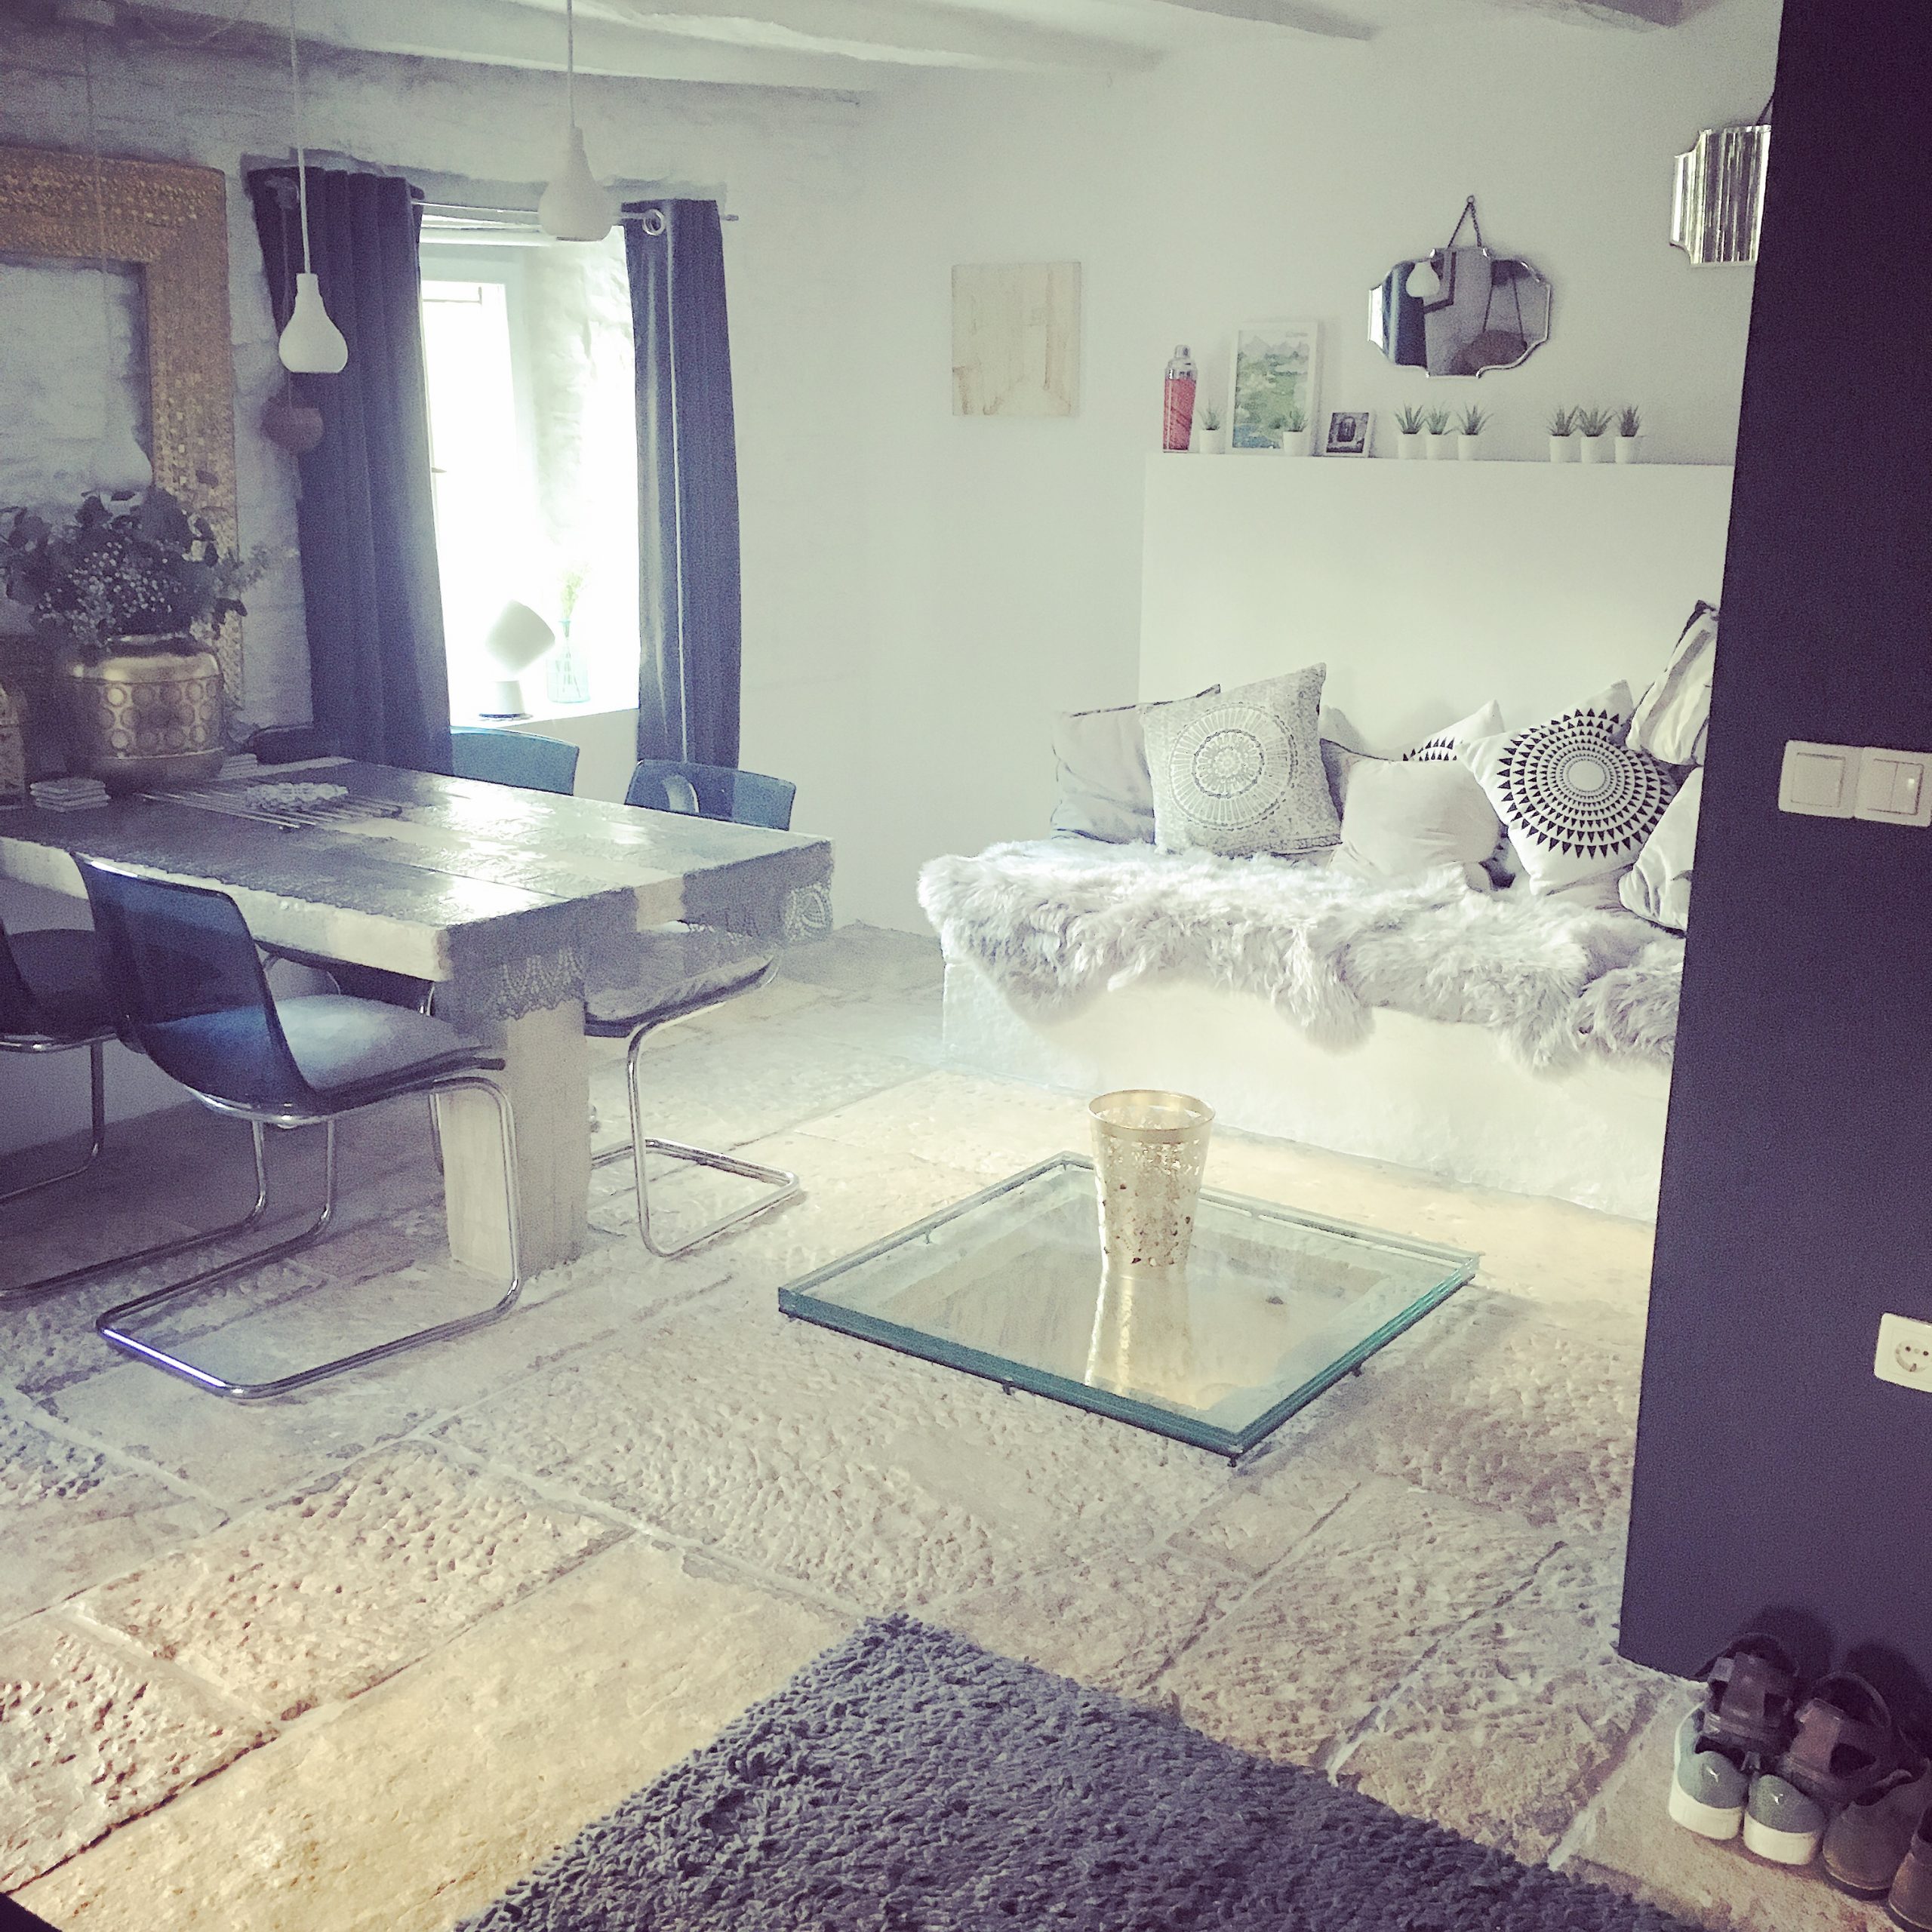
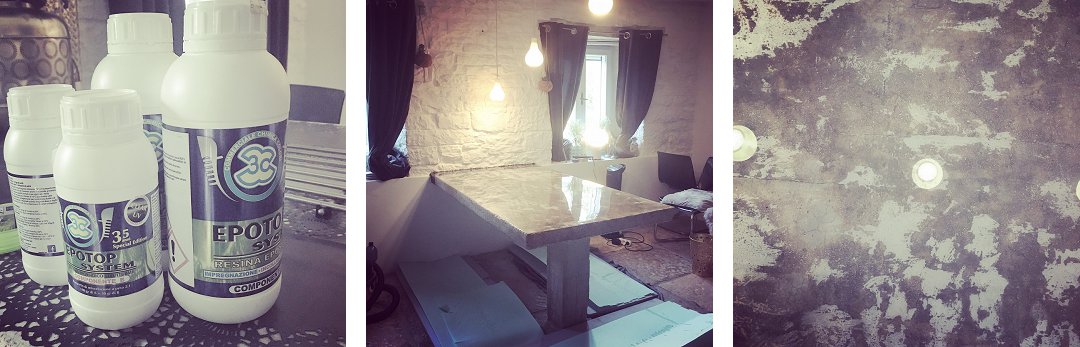
The dual issues with the concrete table and the floor can easily be seen in the photo above. The table plinth is still rough and unfinished and the top of the table is still too powdery, not having ever been treated properly. The floor is effectively like an outdoor patio – uneven and cold. And, you can see the height of the glass cover, which we now also need to take into consideration with any floor we lay. However, once the paint option was decided upon, we figured we could now finish the table – and this was when David revealed another string to his bow. He works with RESIN! So, without further ado, a trip to Koper was done and the resin tracked down – it’s much harder to source here, than you might imagine.
Armed with a blow torch, rubber gloves and the resin, David set about transforming the concrete table top. We also bought wood, cut to size for the plinth – this was painted the same navy blue as the floor and silver profiles were sprayed gold, to finish off the edging. The resin top was left for two days to ensure that it was completely hardened – and wow, what a difference! Because we’d used other varnishes and finishes on the table, and had sanded it a few times, the overall effect is quite marbley, rather than grey polished concrete. Definitely not what we expected, but the resin has highlighted the colours in the concrete and it is just so beautiful. In places, it looks as if specks of gold have been scattered. Just stunning…
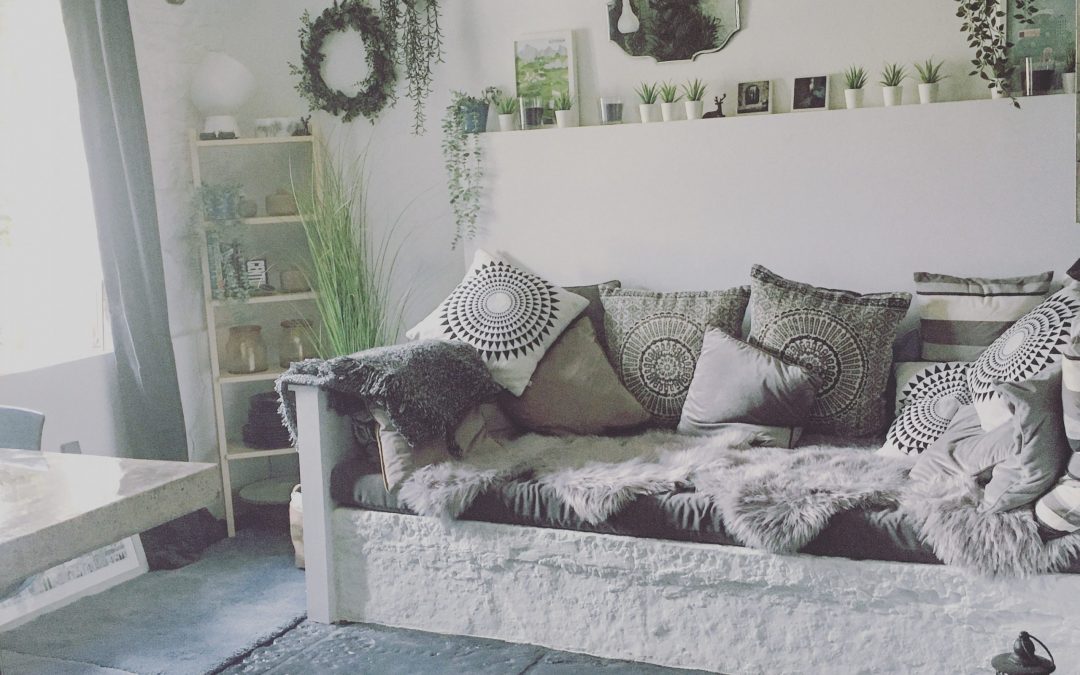
Once the resin had been applied, and dried, the floor was painted. Why we haven’t done this previously, is beyond me! The results are amazing and now the Well Room feels like a room. A proper, finished room.
The final touch will be another couple of big chunky blue rugs to soften the floor and add warmth to the room. Not so long ago the Well Room was a storage room for builders’ tools and general mess. Now, it feels a very luxurious, warm room, with the deep navy colour scheme and touches of gold. The high gloss table top complements the well chamber when it’s lit up, and the soft uplighting on the back wall adds to the ambience. We’re now looking forward to cosy autumn evenings, with the thick navy velvet curtains drawn, and being able to finally sit down and eat at our concrete table.
by Helen | Oct 15, 2019 | Renovation
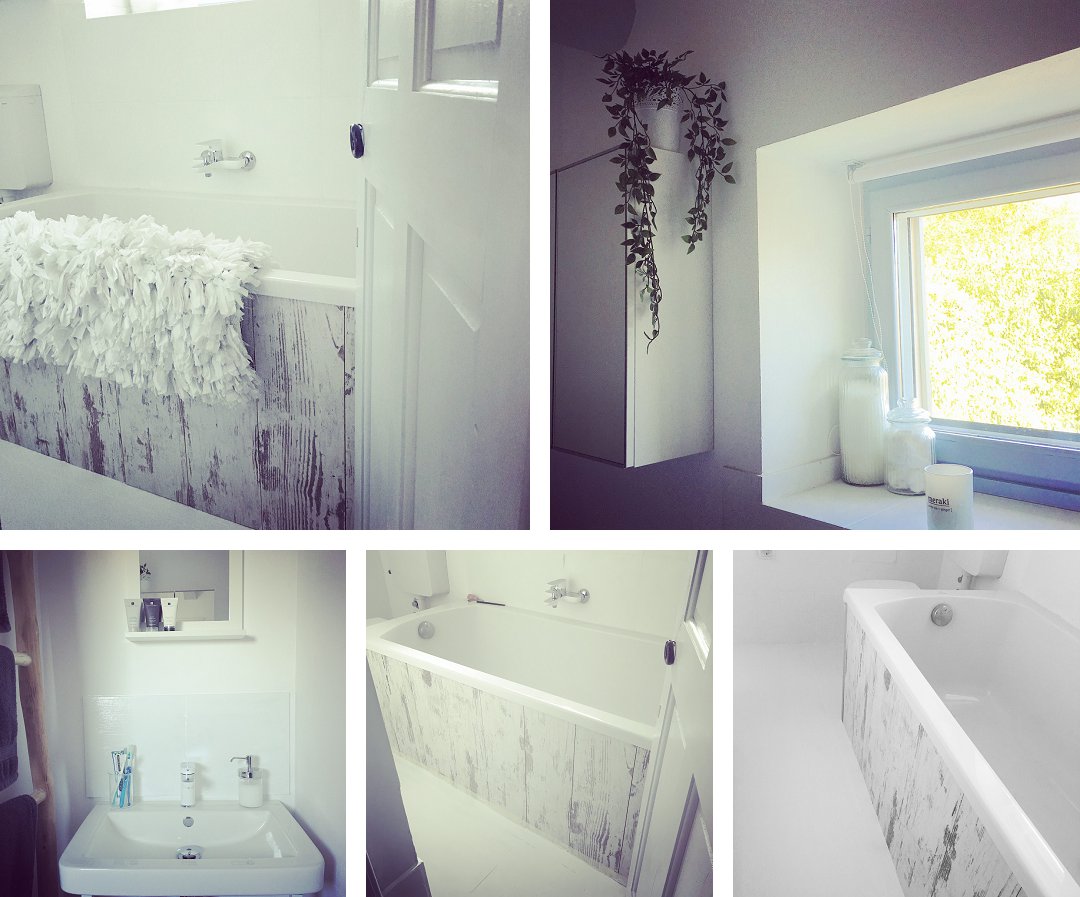
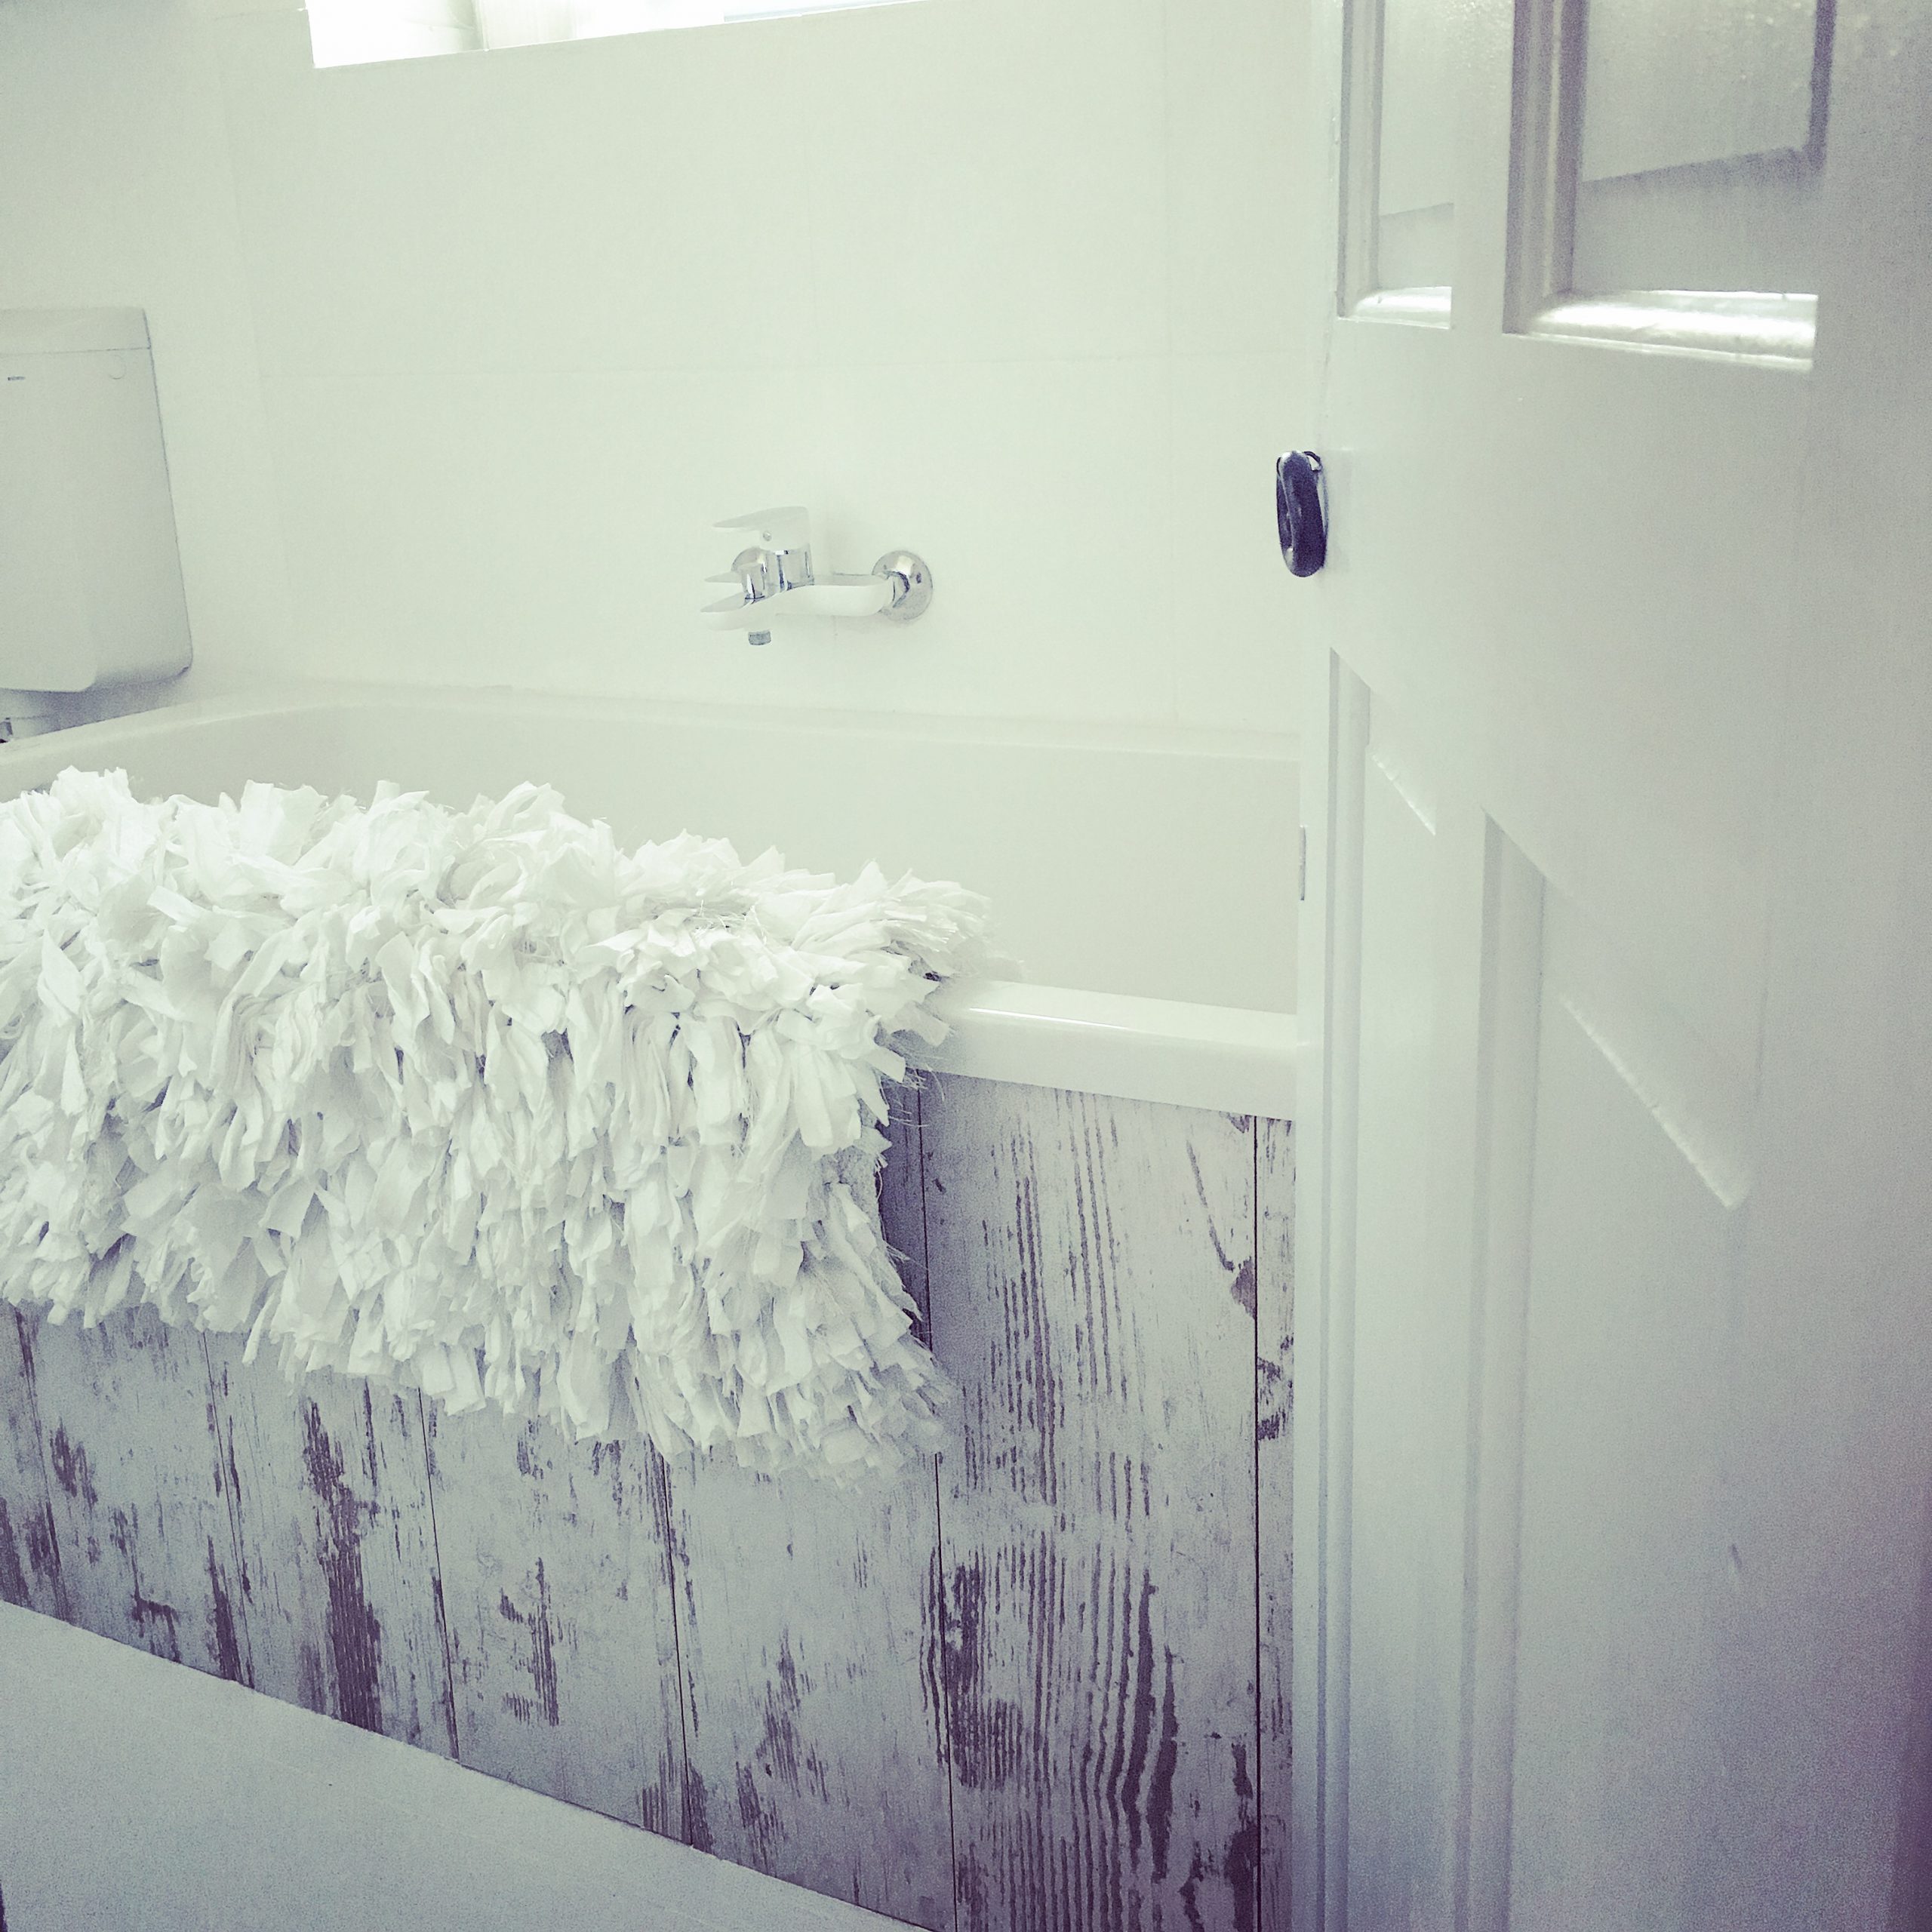
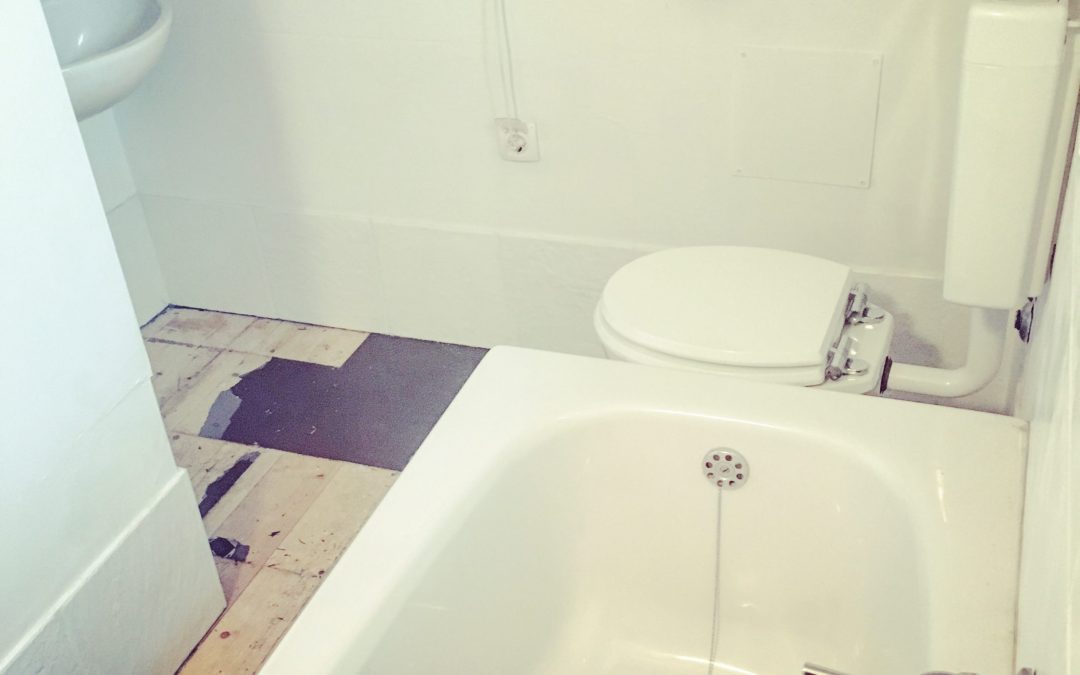
So, what does the bathroom actually look like, now that we’ve completed our mini renovation, and came in under budget? Well, let’s just say that whilst it’ll never win an interior design award, it’s a million times better than the one we inherited, back in 2017…

Literally everything – with the exception of the toilet pedestal, as this was actually quite new – was ripped out and skipped. Apart from the teeny bath which far too small for bathing, but pretty much the perfect size for a re-spray and used as a planter in the garden. That awful lino flooring – which we’d painted early on, as that colour is just vile – was the first thing to come up. It had been stuck on with industrial strength glue, and took a good while to get up. The boards were also sanded back, once the lino was removed.
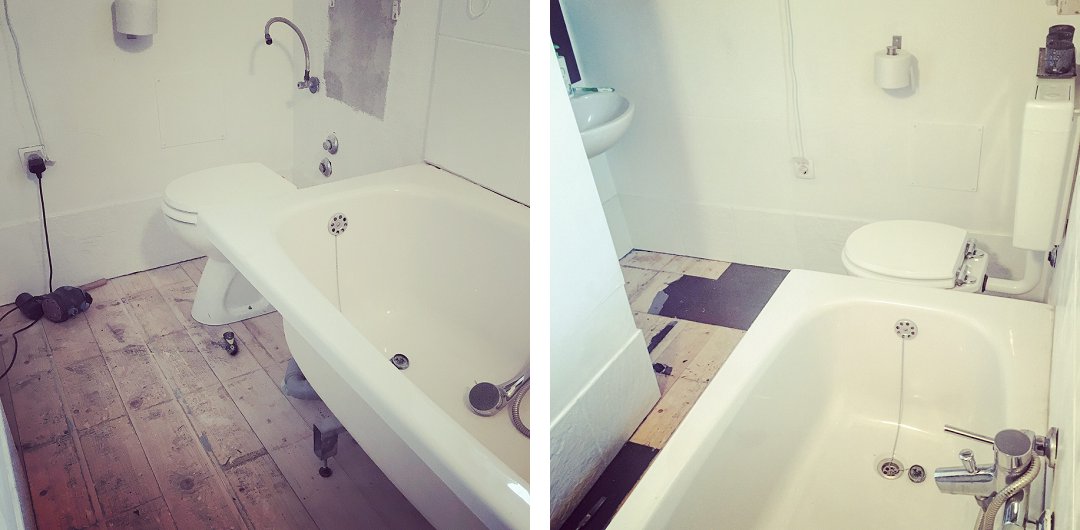
With the cheap, ill-fitting, plastic bath panel removed, we began to get an idea of what the room could look like, as with the sanded floorboards, it immediately felt lighter, brighter and more spacious. Once the bath and sink were removed, everything felt so much better.
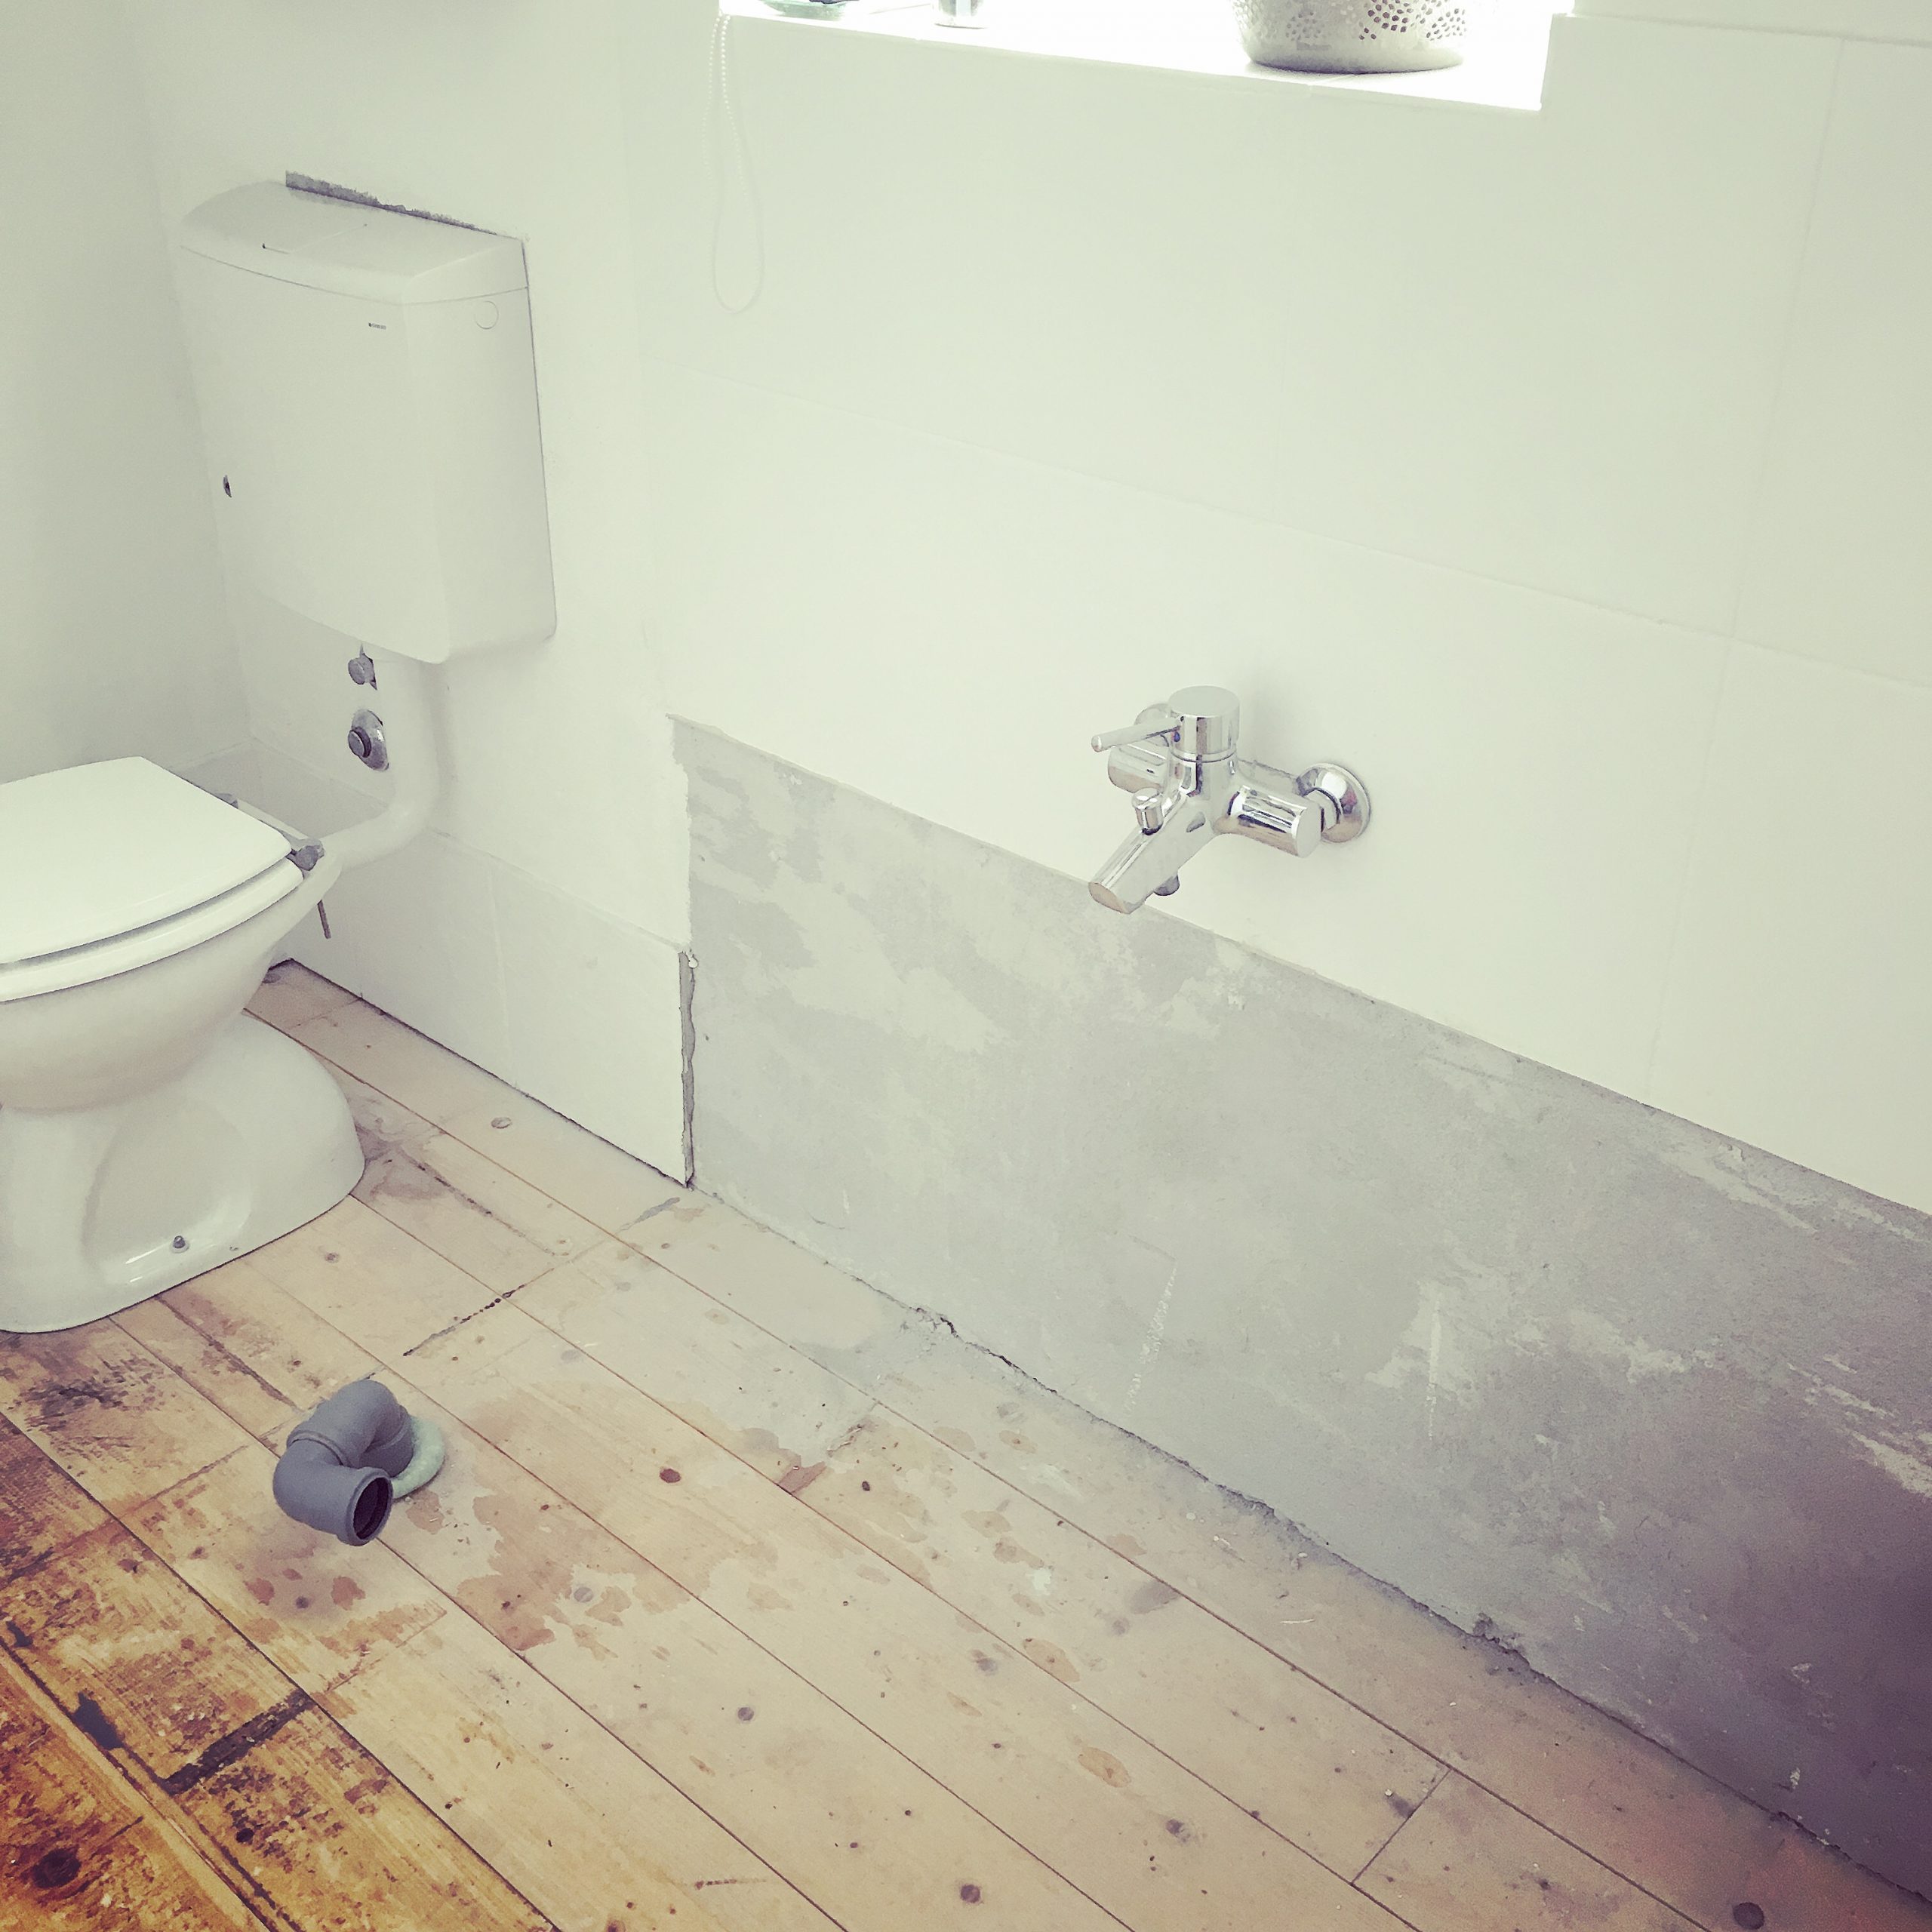
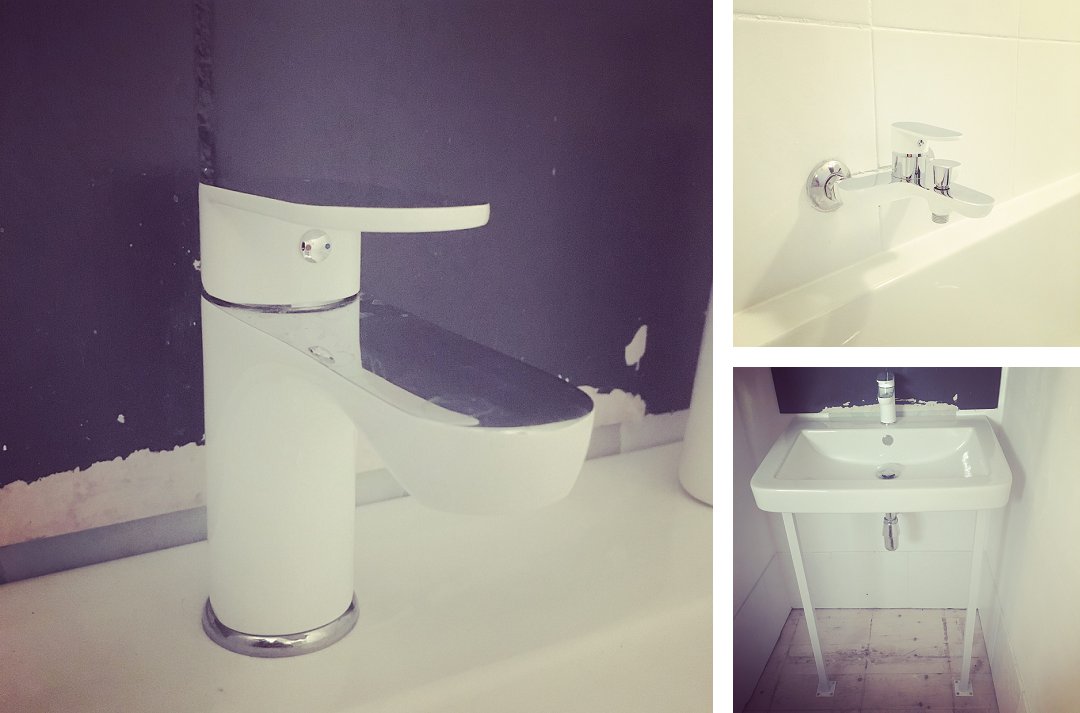
We ditched the idea of relocating the bath, opting instead for a full size one, which would sit under the window, along the length of the wall. This meant we didn’t have to relocate pipework etc, making the job a whole easier and a whole lot less expensive. We chose white sanitary ware, as we were retaining the white toilet and didn’t want to go for a colour, which would potentially minimise the feeling of space we had gained. The bath and the sink were not matching, but both were quite boxy in style and so complemented one another – and the white and chrome taps, push down plugs and shower connection tied the two together.

The new sink was much larger, and therefore heavier than the previous sink, so not wanting it to stand on a vanity unit type of arrangement, we had to come up with a solution. Having made the recess which the sink sits in, feel more spacious, despite it being bigger, we didn’t want it all to feel closed in again, and came up with a very simple idea, to support it.
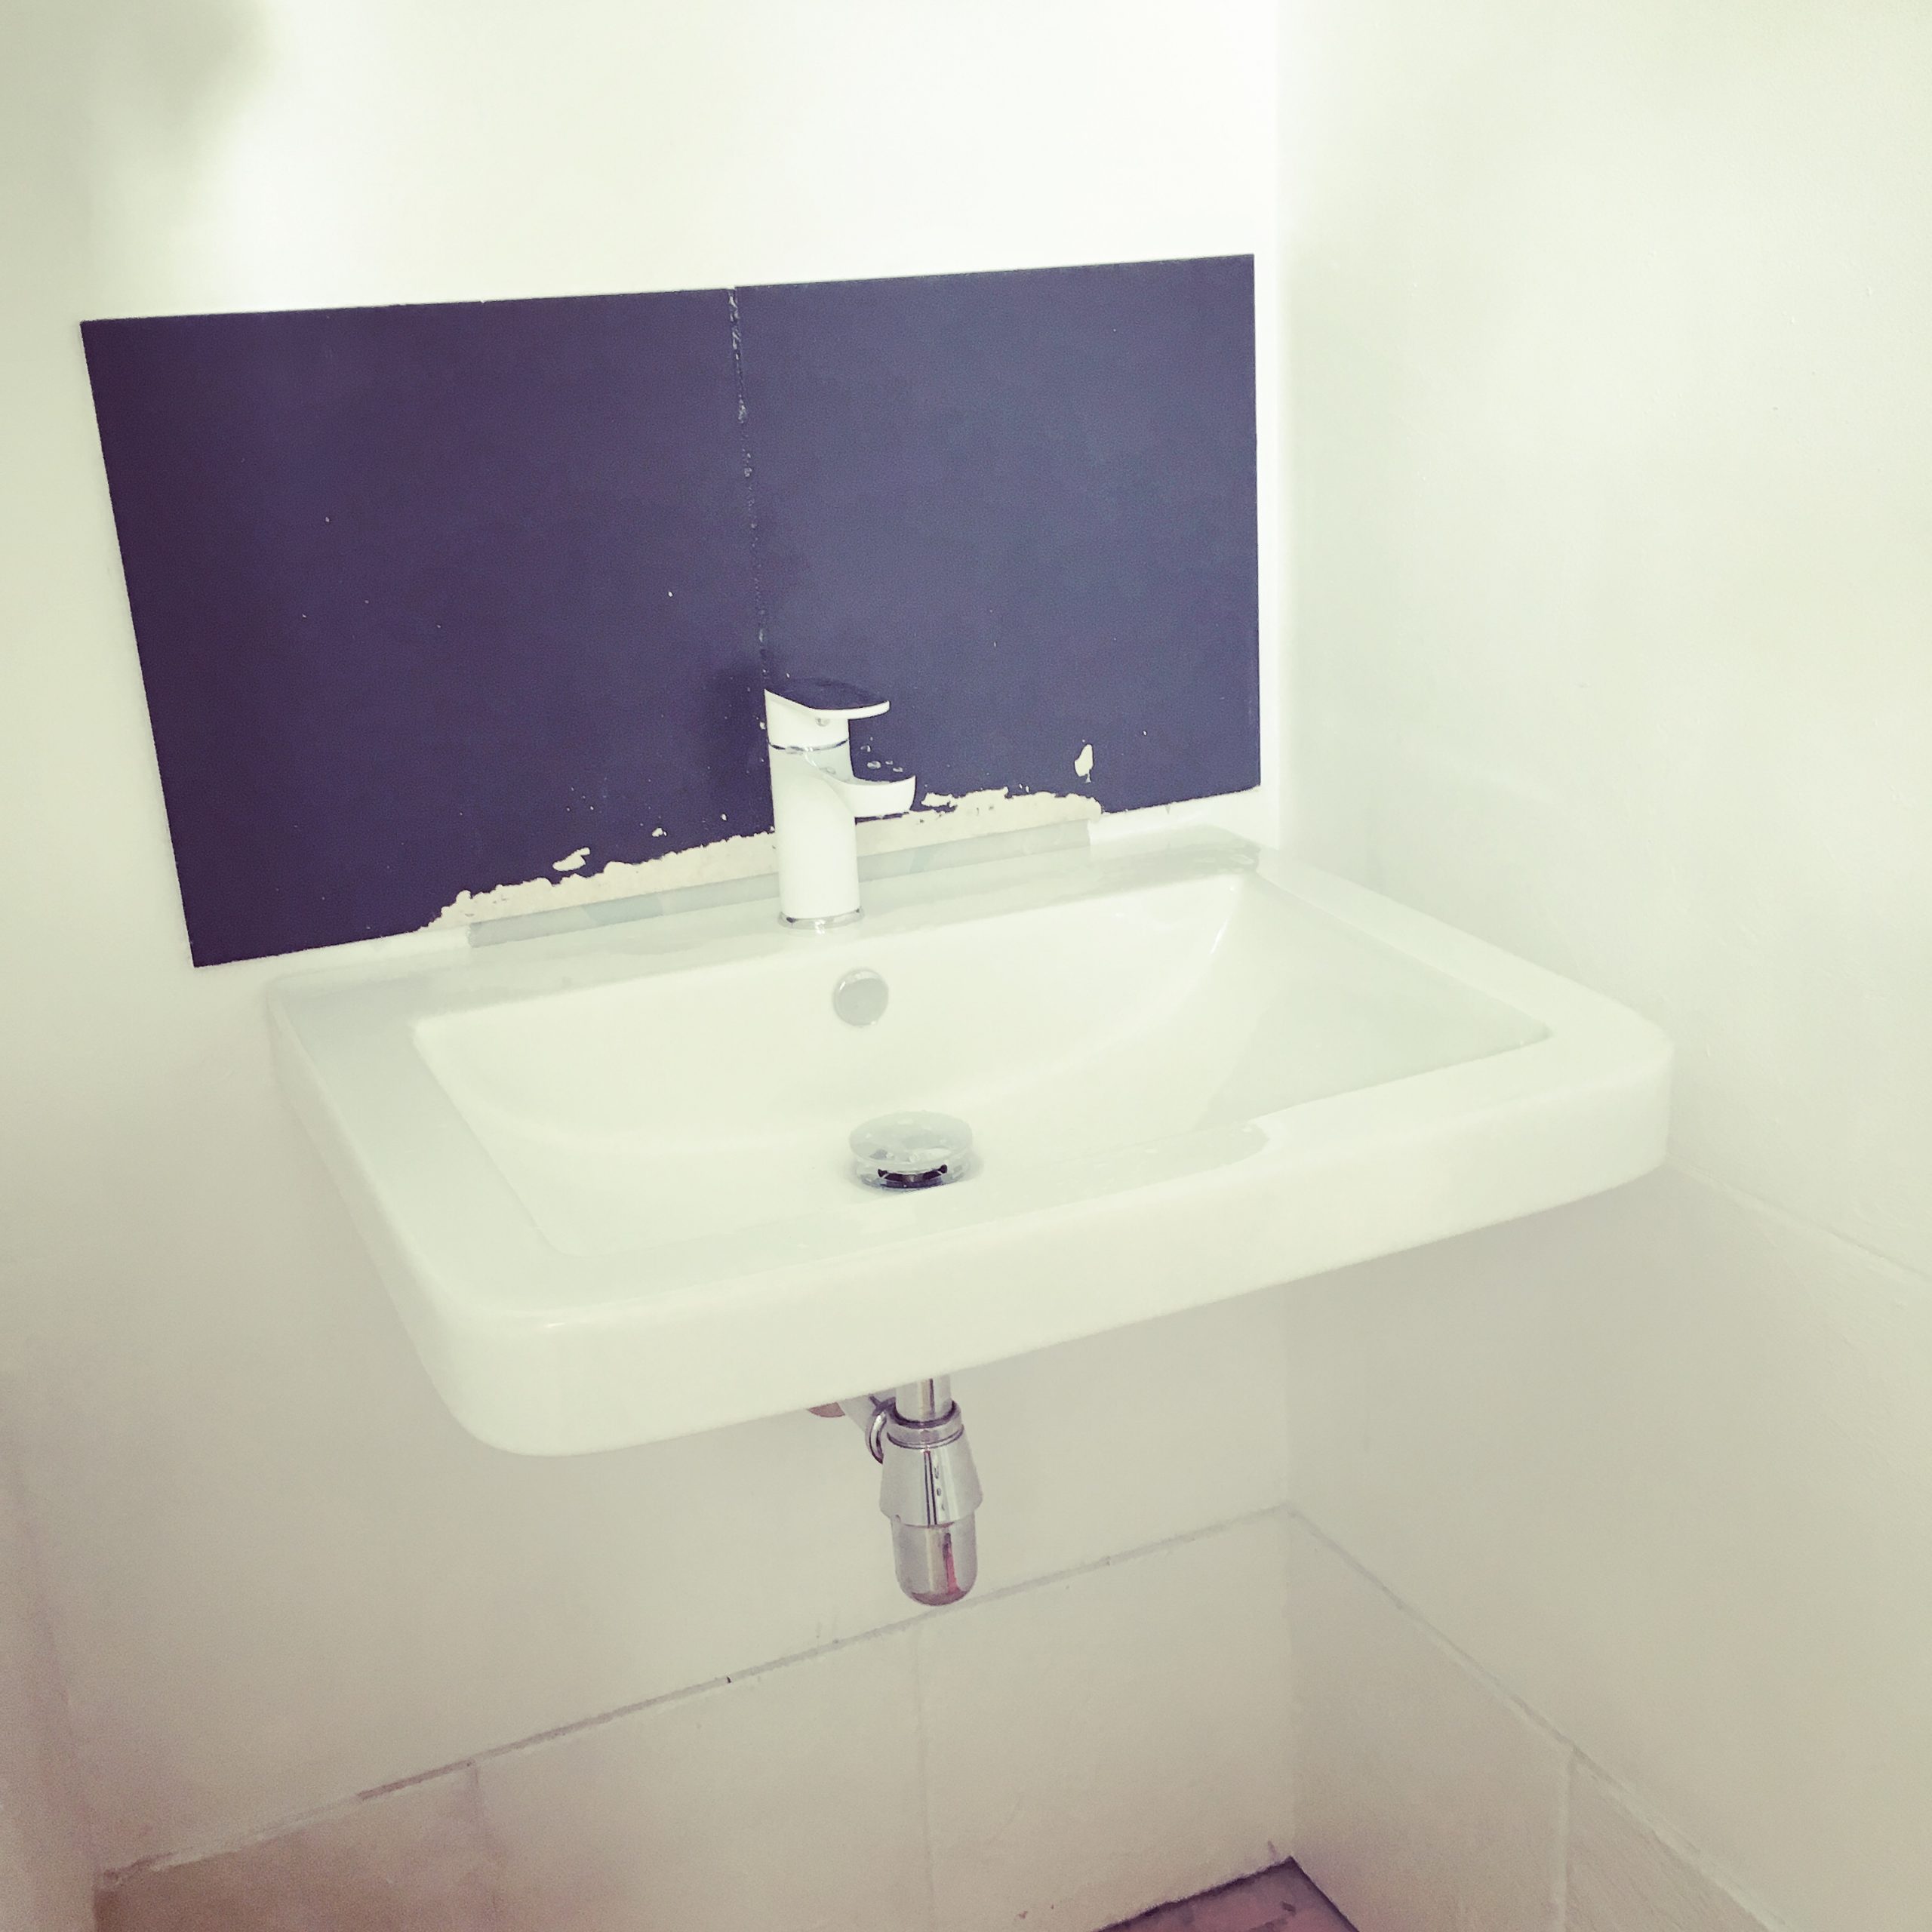
Table legs, secured to the underside of the sink and the floor. Perfect…
The tiles around the sink (which we had previously painted) and the bath, were taken off, the intention being to replace with metro tiles. However, we’d set ourselves the £500 Bathroom Challenge and tiles like this, would have taken us over the budget. So, another decision was taken – which we knew might have to change in the future – and we painted the tiles white and re-grouted. We’re still taking a view on these, but they look a lot smarter than they were, when they a sickly beige colour.
We were still a bit undecided about what to do with the flooring, as there wasn’t so much to cover and potentially we could spend a little more on its finish. But, we quite liked the sanded boards. But, we also quite liked the idea of painting it in a high gloss white, so that the whole room was very light and bright. We did also have the white paint, so that would cut down on expenditure. Decisions, decisions…
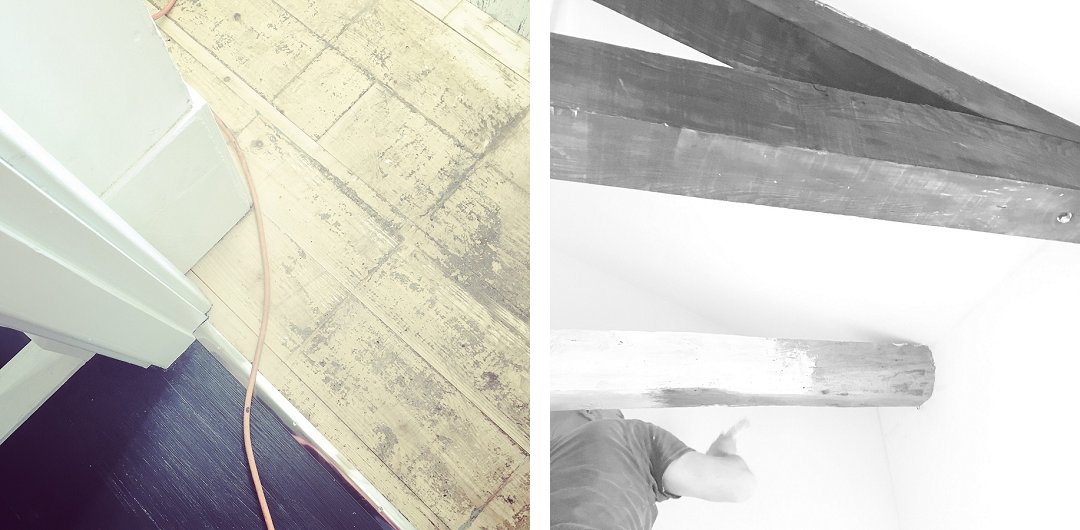
Before we made the choice on the floor finish, the wooden beams were undercoated and painted. Not white this time, though – that’s the undercoat going on above – because we felt that they would just disappear into the white ceiling. So, having plenty of soft grey satinwood, that was our decision made, for the beams.
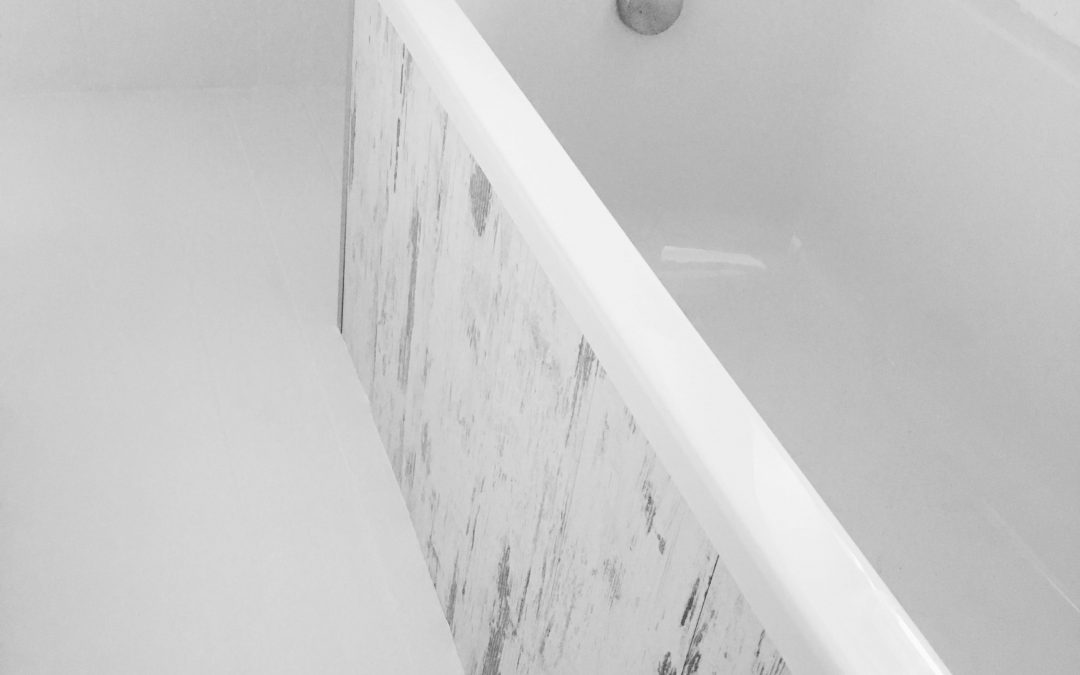
The plastic side panel for the bath was replaced too. A frame was built around the bath, and spare laminate boards, from the kitchen refurbishment, were fitted. White and grey accessories were added to give the room a feeling of softness. And finally, a bathroom we could really begin to relax in.


by Helen | Oct 9, 2019 | Renovation
A while back, I set ourselves the challenge of renovating our upstairs bathroom for less than £500 – excluding labour. Labour is a whole lot less expensive out here, but I’m not mad, as there’s no way we could do a whole renovation of a bathroom, including labour, for that price. So, the initial plan was to cost out labour separately and our trusty builder was going to be the one to do it. However, he now also has a full time job and so the time he can devote to our projects has been reduced, and so we needed to find another solution, or have the prospect of the job taking a long, long time.
Well, the solution became quite obvious – the WorkAway Scheme. Pierre and Patricia, a couple from the South of France, who were on a sabbatical and travelling via the scheme, contacted us as they could offer the plumbing experience we required. We clicked over email contact and a couple of weeks ago, they arrived in their camper van. Thankfully, we hit it off immediately with them and they were really keen to get going on the bathroom! We had an idea as to what we wanted, but we’d decided to wait until they arrived to buy everything, so that they could advise. And, off to Bauhaus in Pula, we went to make the purchases.
the £500 challenge
Since I set the challenge, our circumstances have changed slightly, and the plans we had regarding the bathroom changed. We decided to opt for a safe, all-white option. It also meant that it was much easier to source sanitaryware, as our big go-to DIY store in Pula, has loads of choice.
The primary concerns were a bigger bath and a bigger sink – and we immediately fell for a very chunky, squared-off bath and sink, which whilst not absolutely matching, complemented each other perfectly. The toilet we inherited was in itself, not too awful, as it had obviously been installed new – it was more the cheap, plastic cistern which was the issue. So, we figured we could get away with replacing just the cistern and therefore saving a bulk of money. It also meant we could spend a bit more than we’d intended on the bath and sink taps. The finishing touches 🙂
so, what did we actually spend?
With current exchange rates, the spend on the actual bathroom “furniture” was :
- Bath : 999 kunas = £121
- Cistern : 219.90 kunas = £27
- Sink : 549.90 kunas = £67
- Taps (bath & sink) 1039.80 kunas = £126
- TOTAL : £341
With additional extras such as piping, steel legs to support the sink, wood (for the bath frame), push button plugs, sealant etc, plus a glass door wall cabinet from IKEA, we spent a further £100 (approximately), bringing the total spend to less than £450.
where we made savings
Obviously, not replacing the toilet pedestal and seat cover (which we’d recently replaced) helped in us not going over budget. The actual bath panel was made out of a spare pack of laminate flooring which we had left over from the kitchen renovation. The bathroom floor tiles were lifted, the glue removed (an absolutely hideous job) and the boards sanded. They were then undercoated and painted white – with paint we already had. Same with the walls – repainted white, using paint we already had. A rustic wooden ladder was moved from the bedroom into the bathroom to be used as a towel rail, and a grey felt basket I had bought to store logs in, was brought into the bathroom, to store extra rolled up towels. We didn’t need to change the lighting, as when we moved in, we replaced all of the typical Istrian half moon wall light shades, with amazing white opaque square shades, which had been rescued from a Communist era apartment block in Zagreb. Cool as…!
So, there you go. Challenge met!
by Helen | Oct 2, 2019 | Italy, Travel
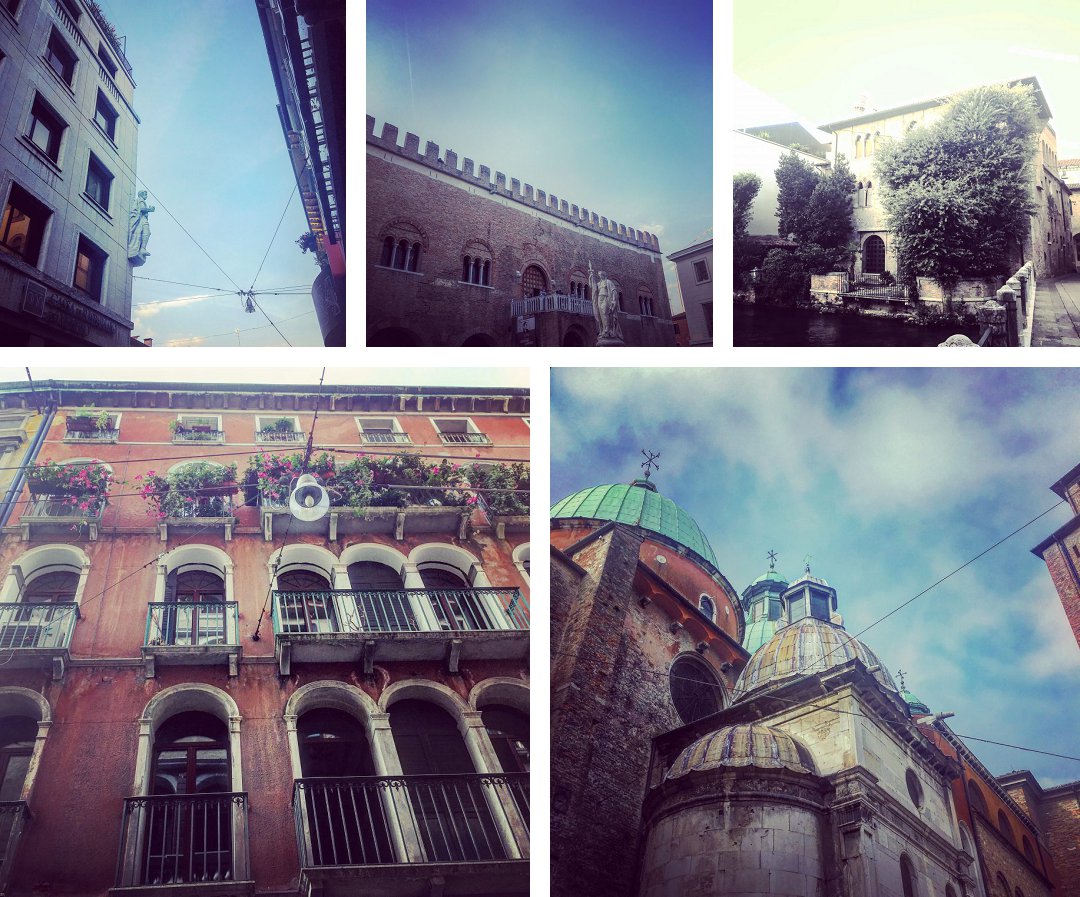
Amanda and Steve, friends who come and visit us from Manchester, usually fly into Treviso, north of Venice, spend a couple of days there and then hop on the train to Trieste where we pick them up. They keep telling us that we must visit Treviso, because we’d love it. Additionally, my sister and family visited a friend of theirs who was living in the city – and she has also told me about this wonderful city and how she’s always surprised, given our love of all things Italy, that we’ve never been there.
It’s easy to get to from our base in northern Istria, as the SS14 (we tend to try and avoid the motorway as it’s, well – mad…) runs straight to Venice, so it’s just a turn off before hitting the canals. But that’s been the issue so far – every time we’re on this road, we’re either heading to Venice with friends or meeting them, or going further west to Verona or Brescia or Bergamo. Or, back to the UK. So the turn off to Treviso is never really convenient – until this weekend.
Amanda and Steve were flying out for a short break with family and they invited us over, to join them. We always get excited at the fact that we can do this now. Just get in the car and drive and meet friends in another country. It’s what we always dreamed – and it’s now happening!
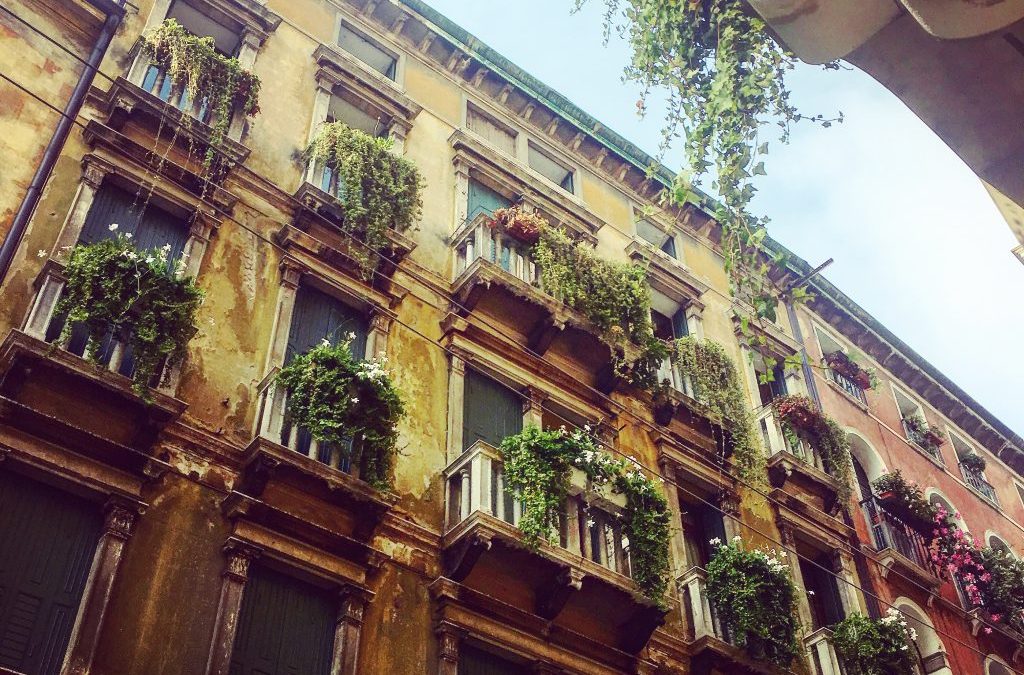
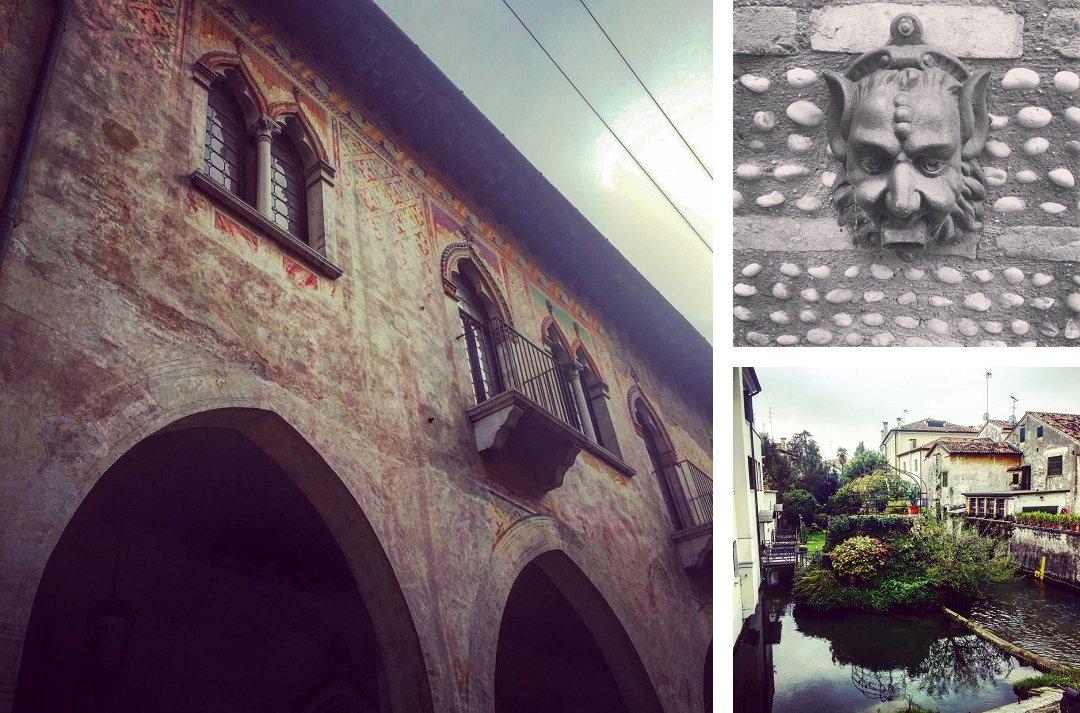
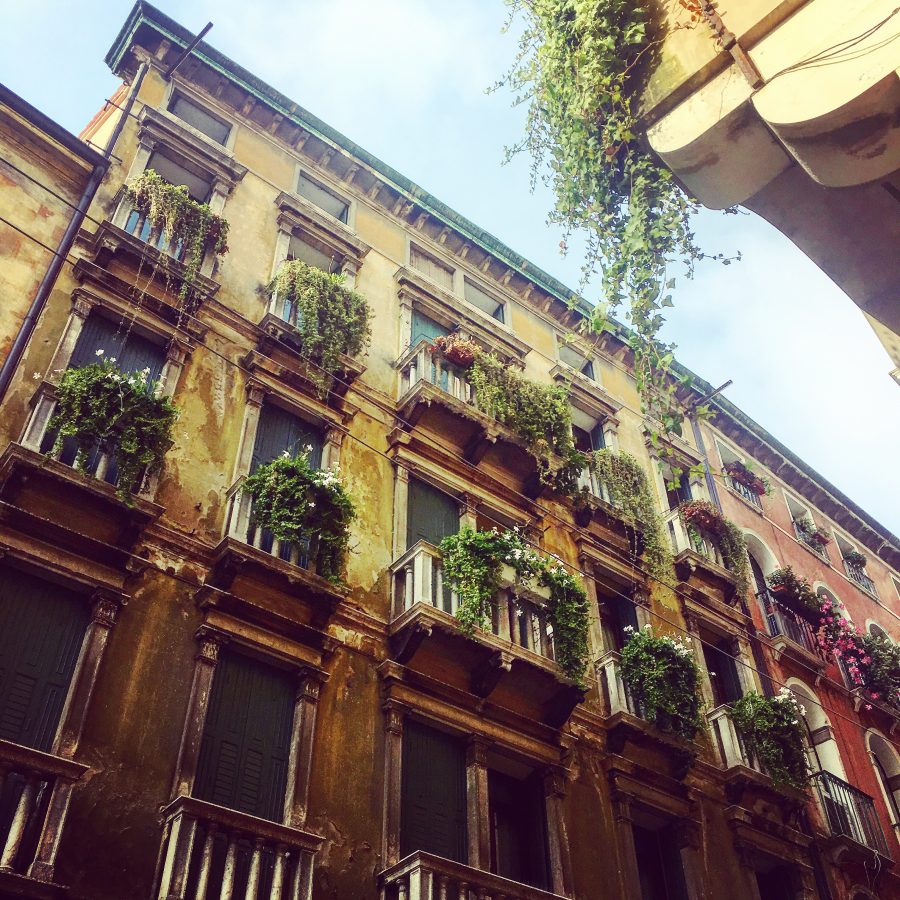
We left our home in Istria at 11am and taking the more scenic route, and we were parked up in Treviso at 3pm. Just driving through the centre of the walled medieval town blew us away, because it wasn’t at all what we expected. I’m not sure what we expected, but it wasn’t what we found. With its Venetian walls, and red bricked buildings, and many bridges over the river, and winding alleyways with tall, overhanging, balconied buildings, it is very much like Venice. But it’s also like Padua and Cesena and Bologna – but with a feeling of real identity. It’s really difficult to describe – it’s like lots of Italian cities, but like none at all.
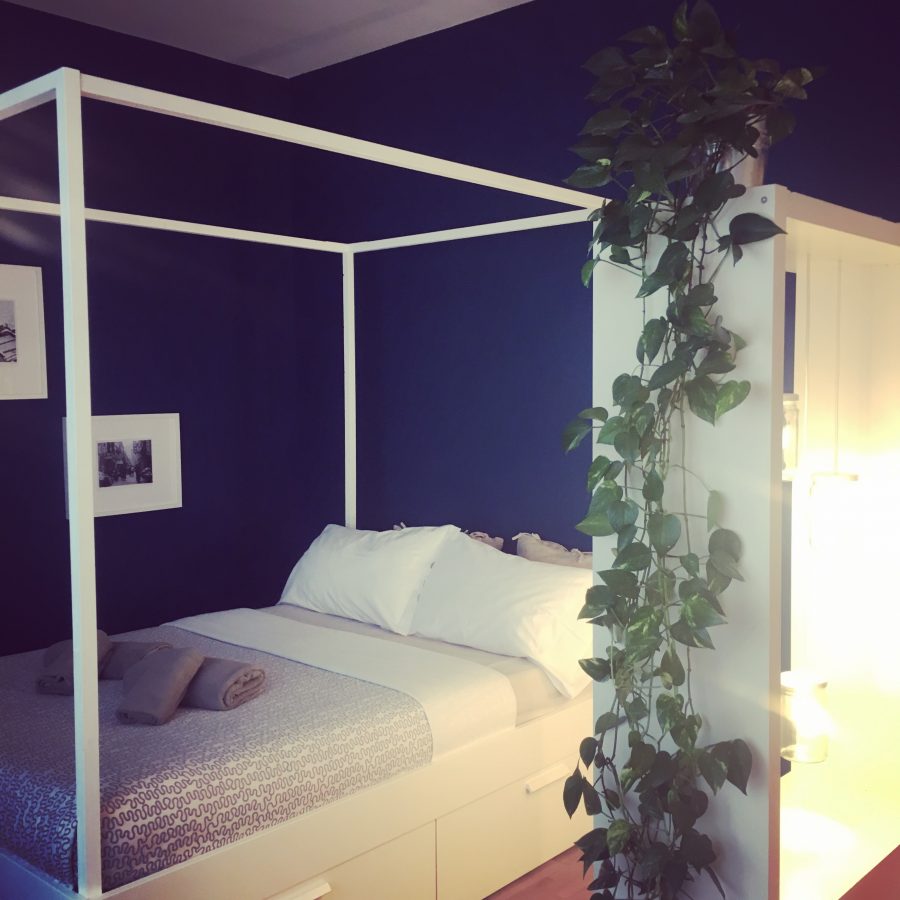
Our apartment, Rialto 13, was situated just off Piazza dei Signori, so very central. It was on the fourth floor of a very old building, so no lift – just lots of stone steps. But, once inside it was a haven of modernity – a really, really well equipped separate kitchen which would be perfect if you were staying more than one night, a large bathroom with a washing machine (again, a plus point for longer staying guests) and a big bedroom, which was very tastefully furnished.
Our overnight trip was unfortunately all too short on this occasion. We had a date with IKEA, the following day – and unlike when we lived in West Didsbury, it’s now not as easy as popping over to Ashton or Warrington. From Treviso our choices were east to Padua or west, and back homewards, to Villesse, just outside of Trieste. So we had to hotfoot it through Treviso to get back to Villesse – but not before we’d savoured some of the some amazing sights that the city has to offer. Enough for me to have already been looking at a return trip…
by Helen | Sep 28, 2019 | Renovation
We’ve just said au revoir to our lastest WorkAway visitors, a very handy French couple, from the Pyrenees area, but on a travelling sabbatical, in their trusty campervan. They contacted us, having seen our profile on the website, and felt that their skills were a good match for what we required. We’ve had two previous fabulous WorkAway experiences, but the last one was not so good and so we really investigated our French would-be guests, as we definitely didn’t want people who were actually on HolidayAway, rather than WorkAway. Like the last one. But, we felt very reassured with everything we read and our email communications were easy, friendly and informative. And, so last Saturday Patricia and Pierre arrived in their campervan.
We always make sure that one of the spare bedrooms is made up for WorkAway guests – the whole point of this scheme is that there should be a fair exchange. So, if people are coming into our home and giving us their time and skills, free of charge, then it’s only right that we ensure that they are comfortable, warm and well fed. Now that we feel at ease and confident with the scheme, we make sure that on arrival, we discuss expectations so as to minimise any room for confusion or misunderstanding. Although they were happy to stay in the campervan if necessary, we didn’t feel this was a “fair exchange” – especially as we immediately hit it off with them – and so they were delighted, after weeks in the van, at the prospect of having a big, comfy bed, as well as a hot shower when they needed it. We also provide breakfast, lunch and an evening meal – we cannot expect people to do quite manual work, without feeding them.
We can almost see the finishing line in terms of our house renovations. We could go on forever, but we have a new, exciting plan in the pipeline and so we’ve honed our profile so that anyone looking for hosts, knows exactly what we need and why we need it. With Pierre’s background in plumbing and building and Patricia’s in landscape gardening, they came to us just at the right time.
so, what did they do?
Our upstairs bathroom hasn’t been renovated, to date – apart from us giving it a lick of paint and adding some nice accessories. But, with us starting to now market the house, we felt that this room finally needed to be tackled and so bit the bullet and made this the priority, ensuring that our French visitors knew beforehand what we wanted then to do. Although we knew exactly what we wanted in terms of the bath etc, we didn’t purchase anything before they arrived because we wanted to take their professional advice re fittings etc, and so set off, with them, to Pula, to make the purchases. Only we were thwarted by the not-very-well-publicised Pula Half Marathon, as all roads into the city were closed until 3pm and on a Sunday, Bauhaus – where we were making the purchases from – is only open until 2pm. However, once back at the house, it did mean we could set about ripping out the old bathroom. A mightily pleasurable task…
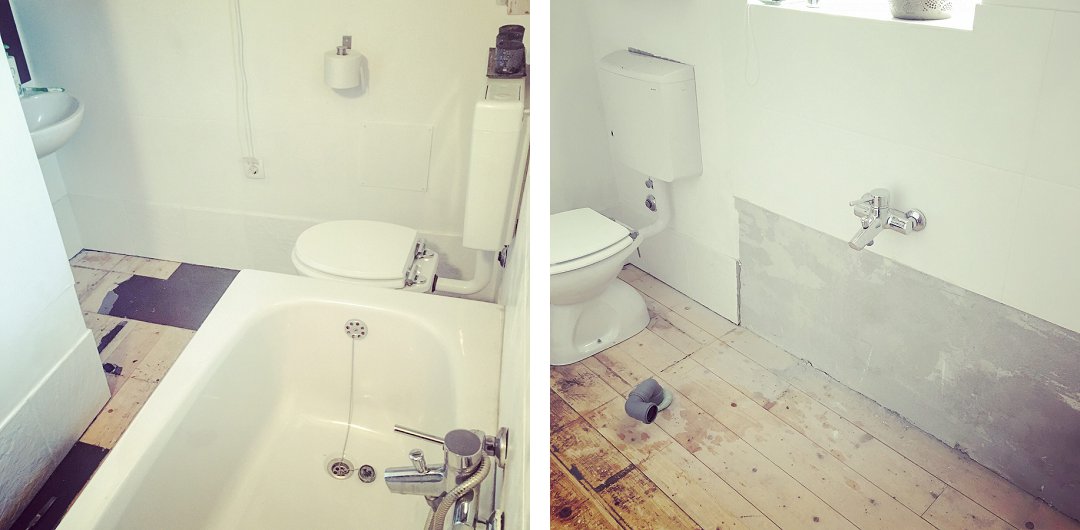
The floor tiles have all been removed but have left behind that hideous, sticky adhesive which is hellish to remove. However, with a mix of a sander, a scraper, a hairdryer and good old elbow grease, we will succeed and we will get rid of it. (We could go out and buy a solution which could make it easier, BUT this would involve a long trip back to Pula, probably, and we’ve decided that in the time this would take, we could probably have shifted a fair amount by other means). The sander is sanding away upstairs and hopefully the boards will be smooth and glue-free, quite soon. We had toyed with the idea of removing the white wall tiles and replacing with Spanish style tiles – BUT, we’ve decided against this expense and instead are going to paint one of the walls in a feature colour. We’re veering towards either Parma Gray or Lulworth Blue, and in a very handy coincidence, we’re off to Treviso for a short visit – where there is a Farrow & Ball showroom. That’s what I call a result.

A return trip to Pula was much more successful and meant the the new sanitaryware was purchased, meaning we had a bath in the living room for a couple of days as the bathroom floor was finished. I don’t want to give away too much here, as the bathroom isn’t fully finished, although the bath, sink, toilet and new taps are all in. Our new friends left yesterday, to head off for their next adventure in Dubrovnik, so it’s over to us now.
would we recommend workaway?
Absolutely, we would. The one blip we had, was entirely my fault, as I didn’t really do my research on this one. It was in the early days of us being part of the scheme, that arrangements were made and I didn’t go back to them, until he was about to arrive and I felt it was unfair to cancel at such short notice. I did have reservations, but thought we’d give this one a chance – when it became quite clear that this particular exchange was going in one direction (us providing accommodation, food, comfortable living etc) and we were getting very, very little reciprocated, we brought things to a close earlier than had been arranged.
Four experiences in, and we are very much enjoying the scheme. We have made three sets of great friends and our house has come on in leaps and bounds, thanks to the skills these people brought with them. If you don’t really like having people in your home, this scheme is probably not for you. But, we’ve found it be overall a very positive and enriching experience and has enabled us to meet interesting people who we wouldn’t have otherwise met, and we’ve learned new skills – as well as being able to tick off a whole load of tasks on our to-do renovation list.
Next week, we have a couple from the States arriving – and the agreed task this time, is to have a wooden floor, with insulation, laid over the stone flags in the Well Room. No more cold feet in the winter…
by Helen | Sep 23, 2019 | Lifestyle
Restaurant choices in Istria are huge. Even the tiniest hamlet will usually boast a konoba, serving food of an excellent quality. If you love pasta, gnocchi, stews and truffles, then Istria is definitely for you, as these do form the staples of many restaurant menus. I think it’s also fair to say that quite a few of the restaurants (mainly the konobas) follow a similar theme, decor-wise. Lots of dark wood, exposed stonework, large open fireplace, red and white checked tablecloths – you get the picture. And so sometimes we do crave for somewhere that’s a little bit different, a bit more comtemporary – and this is where Stari Podrum comes into play.
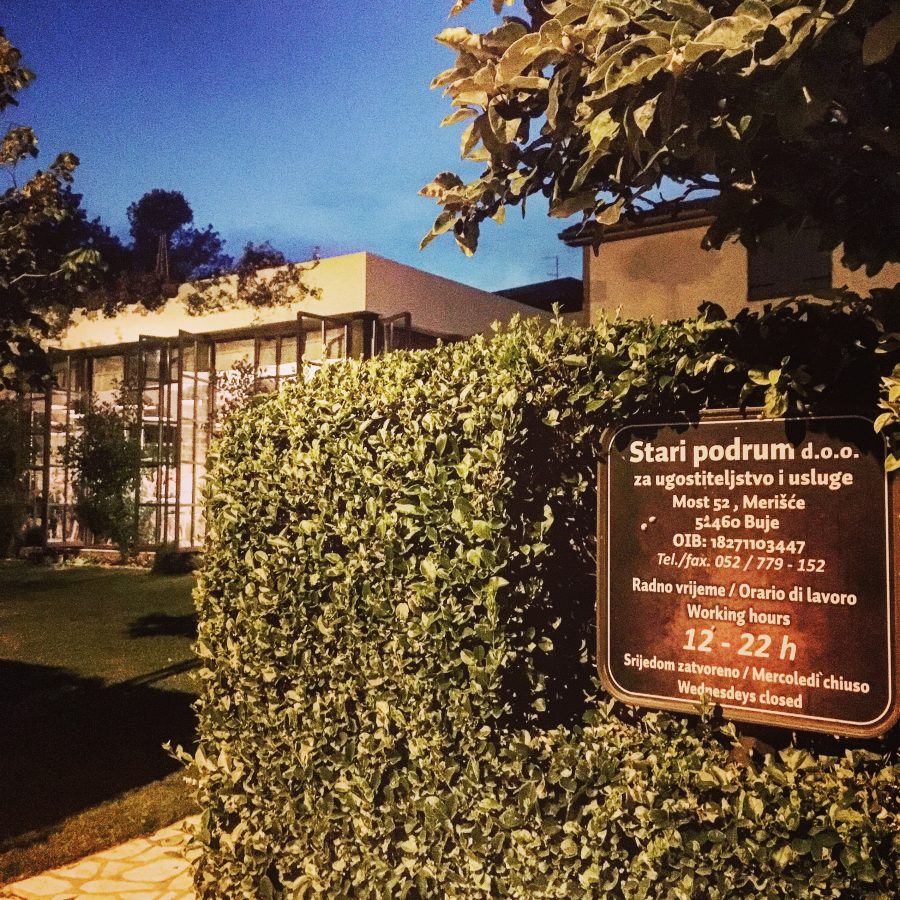
Prior to this summer, even though we’d read lots about it, we always completely underestimated its popularity, turning up on spec many times, only to be turned away, repeatedly being asked, “Do you have a reservation?” And followed by much shaking of heads, when we said we didn’t. So, this year, we were determined that we’d get to experience Stari Podrum – and we have done so, taking visiting friends who’ve been as equally bowled over as us.
First, its location. To reach Stari Podrum, certainly coming from the direction in which we live, you will either drive through the beautiful village of Momjan or wind your way through vineyards and rolling hills. You will know when you’ve reached it – whatever time of day, whatever day of the week (apart from a Wednesday, when it is closed) – by the number of cars parked in both the small car park and the grassed verges outside. Look at the plates too – people don’t half travel some distances to come here. Opposite the restaurant, beyond the river, and perched up on a rocky outcrop is the ruin of Momjan Castle. Quite a view!
The family run restaurant is set within beautiful grounds – a perfectly manicured garden, full of olive trees and scented flowers and climbers and vines, with, as you might imagine, a very popular eating area. We were lucky enough to book a table here a couple of times in the summer, and it really is a very special place to eat. There’s something quite magical about eating outdoors, on a balmy evening, with the moon silhouetting a medieval castle tower. No wonder you can’t stroll into Stari Podrum and bag a table.
When evenings get a bit chillier or the weather’s a bit more inclement, you can dine in a gorgeous dining room, just off the garden, with super stylish black crittal doors – meaning that you get the experience of outdoor eating, just a bit more inside. As I said earlier, many Istrian restaurants follow a similar pattern decor-wise, but not Stari Podrum. It’s very contemporary, with bold artwork and big, overhead black and copper light shades, which perfectly complement the black framed windows.
However, the star of the show is undoubtedly the food. The menu is relatively simple and does not seem to change very often, if at all. We shall find out in the winter. For me, it’s hard to steer myself away from the cheese selection for starters, with marinated mushrooms and seasonal vegetables. OK, maybe doesn’t sound too interesting, but believe me, the local cheeses are superb, especially the ubiquitous truffle cheese and the marinated vegetables just delicious. All accompanied with homemade breads and local olive oils.
If you are a meat-eater, we have it on very good authority from at least two friends, that the steak they had was the “best ever”. I don’t eat red meat, but I have to say, it did look good – and the appreciative sounds did indicate that it was pretty amazing. The pasta dishes are just a notch above your usual, standard fare – wild, foraged mushrooms are my favourite ingredient with traditional hand rolled pljukanci, which is just the perfect size, shape and texture for soaking up the mouth-watering sauce. On our last visit, my main course was an omelette. Never before have I ordered an omelette as a main course. I mean, why would you? But wow, am I glad I did! I’ve certainly never made an omelette like this one. Fish doesn’t appear on the menu – because Stari Podrum is inland, and no-one 10 kms from the sea would include fish on the menu. Just doesn’t happen here.
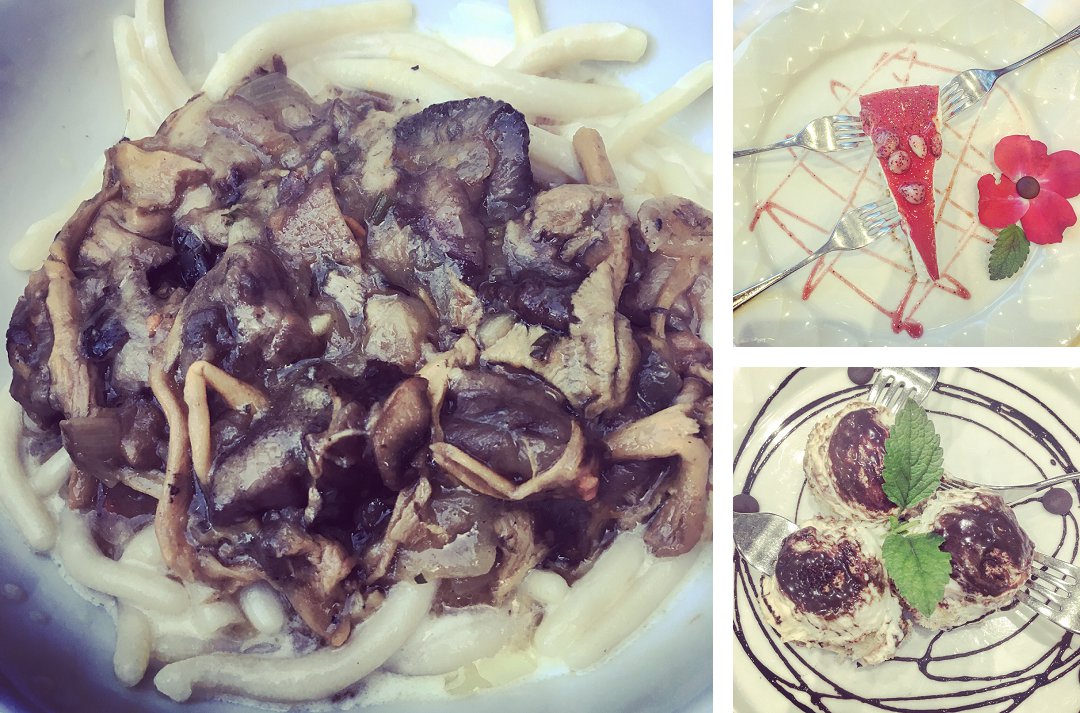
These dishes are all well and good, but we’ll let you into a secret. They VERY best one on the menu, by a country mile, is the side dish of potatoes. Now, we love a potato and quite consider ourselves to be good judges of potato based dishes. But this one, quite literally, blows all others out of the water. To be honest, everything with a potato in it is judged against this one, and many now fall short. Think of bubble and squeak – but just so much more perfect. We did get the recipe for it from one of the lovely waiting on staff – but after a couple of litres of the house wine (deemed, by a friend who knows his wine, as the “best house wine” he’s had) and complimentary digestivos, I’m afraid I can’t remember it all. I suppose what happens with the potatoes in Stari Podrum, stays in Stari Podrum.
It’s definitely not a rock-up-from-the-beach-for-a-bite-to-eat kind of place. Although it’s not stuffy or pretentious, in any way, and definitely NO more expensive than all restaurants around, it just has that feel of being a little bit more of a class act. The owner and staff are wonderful – warm, welcoming people who effortlessly make you feel completely at ease in their beautiful Istrian restaurant.
An utter class act.
by Helen | Sep 4, 2019 | Croatia, Travel
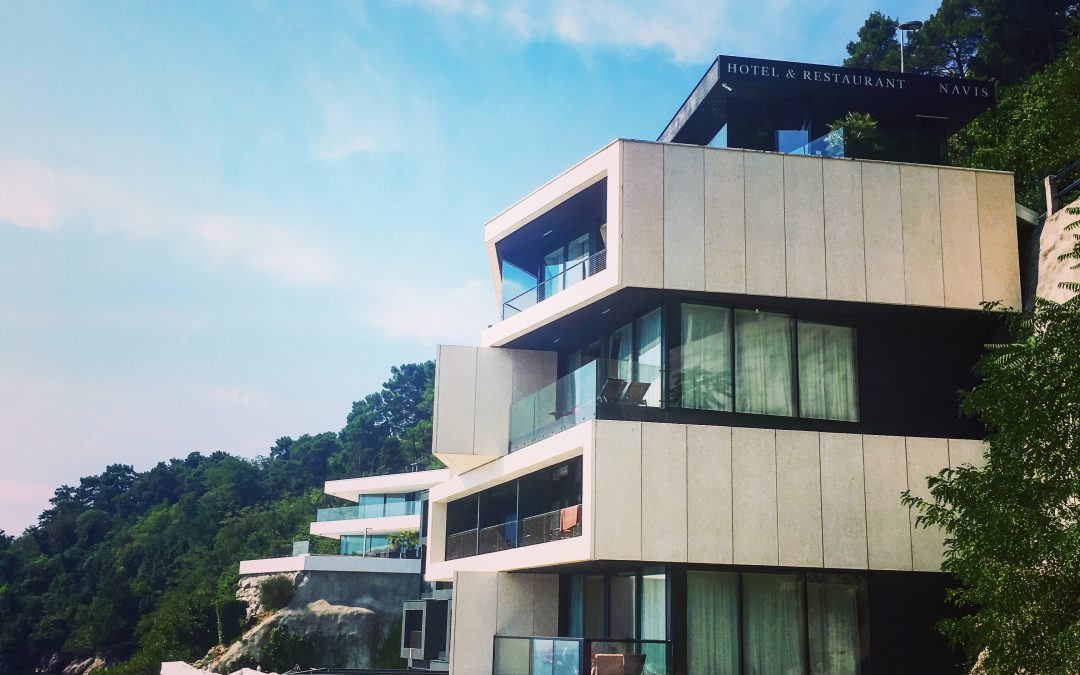
What a treat, a day and night away at Hotel Navis, in Opatija, is. Built into a cliff-face, and with all rooms overlooking the sea, it is situated between Rijeka and Volosko, on Preluk Bay – and for us, not too far away from our home in Istria. We spotted the hotel on one of our first drives back from Rijeka when we moved here, and vowed that we’d investigate it – which we did recently, with friends who were visiting from England. The hotel is very cleverly designed. From the road, only the sign can be seen. A steep drive takes you down to the entrance and the reception and it is only when you get out of your car, that you really appreciate how beautiful it is. Glass walls form the shell of the hotel on the reception level, creating such a feeling of light and space, and bright pops of furnishing colour add to the overall wow factor…
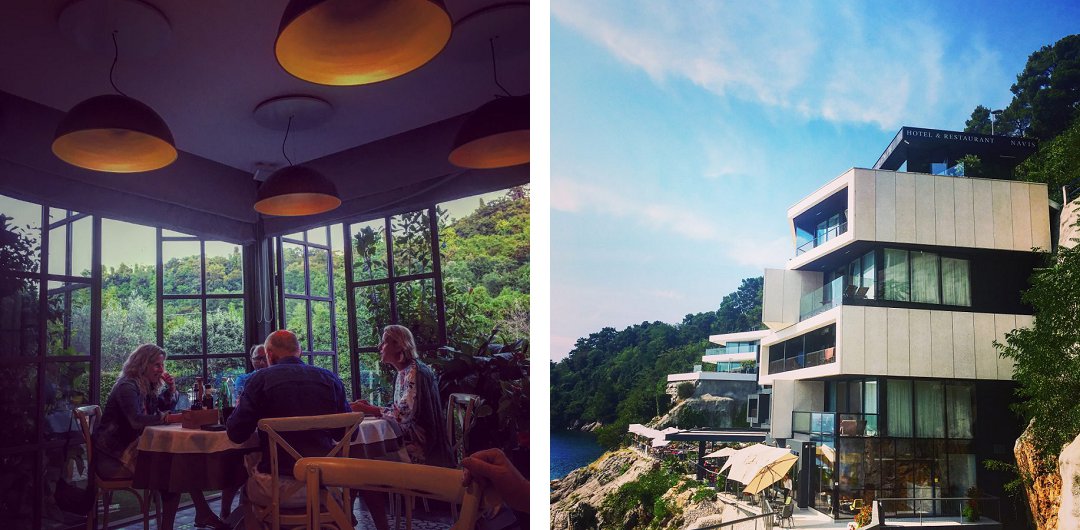
We’d arrived quite early, much earlier than the check-in time, and our rooms were still being prepared. How lovely then to be greeted by one of the owners, who chatted to us about the hotel and the gorgeous Opatija Riviera – and who also brought us complimentary pink fizz, whilst we waited. Not a bad way to begin a Tuesday. It was almost a shame when we told our rooms were ready, as we weren’t quite ready to leave the little terrace above the private beach…
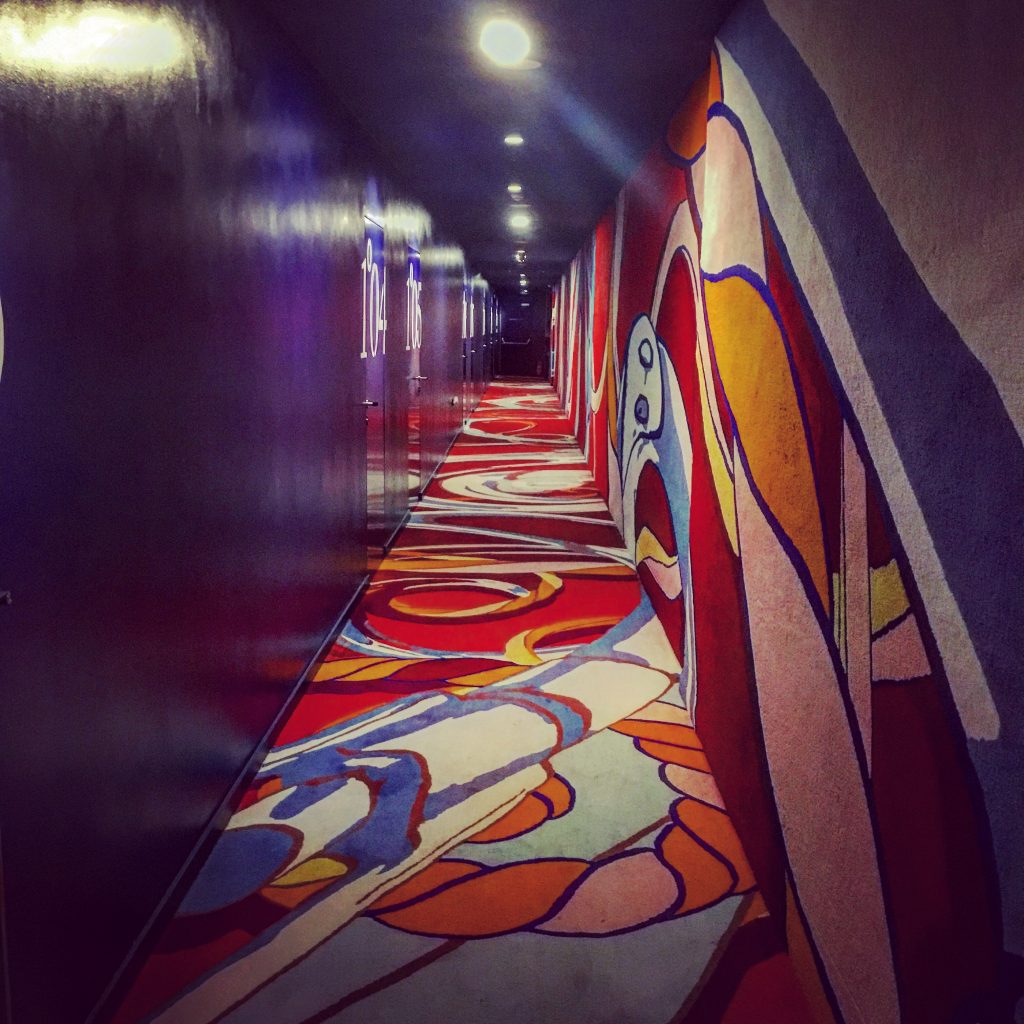
All rooms have balconies and all face the sea. We had a room on the first floor – Room 101 – and our friends had a similar room, on the fourth floor. You can’t miss your room – super-sized room numbers guide you easily, along the corridors. If you like your decor to be neutral, Hotel Navis may not tick your boxes, but we loved the bold colours and designs, and especially the purple, black and red patina walls, the famous coloured concrete Venetian technique.
When we stay somewhere, my rule of thumb is that I want it to be at least as nice as where I live – otherwise I could stay at home. Often, though, our expectations are exceeded – and they certainly were at Hotel Navis.
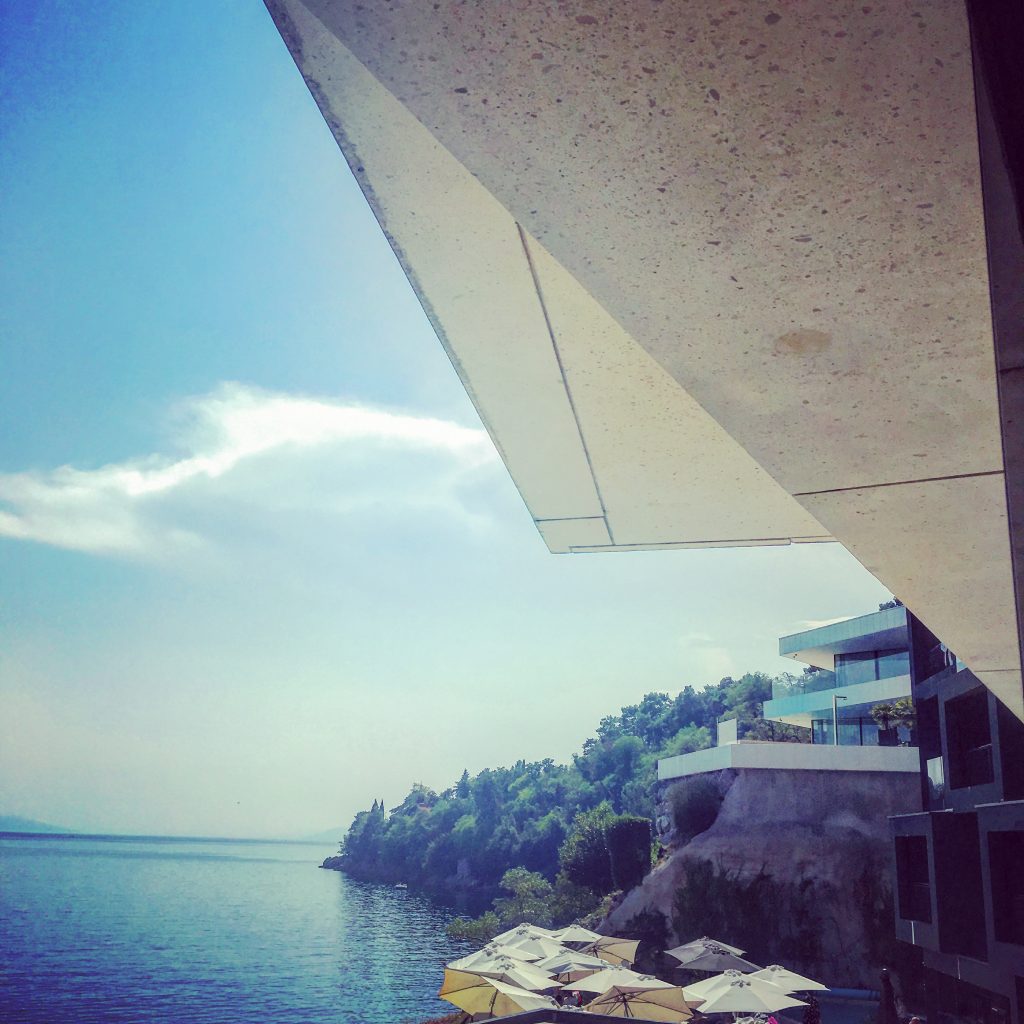
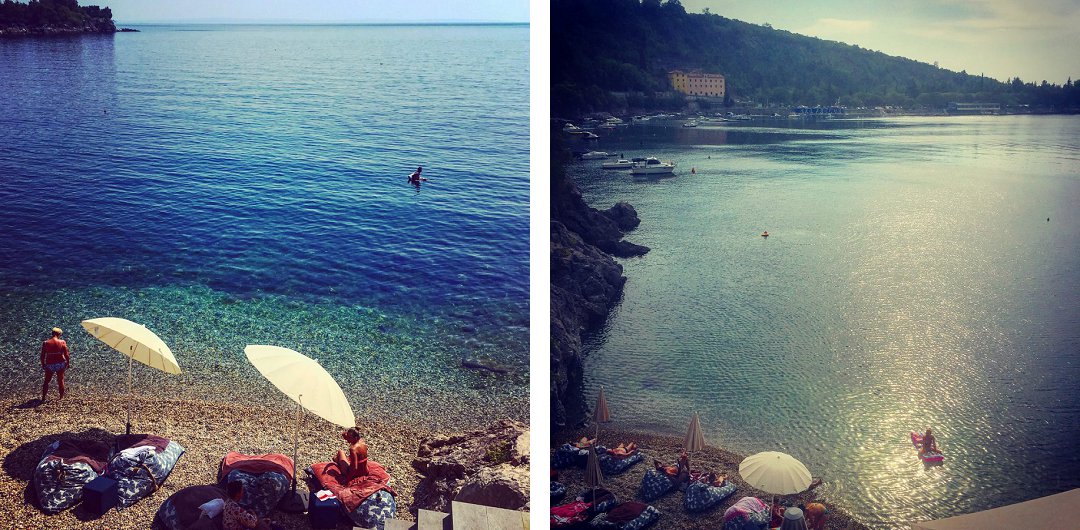
Rooms have been meticulously designed in this hotel. Dark concrete walls contrast with the floor to ceiling glass doors which slide back, to reveal a balcony and sweeping views across the bay. Our room was perfectly positioned, just above the little pebbled private beach. Rather then sunbeds, this beach has big squishy beanbags which look super comfy – so comfortable that even when some quite unexpected waves rolled in, literally no-one moved. Although that could also have been to do with the waves providing some respite from the searing heat.
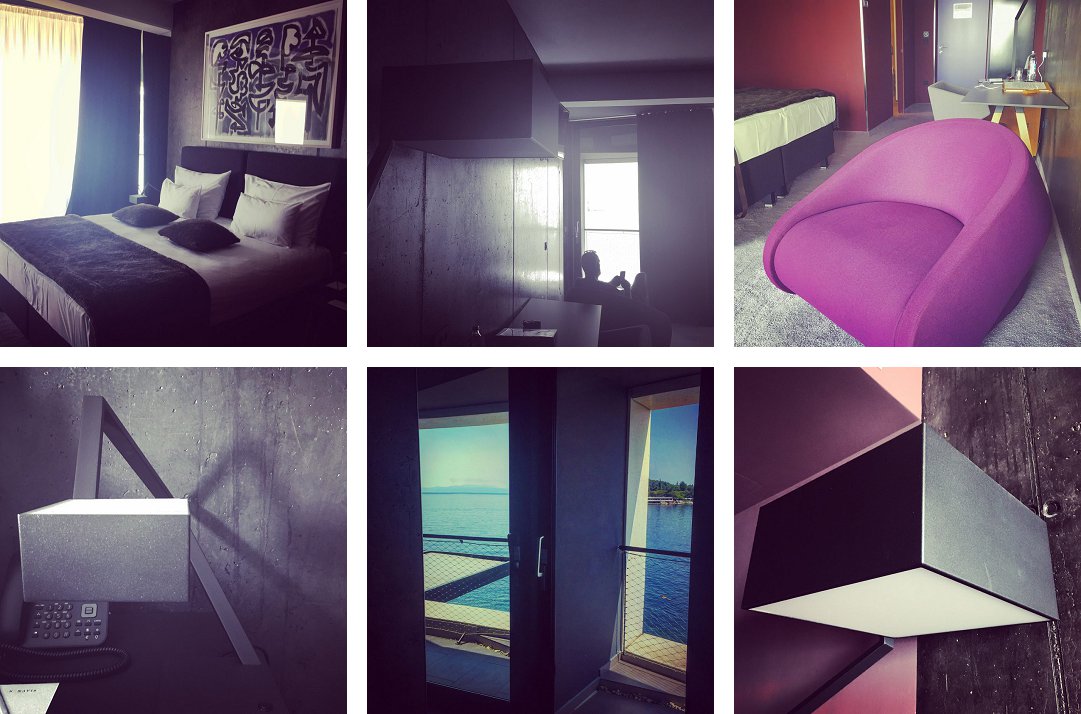
The bathrooms are also a delight. As well as L’Occitainie toiletries – a class act – and big fluffy towels and robes and slippers, most rooms have a bath, as well as a shower. And, given that we have tiniest bath ever, anywhere that has a big one, gets a massive thumbs up from us.
The attention to detail continues in the hotel corridors and stairways. Huge glass and concrete planters and vases, filled with greenery (and wine corks), dominate corners and add real interest to what would otherwise be dead space. The dark colours continue – but the hotel is not dark, simply because of the expanse of glass, which reflects the sunlight and the turquoise sea.
The hotel has, as well as the cute little private beach, a spa and treatment area, and a large sun terrace with a pool and a very stylish bar. It was a luxurious treat to just lounge around the pool, sunbathing and interspersing this with swimming in the sea. The location is so peaceful – nothing beats being able to lie in the sun and just watch boats bobbing about on the water.
Breakfast is amazing. I think it’s probably one of the best breakfasts we’ve experienced, simply because of the range and choice. As well as the location of the restaurant, which literally overhangs the water.

As well as an extensive cold buffet – with cheeses, meats, breads, fruit, youghurts, cereal, croissants, cakes – there is also a cooked breakfast menu, with so much choice. The consensus amongst us was that we had all made the perfect choices – the lightest, fluffiest omelettes, and poached eggs with avocado and the other with truffles. Breakfast is available until 11am, and with check out until midday, it meant that we could enjoy a long, leisurely start to the day. Although perhaps not as leisurely as those who were opting for the Prosecco with breakfast. Think we missed a trick there…
The location of this architect designed hotel really is quite stunning – situated where it is, clinging to the rocks below a road which snakes around the Opatija Riviera, it is very reminiscent of the Amalfi Coast. Although without the hoardes of tourists, coaches and back to back traffic, which makes it all the more special. Got to be honest and say it definitely wasn’t the cheapest hotel we’ve ever stayed in – but you certainly get what you pay for. And as a treat, it was absolutely perfect. Just perfect…
by Helen | Jul 29, 2019 | Renovation
The best part of the last two and half years has largely involved renovation. Somewhere in the house, something is usually being knocked down, built back up, painted, restyled, tiled, plumbed in or redesigned. We knew the challenges we would be facing when we bought our shell of an Istrian stone house which hadn’t been lived in for some time and needed an awful lot of TLC. Thankfully, much progress has been made and we can now count the things that still need to be tackled on two hands, rather than running out of digits. Still on the to-do-list are the following :
- the front garden boundary wall/fence;
- a car port/pergola to protect the cars from the sun and heat;
- outdoor electricity and additional lighting;
- deciding what to do with the shell of the abandoned house we are buying a the back of our house;
- creating an enclosed courtyard;
- completing the internal painting of floors and beams;
- finishing the industrial style banisters and spindles on the stairs;
- and, the small bathroom, upstairs.
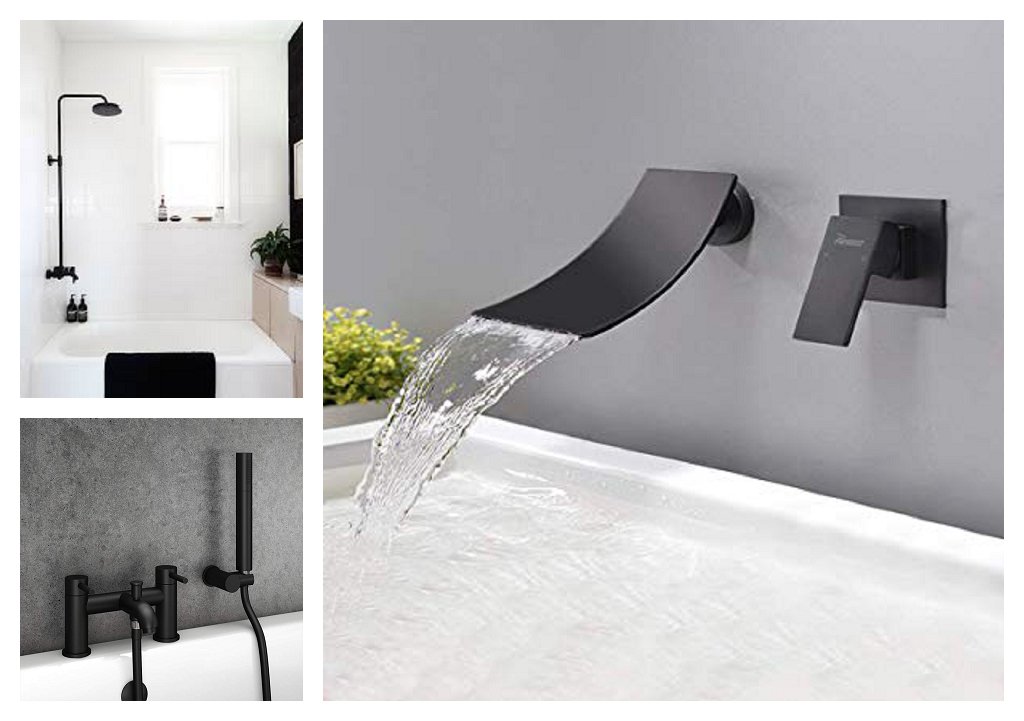
Although we’ve been careful in what we have spent on this project, costs do tend to escalate and it’s easy to go over-budget, especially if you are a bit magpie-like and veer towards the shiny things. So, I’ve decided to set us a DIY/Reno challenge – and the challenge is to see if we can renovate the upstairs bathroom (excluding labour – we’re not stupid!) for no more than £500. That’s right – £500. Before we even to begin to plan in detail, we know that this will be very tight and will mean that much time will be spent online, and in-stores, sourcing and comparing and re-thinking. The current bathroom is awful. Even though we’ve tarted it up and it’s fully functioning and looking a million times better than when we moved in, the sanitary ware is really, really cheap and really, really unattractive. The bath is very small, meaning that it’s hardly ever used and the shower is just an attachment from the tap, meaning that if you do try and use it, because there’s no screen, chances are, however careful you are, the walls and floor, get soaked.
To make things better in the interim, we’ve painted the walls and the bath panel white, the woodwork the same soft, pale blue that runs through the rest of the house and the floor tiles have been painted in Farrow and Ball Railings. New accessories, such as the shelving for the towels, plants, lanterns and new bath mats have been added. Plus a new loo seat. But, however much we try and prettify it up, it’s still essentially an inherited bathroom and we want to make it ours.
The original plan was to reposition all of the sanitary ware. The bath, with a new shower, would go into the recess, where the sink and toilet currently sit opposite each other, and the sink and toilet would be moved under the window. However, even though everything is already plumbed in, it would involve quite a lot of moving of pipes – and especially the waste pipe and soil stack – and we decided that for a room this small, it just wasn’t worth the hassle. However much more sense the new, intended layout would make.
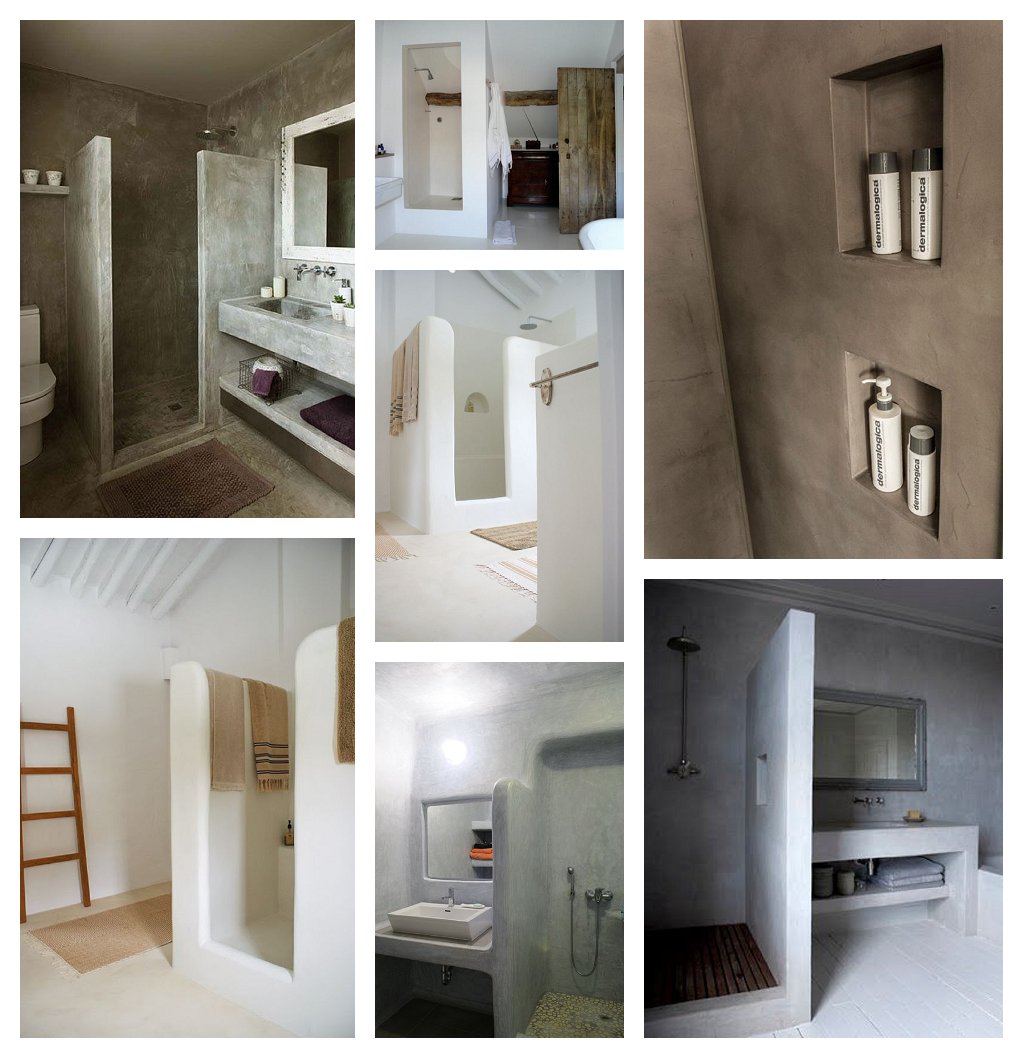
So, the decision has been made to keep everything in the position they are now, but with some (quite big) tweaks. A new bath, with a new bath panel, will now extend the full length under the window, meaning the shelving will go. A shower will be fitted to the right of the window, with a screen, which will fold back onto itself on the wall where the shelving currently is. The door which opens into the bathroom, will be removed and a sliding door installed, giving us the much needed extra space. A new sink and toilet will also be installed. Flooring and walls are still being discussed, as are storage options. I’ve been scouring the internet for bathroom inspiration, and pinning like mad on Pinterest. Some of the ideas I’ve liked, just aren’t suitable for such a small space. Some are just a bit too out there. But, there are elements in all of the ideas I’ve found, that make me convinced that with a bit of imagination, and patience, we can achieve the £500 challenge…
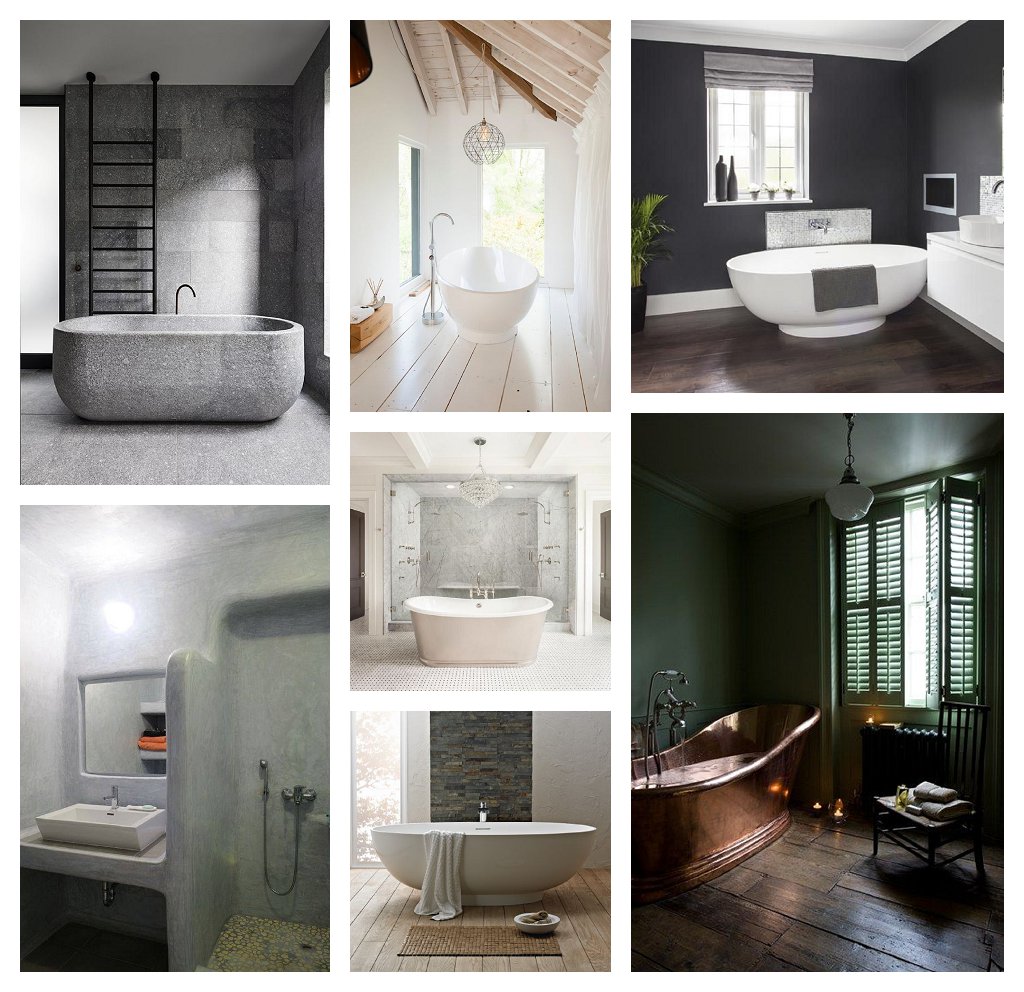
inspiration for when we’re not working to a £500 challenge…
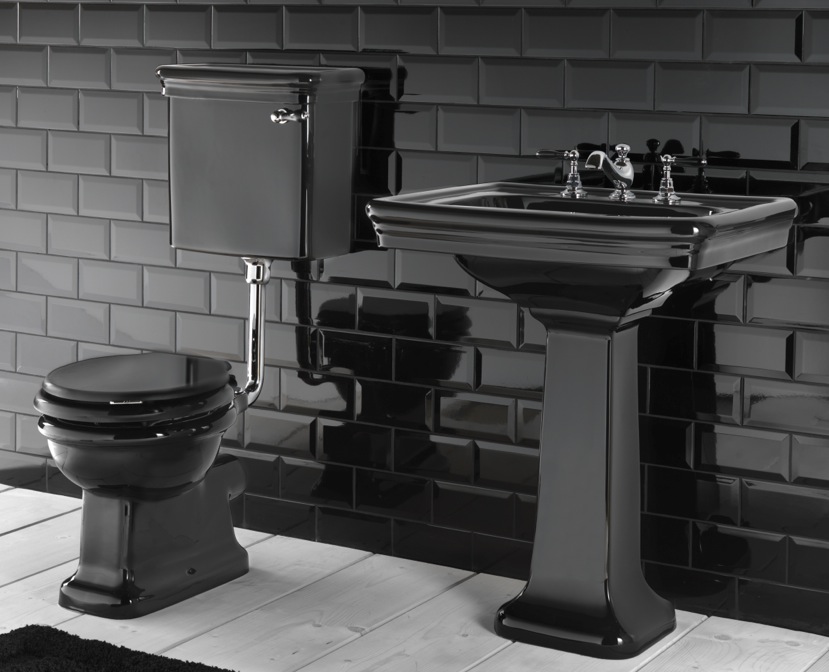
I’m a bit taken by a monochrome theme. The room is strangely proportioned – the floor space is small, but the ceiling is very high, so we don’t want an overpowering colour at floor level, making the room seem smaller. However, the height will lend itself to something quite unusual, so the current thinking is white bath, sink and toilet with a white tiled floor and white walls. And then matt black taps and shower, and to the right of the current window, where the shower will hopefully be installed, black metro tiles. Perhaps the boldest thing we’re thinking, is to paint the ceiling black and the beams white. Might work. Might not. But we can only try.
So, my days are currently taken up with trying to source all of these kinds of beauties (including bath, sink and toilet), and coming in less than our £500 challenge. Can we do it? Only time will tell – but as we always, say…
Where there’s a will, there’s a way!
by Helen | Jul 25, 2019 | Renovation
Our second and third WorkAway visits have just come to an end. We are delighted to report that our second visitors – a couple from Tasmania, who are travelling and working their work around the world – were another massive success. Like we said we preferred, they were a couple, they were independent, resourceful, creative, gregarious, kind, helpful and very mindful that they were living in our home, for a week. As with our first visitors, we really struck lucky with our new friends, from Down Under.
Our way of doing things, is to explain what we would like to achieve and let the WorkAwayers decide which task(s) they feel most comfortable/confident with and take it from there. However, with these two, there was very little they couldn’t/didn’t want to tackle and so pretty soon after their arrival, they started with real gusto.
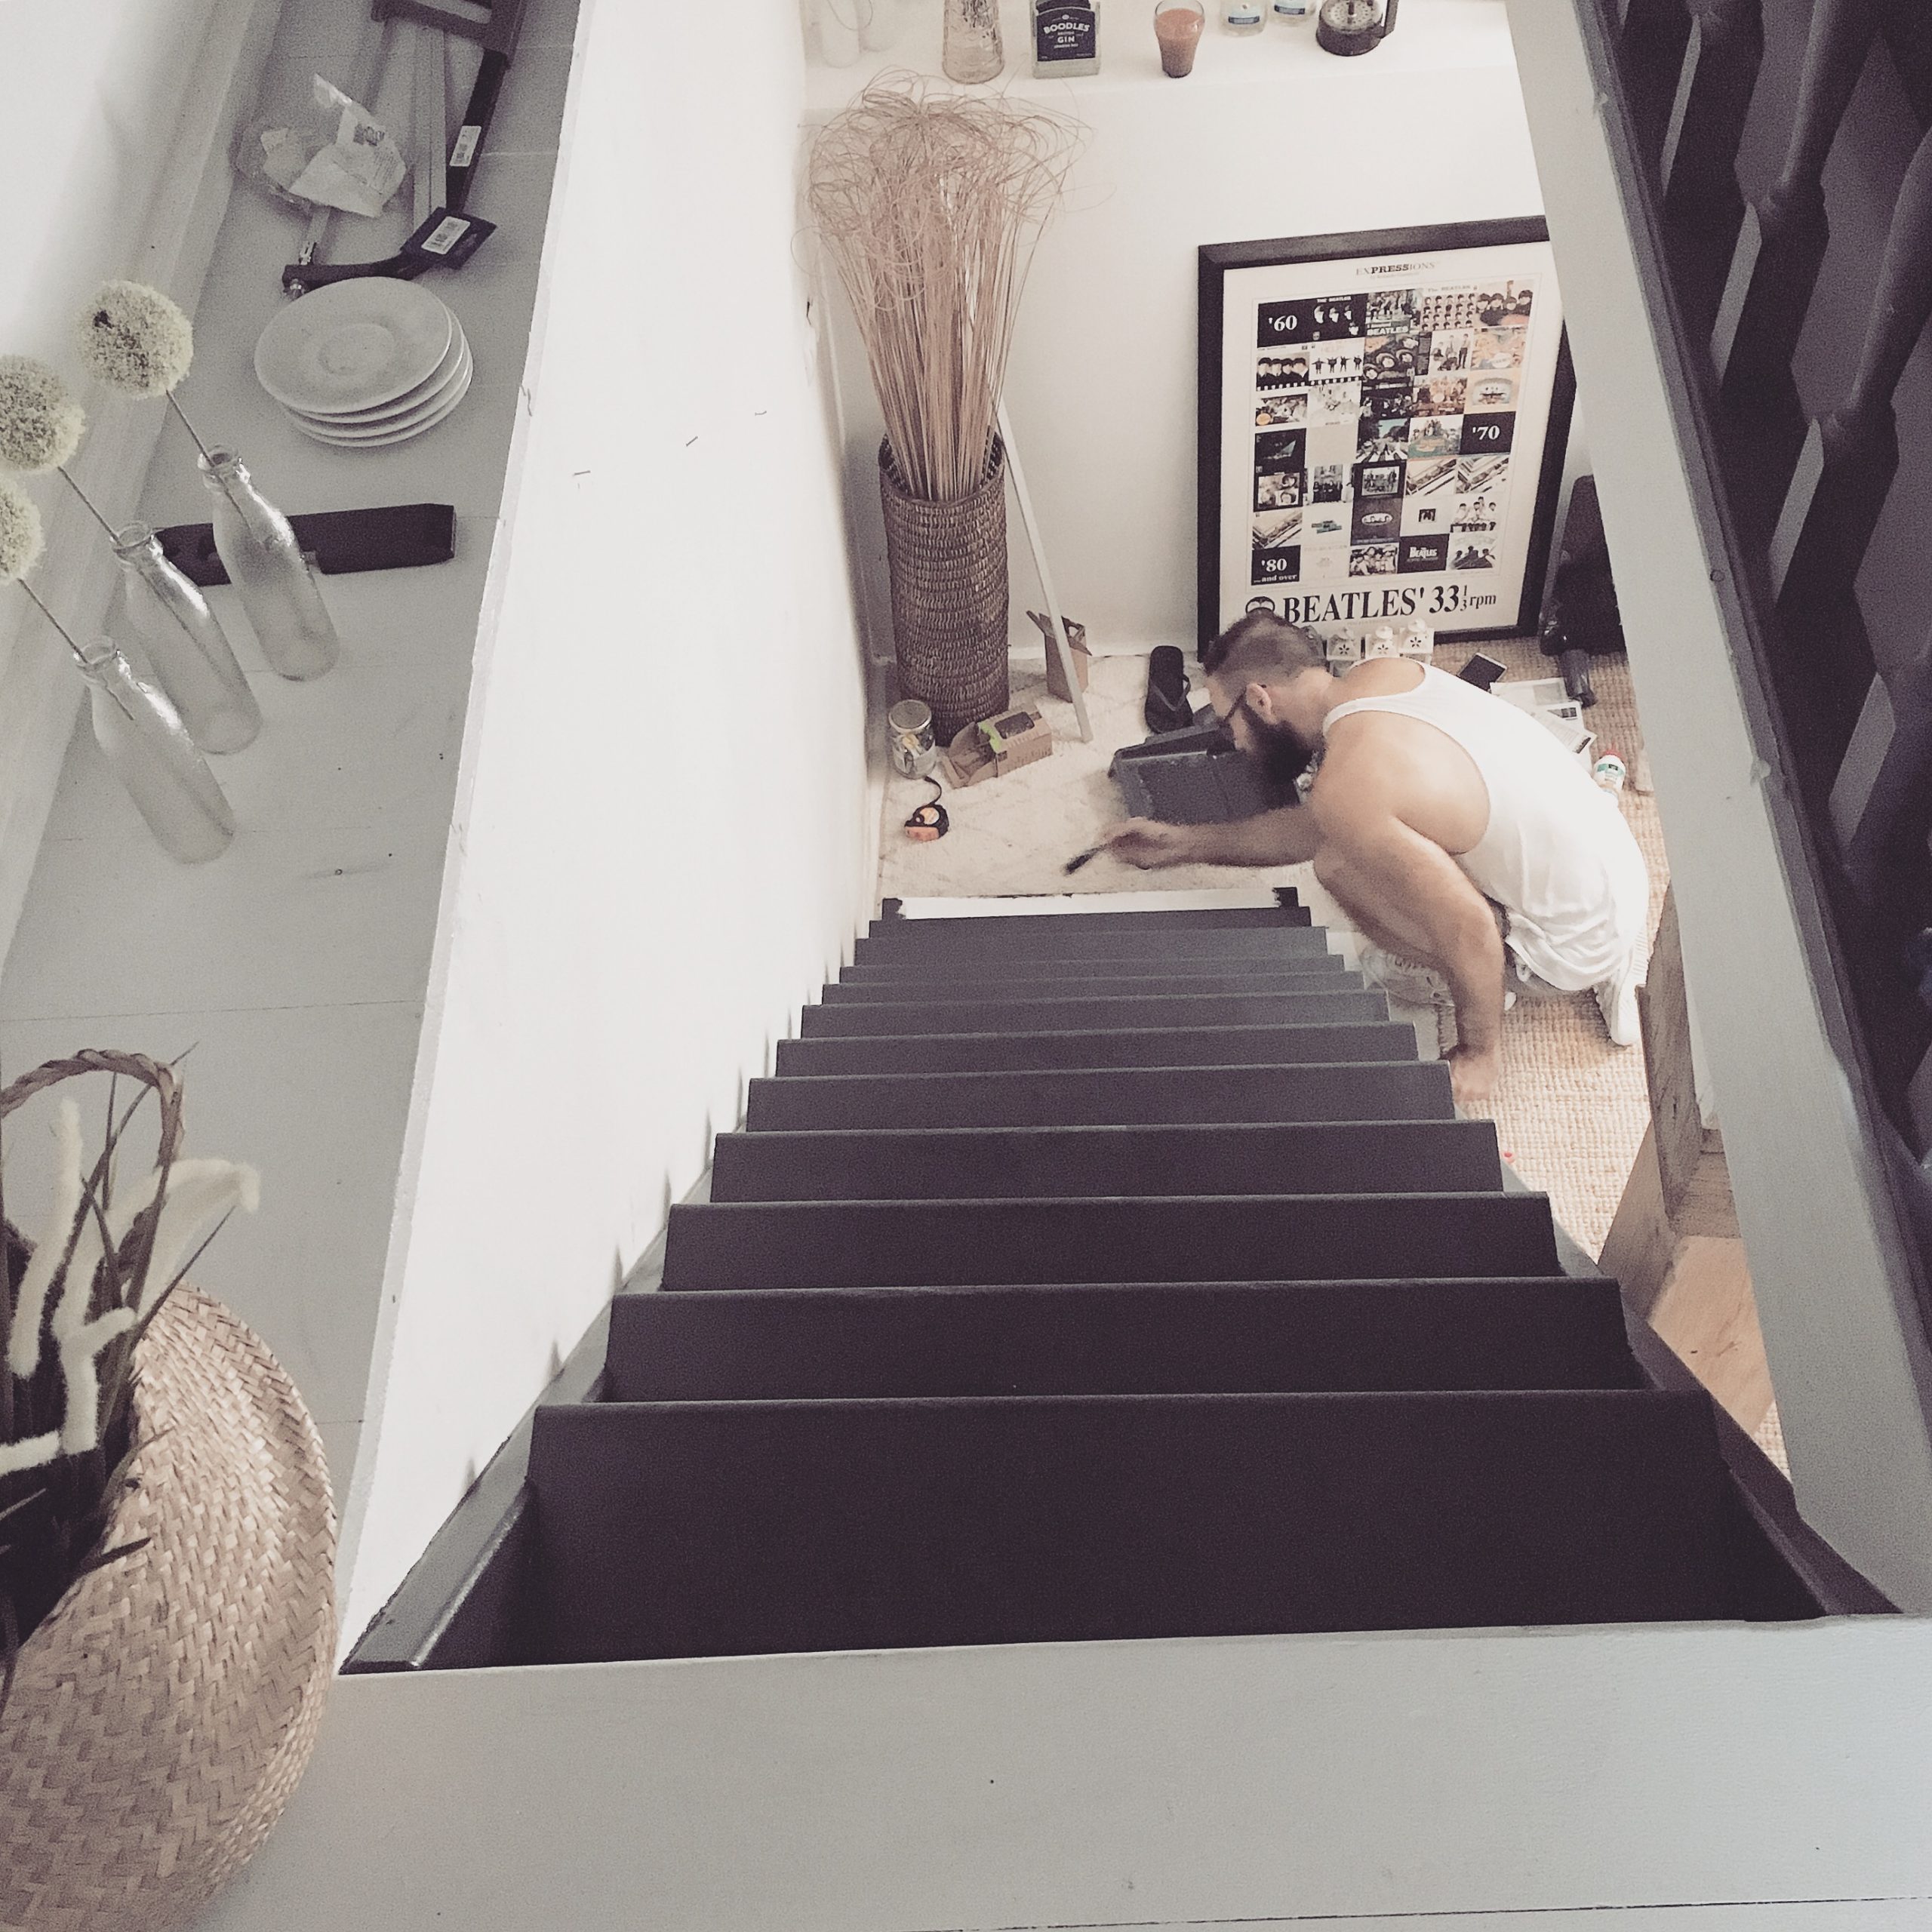
First up, was the biggest task – the renovation of the horrible, and pretty dangerous stairs down into The Snug, under the living room. We already had all of the materials needed as our builder has been meaning to do this, but a new full time job has meant that he’s not as available as he has been. So, the wooden slats for the back of the treads – the staircase has been open and exposed – were firstly sanded, undercoated and painted in our beautiful Farrow & Ball Railings. Done in double quick time with these two speedsters!

Shandelle & Jeremy worked so well as a team – it was great to pick up some excellent tips from them, too. Sometimes, the solution to your DIY problem is staring you in the face, but until you see it, it’s just not there – and they helped us to see certain things much more clearly.
The next stage was to deal with the actual treads – upon closer inspection, it transpired that they had never actually been secured. No wonder I always clung onto the wall as I came down them! They were all moved forward (as was done with the stairs going up to the top floor) and this time, very securely secured! Once in place, they were sanded, undercoated and top coated. Twice, for good measure!
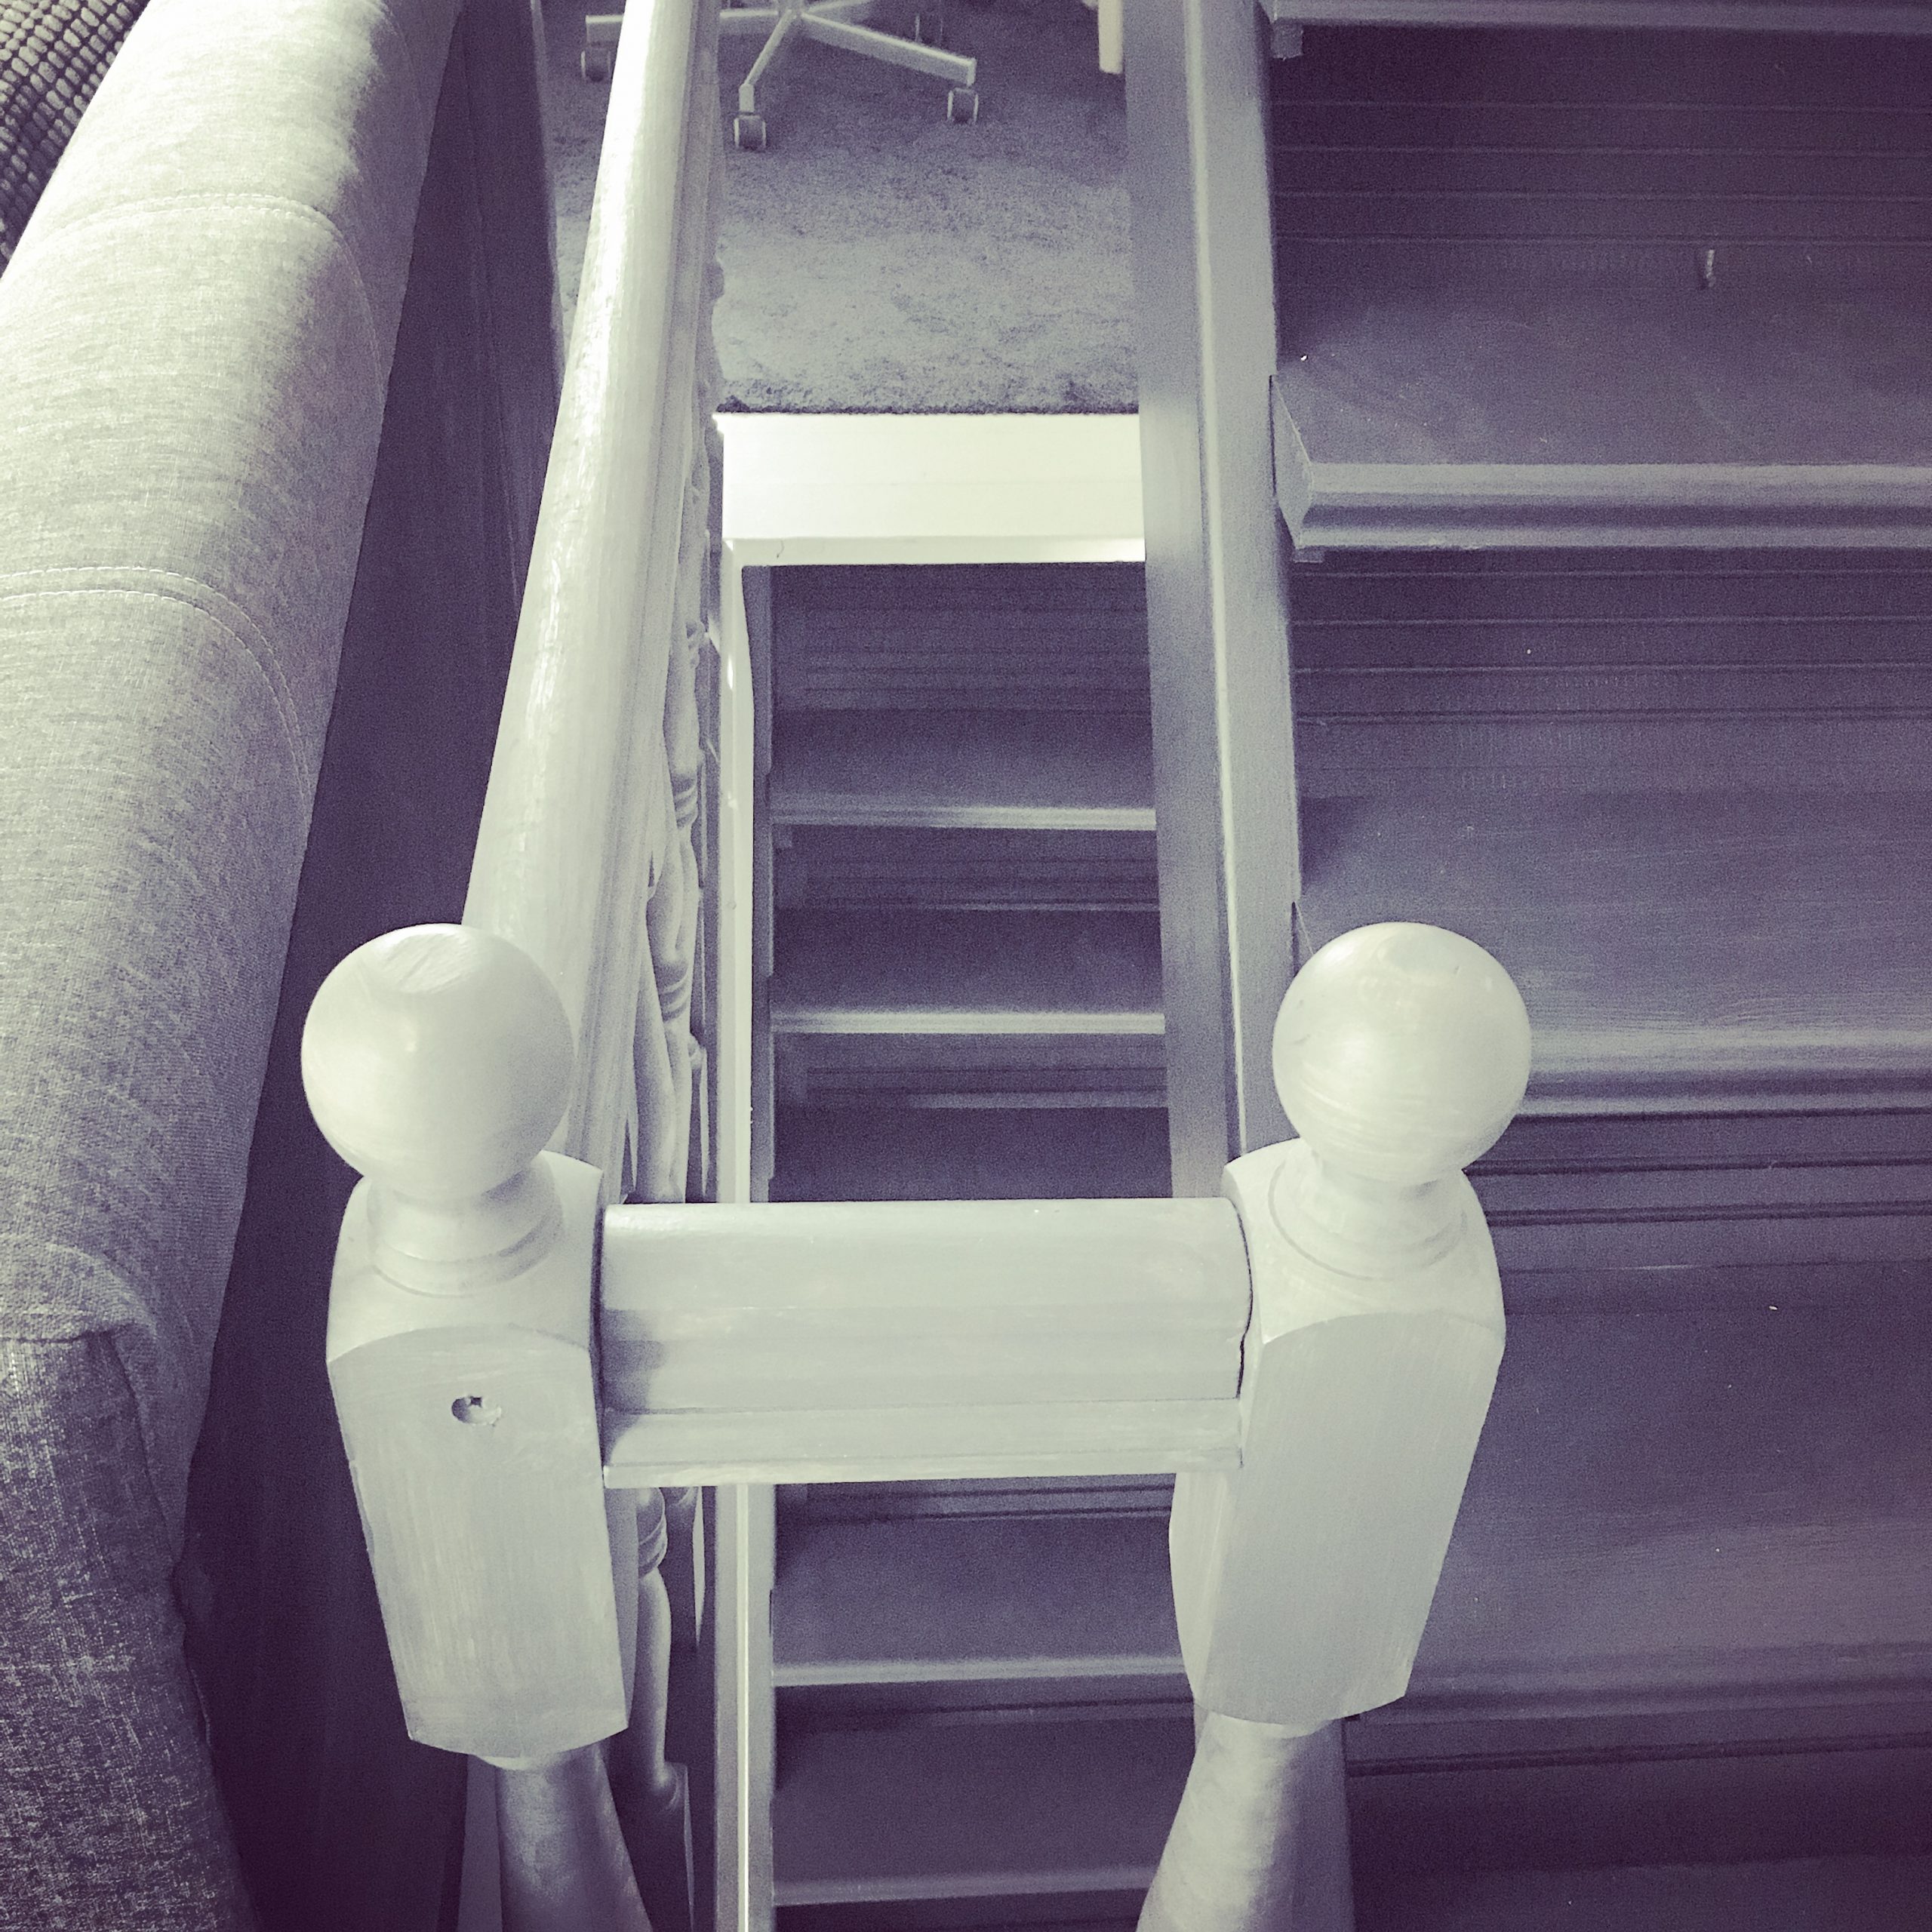
The next thing we had to consider was a handrail, because even though the treads were firmly in place, the stairs are steep and the exposed edge, still did look very precarious. We knew we wanted an industrial style handrail, but even with our clear-thinking WorkAwayers, we were struggling to get what we wanted, to actually work. A handrail going down the stairs at an angle, as you would expect, was proving difficult to achieve, because of where the fixings would go. And, the suddenly, a lightbulb moment! Why not go vertical? And this is exactly what we did!
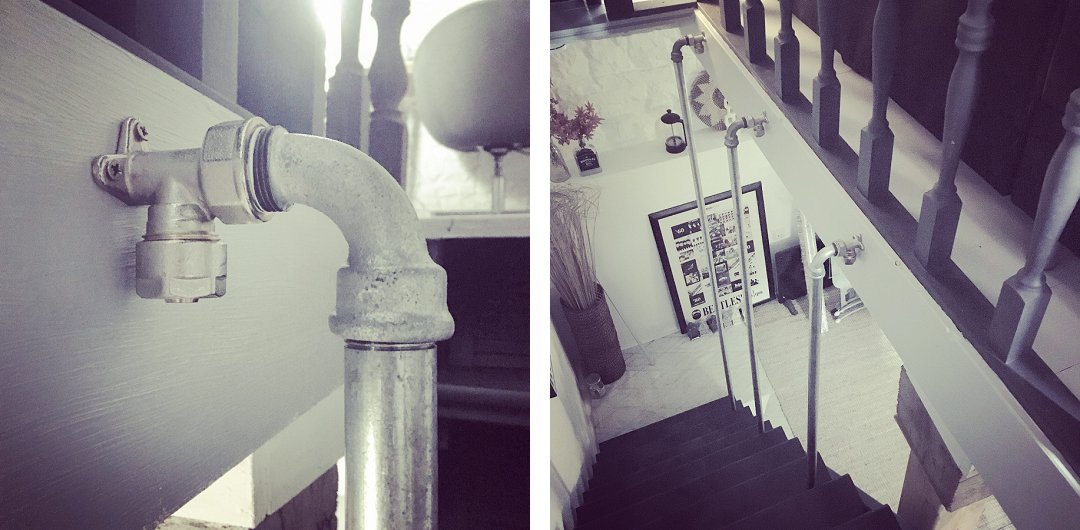
The plan now, now that we’ve been shown exactly how do it, is repeat this pattern on the stairs going up to the first floor, and to replace the wooden handrail and spindles (above) with similar industrial pipes.
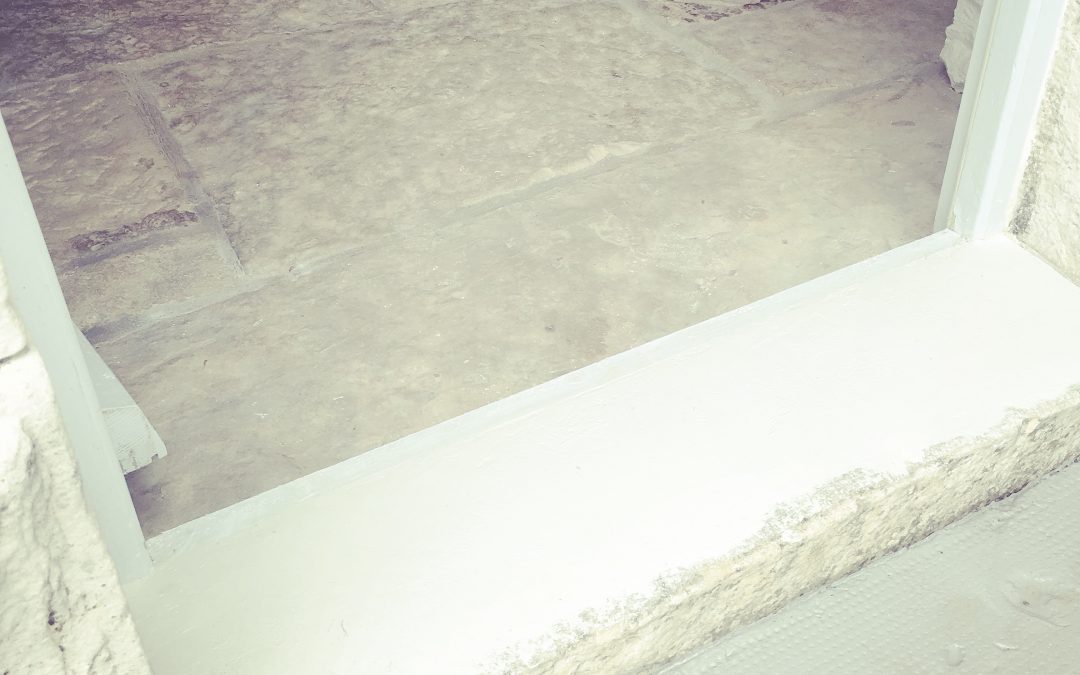
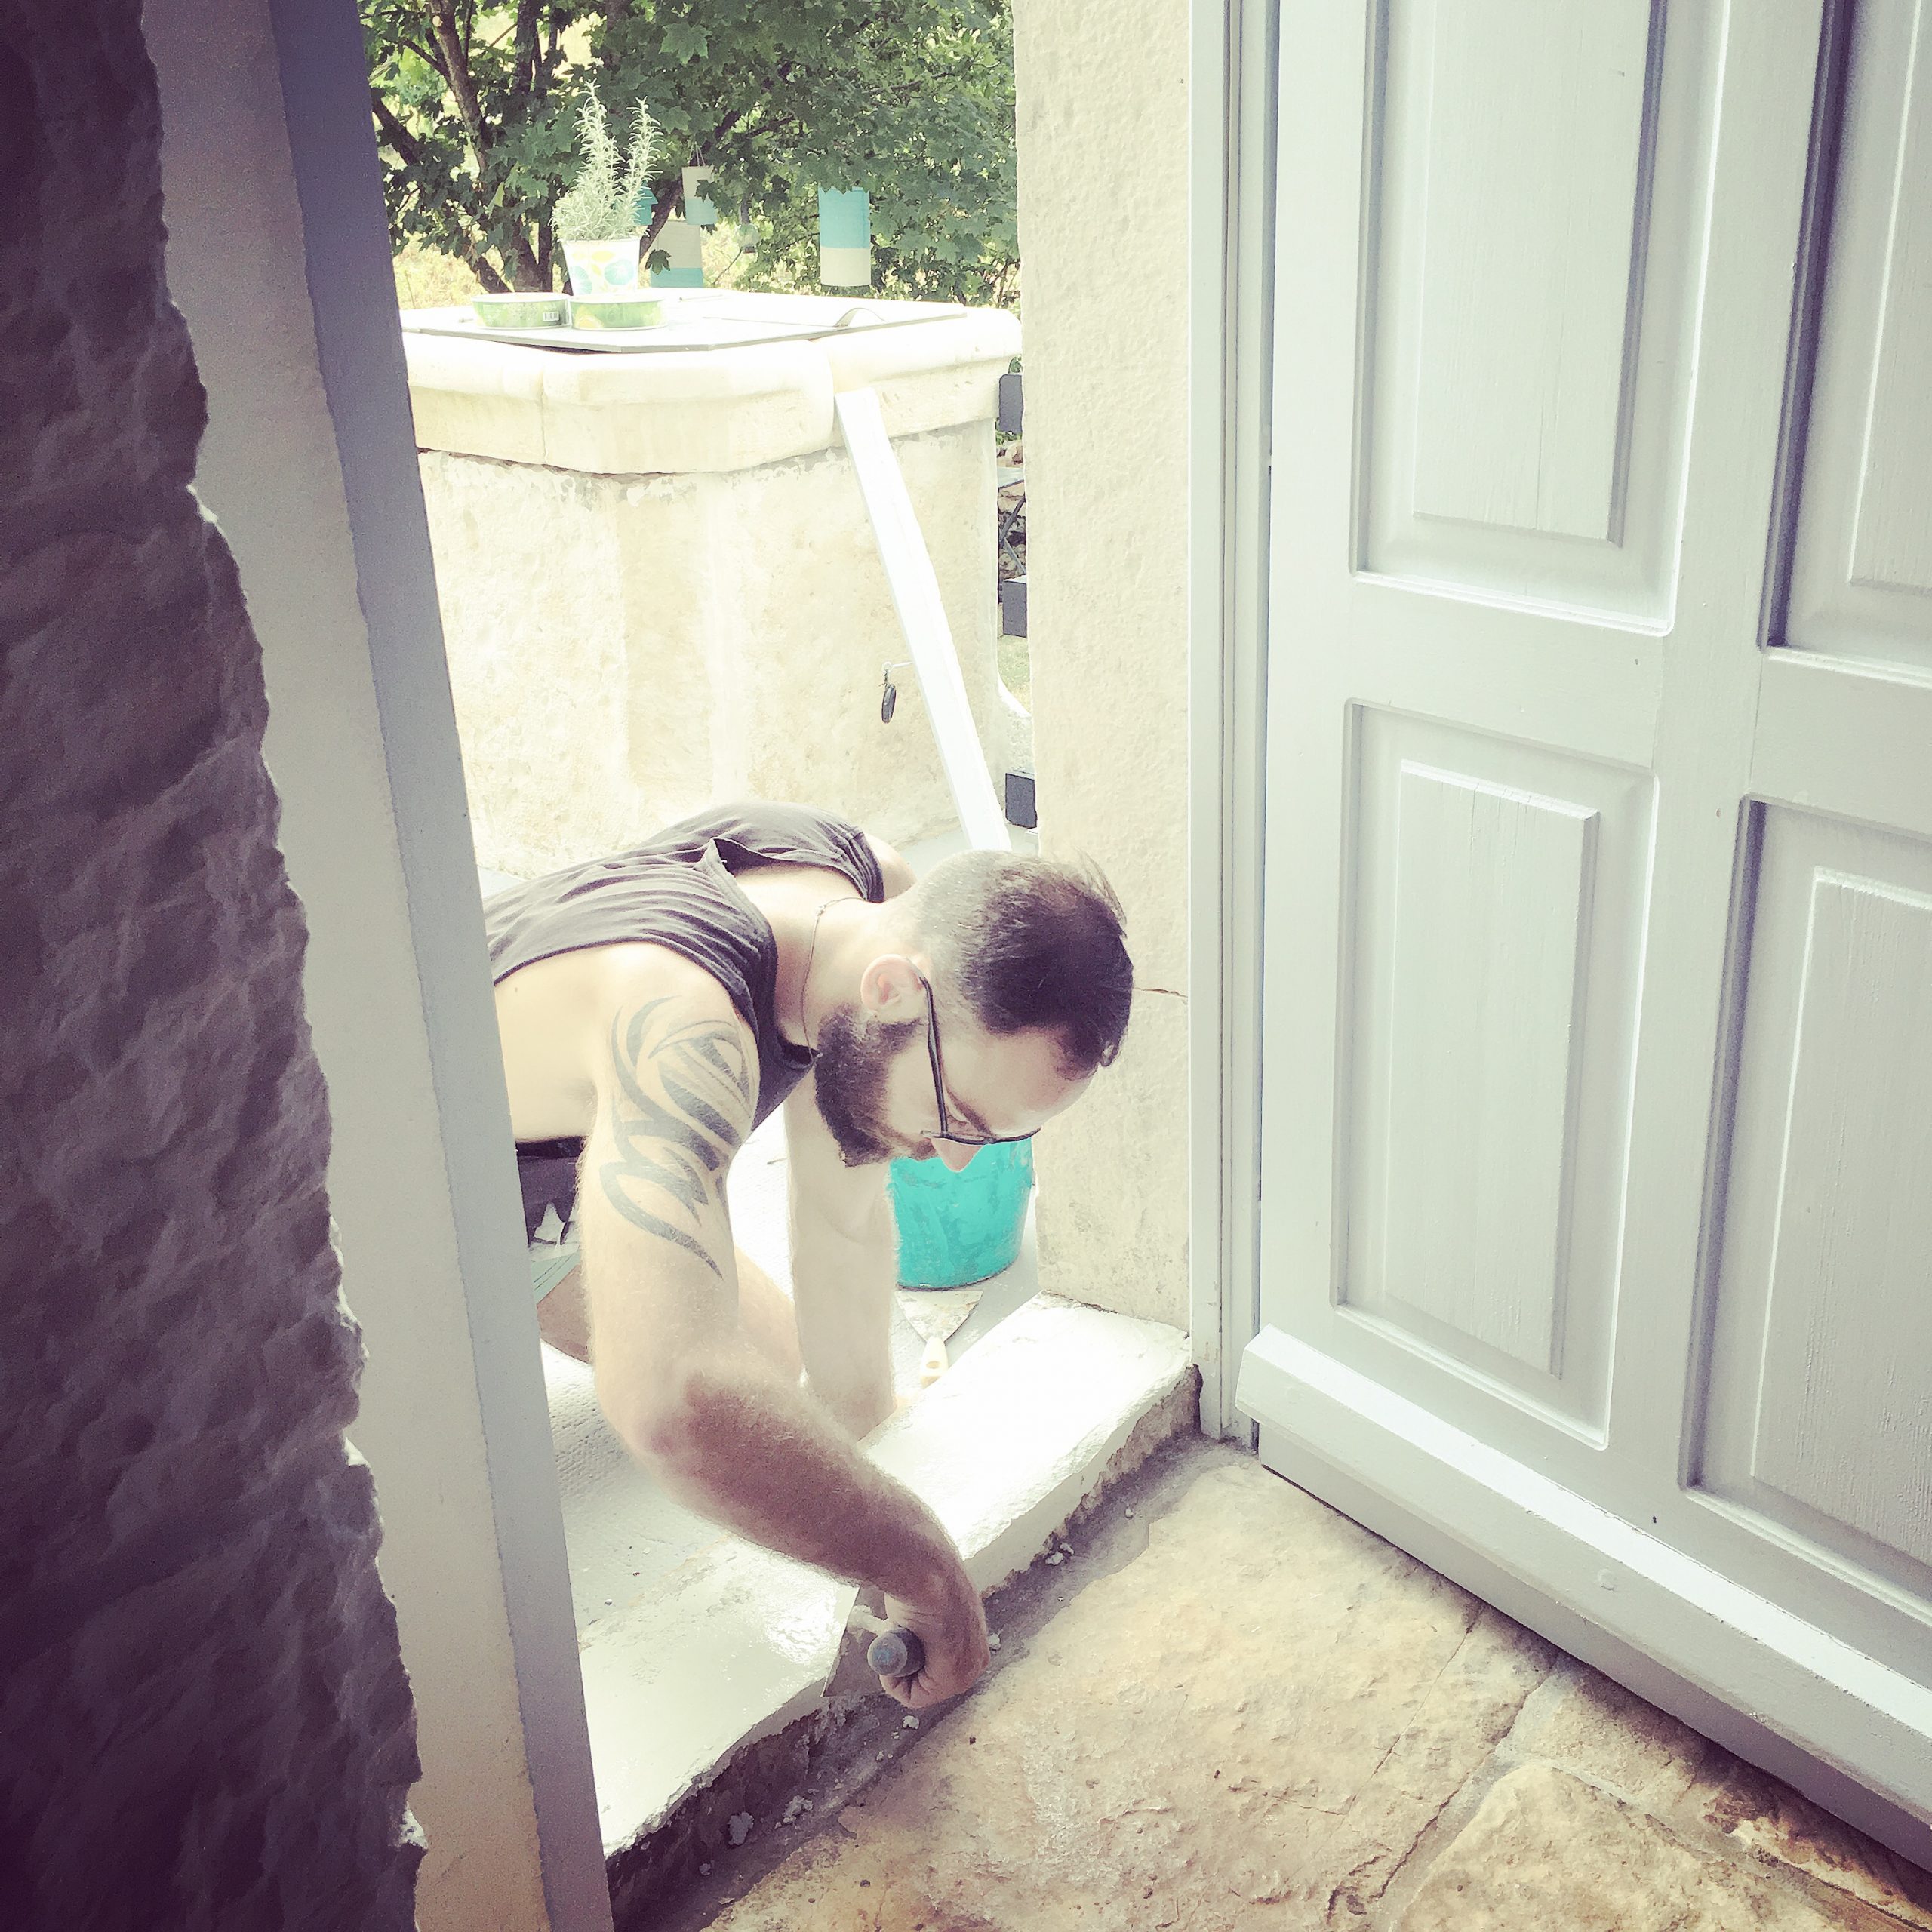
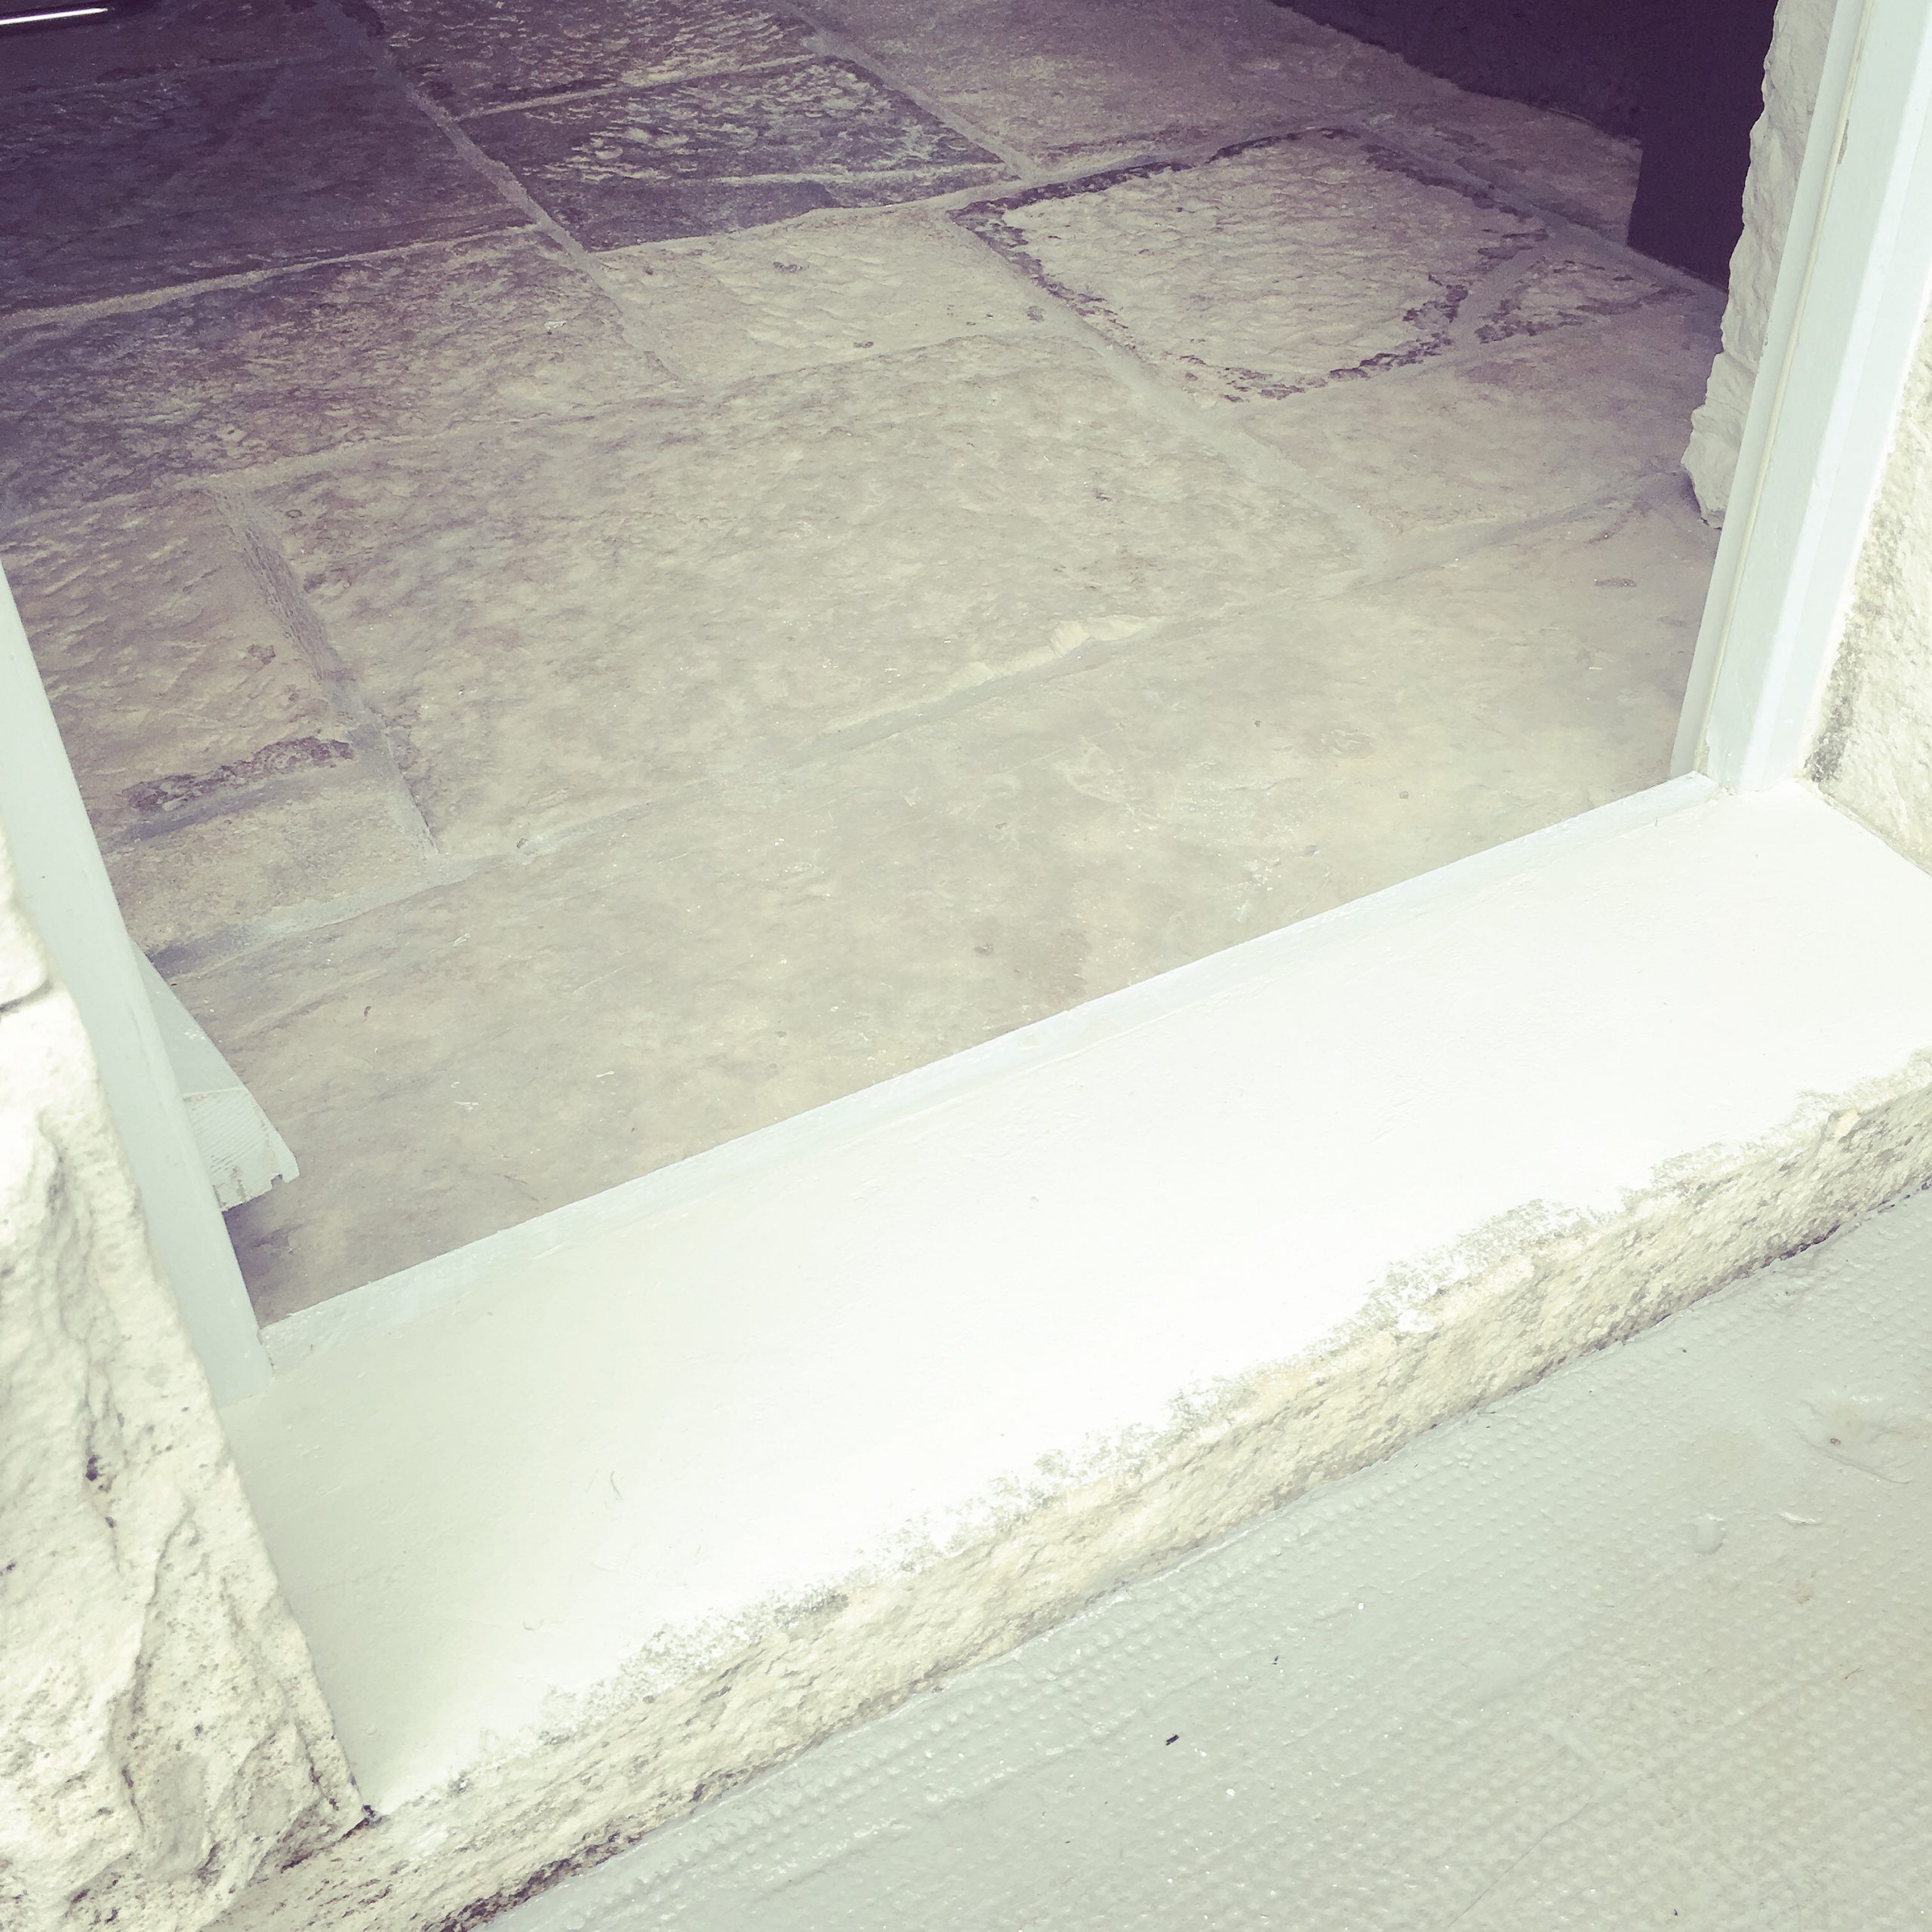
Our front door has been on the “to-do” list since we moved in. Not only is it pretty unattractive, despite our best efforts – it was also very poorly fitted originally, and the threshold has been very uneven. Meaning that if it rains, and we have a driving wind, the stone floor in the Well Room is full of puddles…However, no longer – the threshold has now been filled and concreted and framed and painted. And, we’ve had rain since – and NO PUDDLES! Simple, but ingenious. Proof of what happens when you are lucky enough to have excellent WorkAwayers.
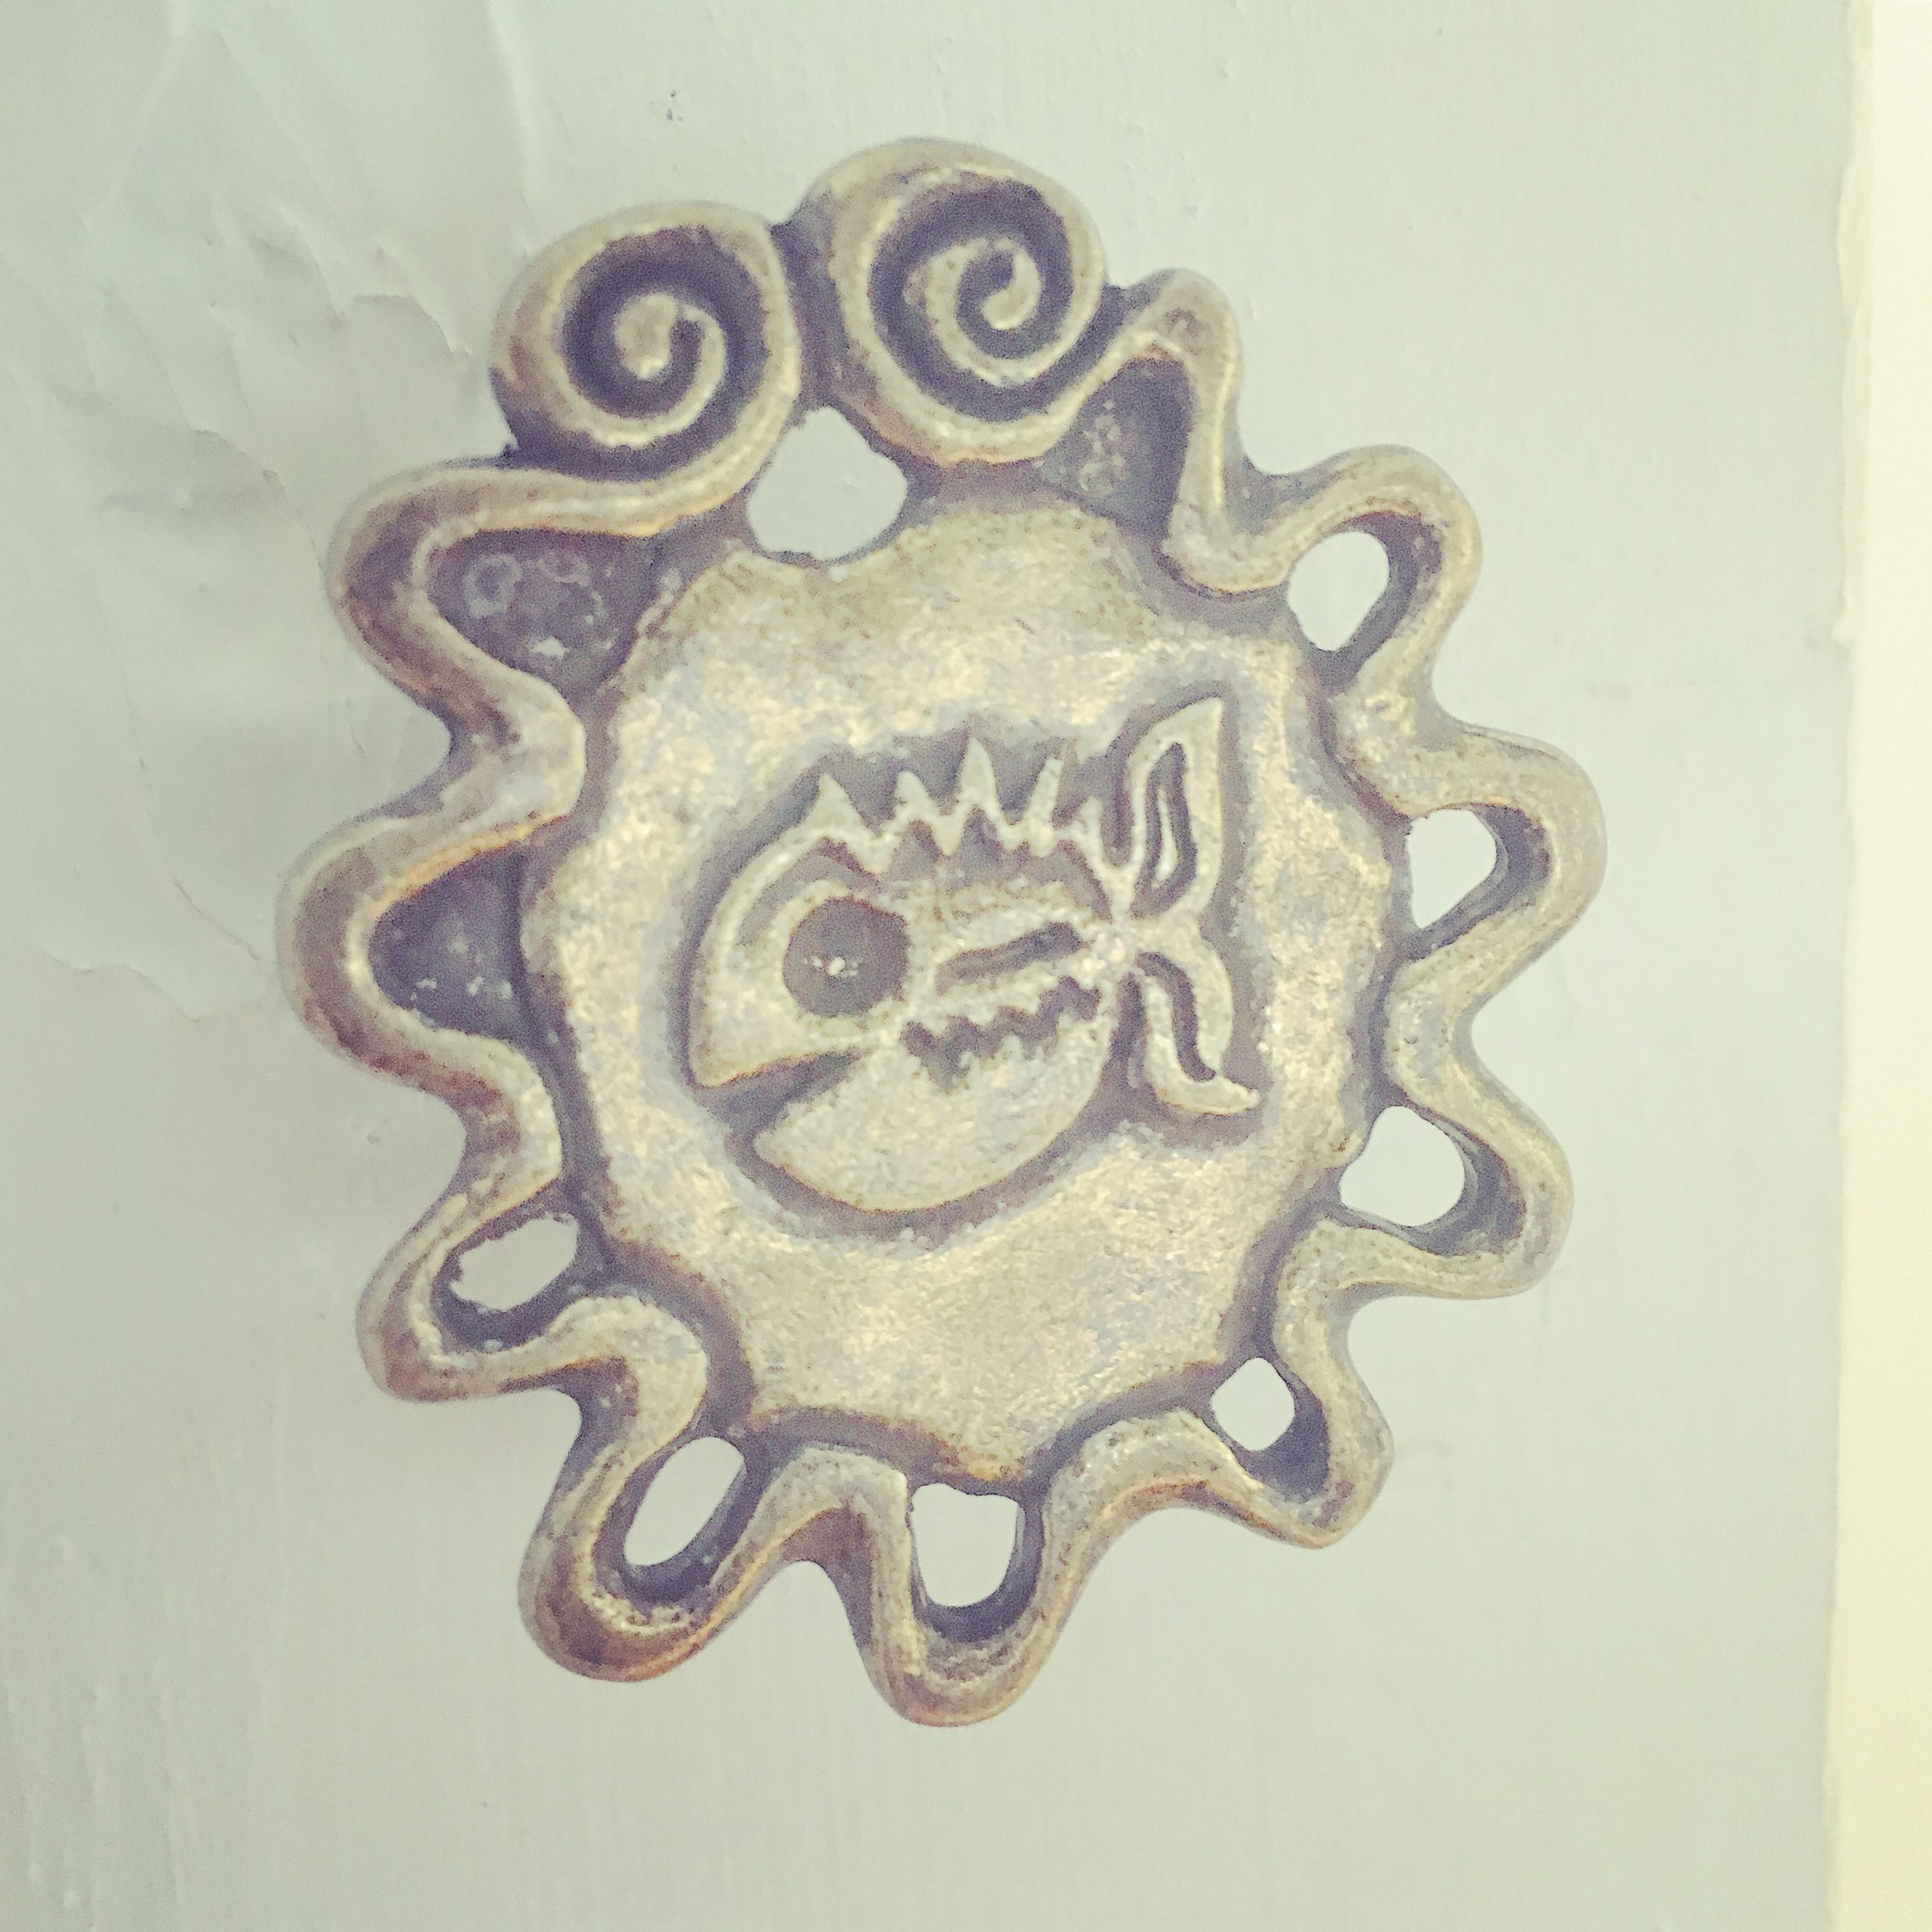
Not ones for letting the grass grow under their feet, this lovely pair also tackled our upstairs doors. Again, these are on the “to-do” list as we want to replace these very cheap, badly fitted doors – but with magnets, new handles and a plane, they’ve made them a hundred times better. All upstairs doors now close properly, affording that kind of privacy you really need sometimes. And, with a little nod to where we are now, our new industrial fish door handles…
So, three WorkAway visits in, do we think it’s a success? Well, yes, we most definitely do. Those of you who are doing your maths though, must be wondering about WorkAway Number 3. Let’s just park that one – not so much WorkAway as RestAway. But, we won’t let that experience cloud what so far, has been a pretty excellent experience. Two new sets of friends. Invitations to France and Tasmania. Lots of laughs and lots of jobs ticked off the list. And, to be fair, our third guest,managed to get us up and running for the winter, with a mountain of kindling chopped…


