Recently, we’ve had our latest Workaway couple staying with us, Kaiti and David, a couple from Oklahoma. Like the other couples who’ve come to stay with us, they are on a sabbatical, travelling and working and embracing the cultural highlights of other countries. They came to us via Ireland, Portugal, Spain, Italy and southern Croatia and brought with them a healthy dose of mid-western American humour, friendship and many an interesting tale, hugely changing our recent perceptions of our neighbours across the pond.
If you’ve seen any of our other posts about WorkAway, you’ll have a fair idea of what it’s about. Basically, people travelling and would-be hosts join an online scheme. The “workers” showcase their skills and the “hosts” describe their project and if it all works out – as it has done so far for us – compatible workers and hosts communicate. The deal is that the people travelling agree to do tasks – we always clarify these in detail, in advance – in exchange for food and accommodation. Between us, we decided to focus on The Well Room, specifically the floor, as David has had experience of floor laying.
However, our floor is not a normal floor. Our builder has always put this job to the back of the queue – and we now absolutely understand why. There are a number of issues with it :
- it is entirely made up of Istrian stone flags – all different sizes and different levels and different textures
- the stones do not join the walls smoothly – there’s much undulation, let’s say
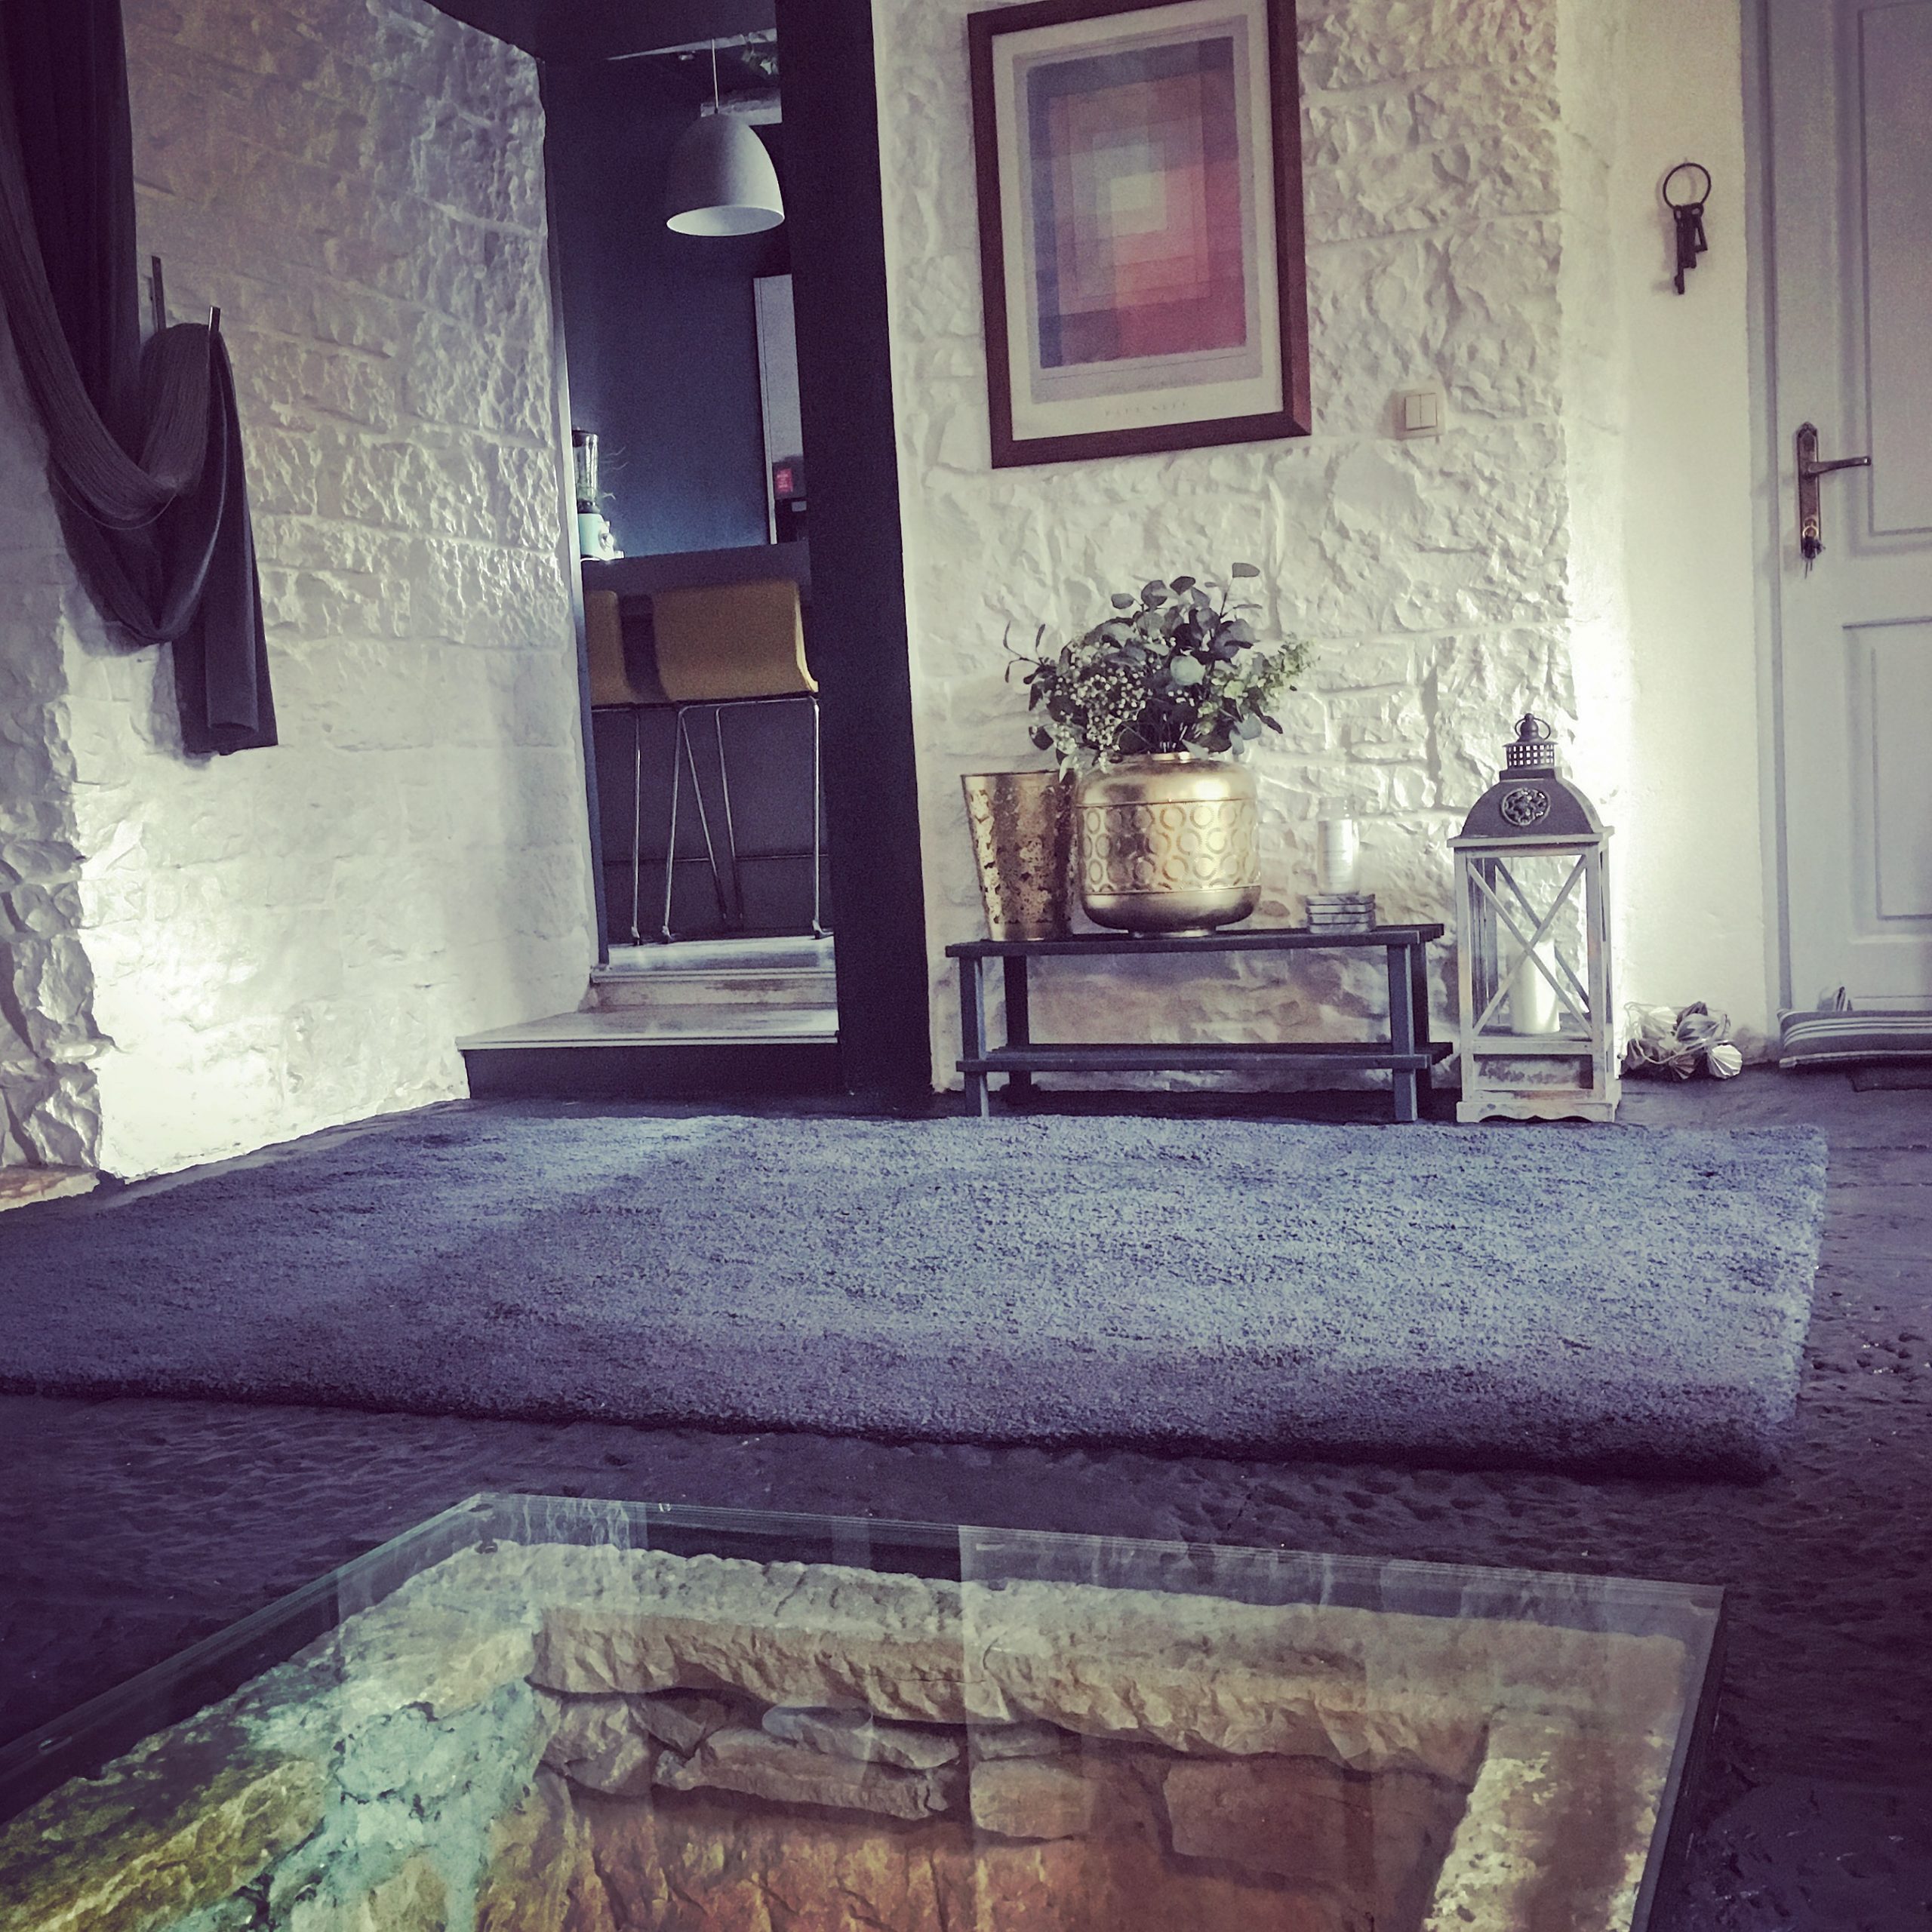
- the glass cover of the well chamber is about 4cms high, but the stone step into the living room less, so somehow the difference would have be levelled
- we want to try and preserve the stones as much as possible, as future owners may find this a real feature and want to once again reveal them
We looked at the potential cost of laying a new wooden floor and it started to become a bit more prohibitive than we had originally anticipated. There was also the issue of fixing the batons to level the floor. Because of the uneveness of the flags, the batons would have had to be cut to various sizes to ensure that the boarding, onto which the flooring would be fixed, would be level. A bit of a nightmare in itself, which would have required mathematical precision. And, time. Time which we didn’t really have as Kaiti and David weren’t with us for that long. Then we considered laying self-levelling concrete – sounded like a solution until we quickly realised that this should probably have been done way back, when the house was still a building site. Not when it was 95% complete. And definitely not when we had people staying as the room would effectively been out of action meaning no access to the kitchen or downstairs bathroom. Next solution we considered was coir carpet. This would have worked well in this room, but the same problems were still there, specifically the uneven base. And, where on earth would we have sourced coir here? Doable, but not in this WorkAway timeframe.
Suddenly, we realised that we were overthinking the floor situation, and we had the lightbulb moment. Back to the start… *PAINT* Yes, masonry paint. How much easier could the solution actually be? 5 litres of navy blue mixed and the floor covering was solved 🙂 However, before the floor was painted, another job was tackled – the concrete table. We’ve never found a suitable finish for this table and so it’s never been quite there. The plinth has also been left unfinished as we were waiting to make the decision on the floor.
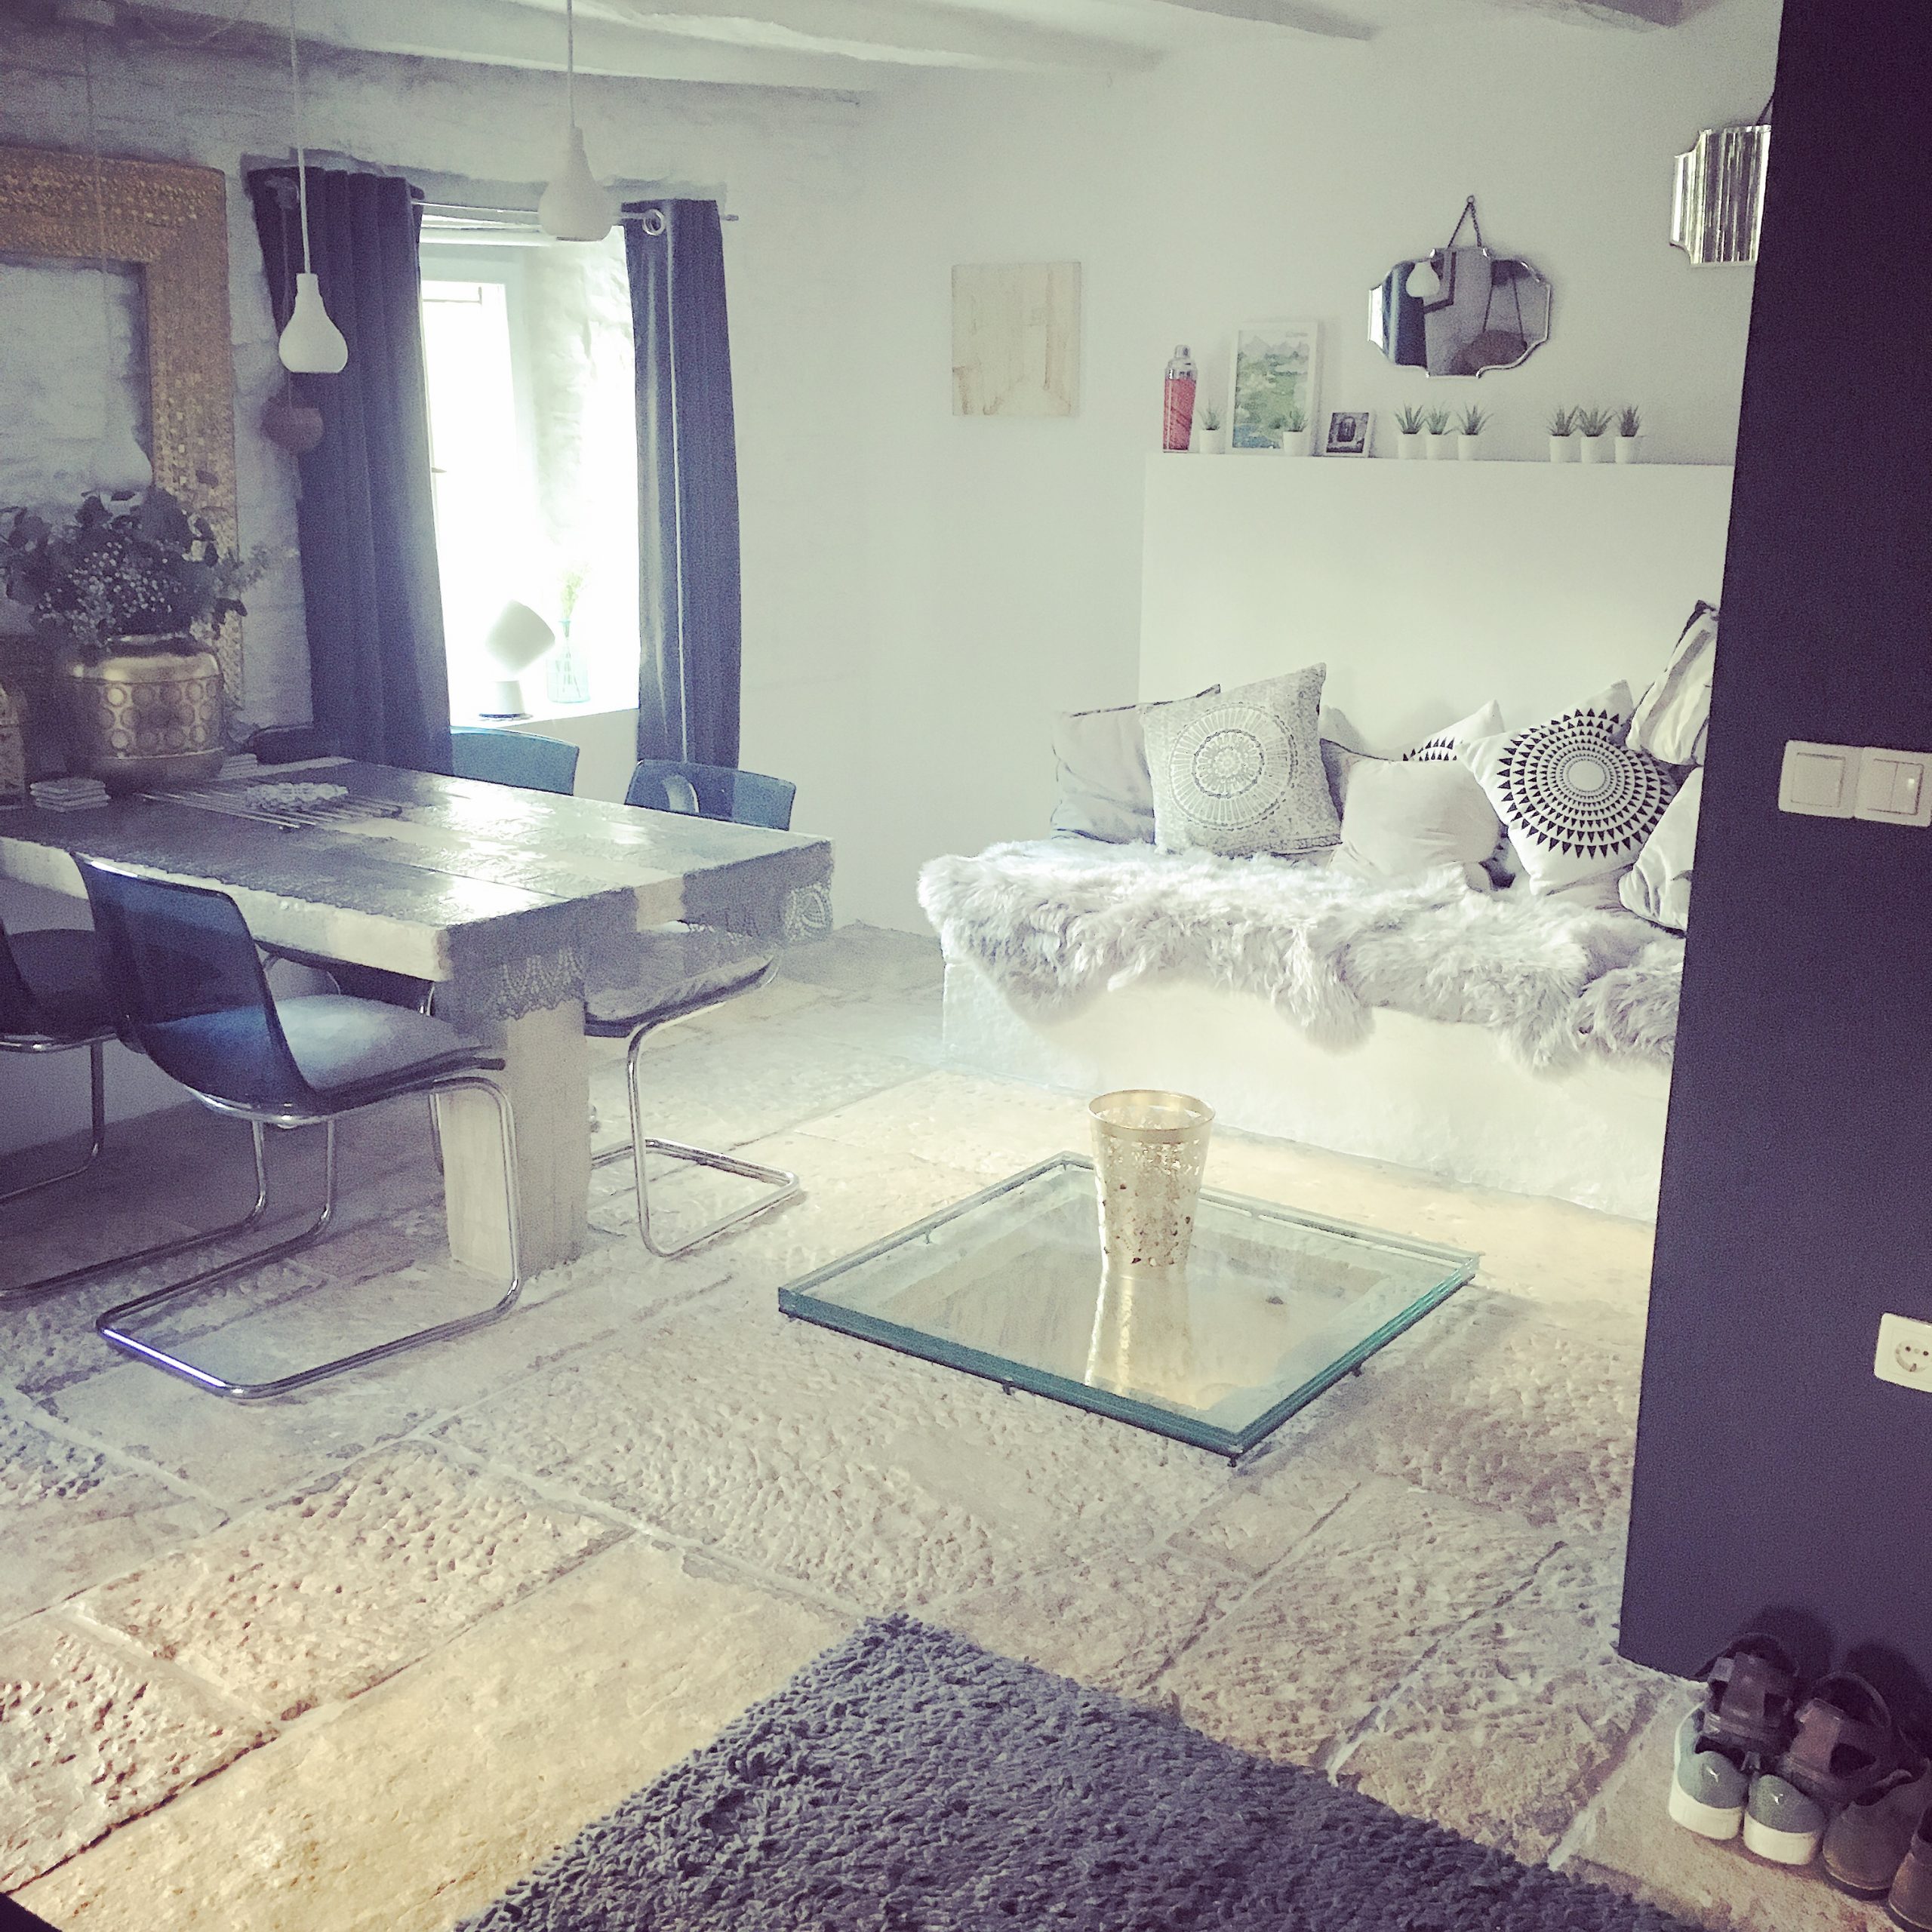
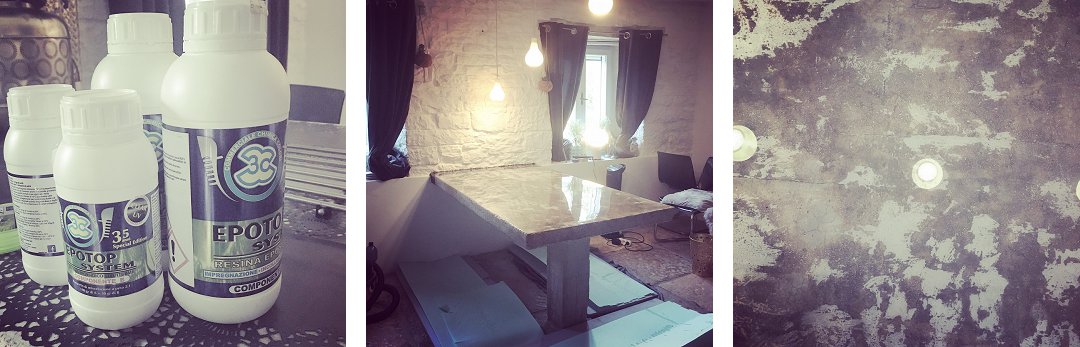
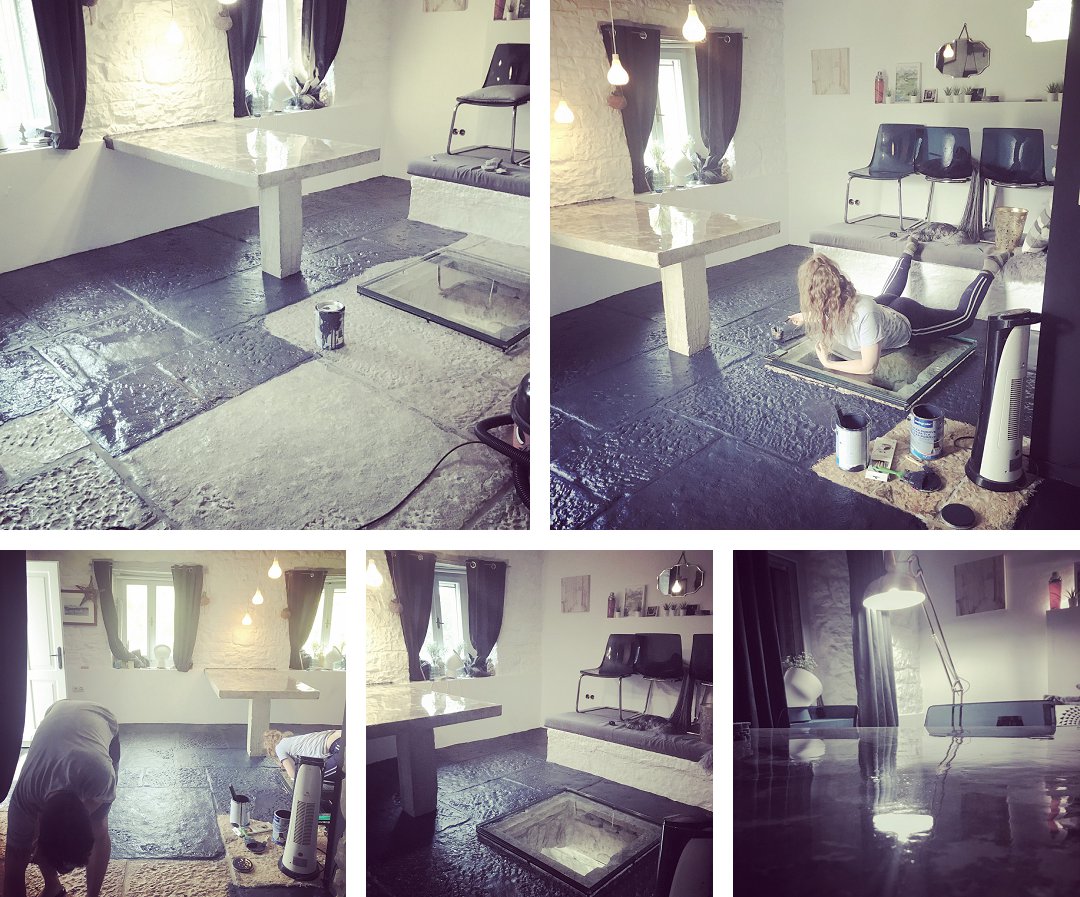
The dual issues with the concrete table and the floor can easily be seen in the photo above. The table plinth is still rough and unfinished and the top of the table is still too powdery, not having ever been treated properly. The floor is effectively like an outdoor patio – uneven and cold. And, you can see the height of the glass cover, which we now also need to take into consideration with any floor we lay. However, once the paint option was decided upon, we figured we could now finish the table – and this was when David revealed another string to his bow. He works with RESIN! So, without further ado, a trip to Koper was done and the resin tracked down – it’s much harder to source here, than you might imagine.
Armed with a blow torch, rubber gloves and the resin, David set about transforming the concrete table top. We also bought wood, cut to size for the plinth – this was painted the same navy blue as the floor and silver profiles were sprayed gold, to finish off the edging. The resin top was left for two days to ensure that it was completely hardened – and wow, what a difference! Because we’d used other varnishes and finishes on the table, and had sanded it a few times, the overall effect is quite marbley, rather than grey polished concrete. Definitely not what we expected, but the resin has highlighted the colours in the concrete and it is just so beautiful. In places, it looks as if specks of gold have been scattered. Just stunning…
Once the resin had been applied, and dried, the floor was painted. Why we haven’t done this previously, is beyond me! The results are amazing and now the Well Room feels like a room. A proper, finished room.
The final touch will be another couple of big chunky blue rugs to soften the floor and add warmth to the room. Not so long ago the Well Room was a storage room for builders’ tools and general mess. Now, it feels a very luxurious, warm room, with the deep navy colour scheme and touches of gold. The high gloss table top complements the well chamber when it’s lit up, and the soft uplighting on the back wall adds to the ambience. We’re now looking forward to cosy autumn evenings, with the thick navy velvet curtains drawn, and being able to finally sit down and eat at our concrete table.