Decoupage or découpage is the art of decorating an object by gluing colored paper cutouts onto it in combination with special paint effects, gold leaf and other decorative elements. Commonly, an object like a small box or an item of furniture is covered by cutouts from magazines or from purpose-manufactured papers.
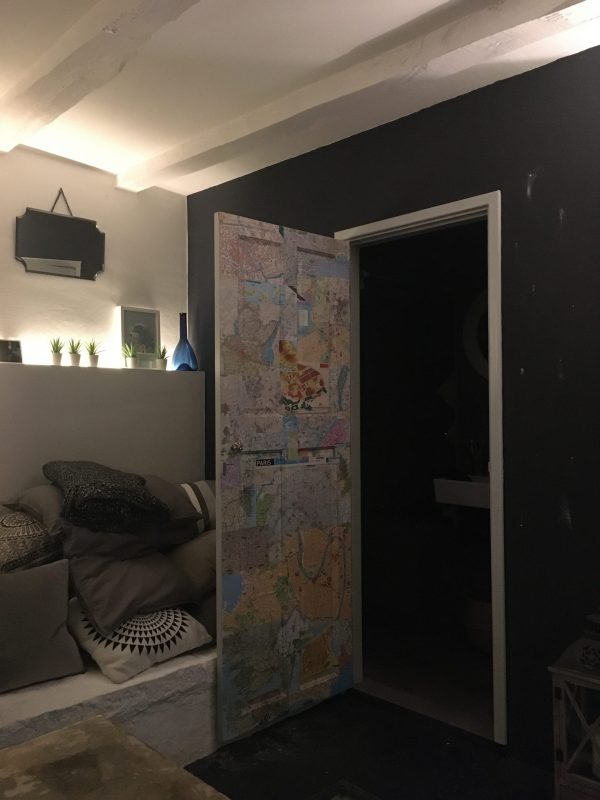
Our internal doors are the pretty basic DIY store four panelled ones. They are on the list to replace, but we’ve not got round to bit of the list yet. They have all been painted a very soft pale blue satinwood and new handles have been fitted, so are OK for the time being. However, over a couple of rainy days we were sorting our holiday box – the one where receipts and tickets and maps get chucked at the end of a trip, always with the intention to do something with these memories. Sorting them all on the concrete table in the Well Room, it suddenly came to me – why not use them to decoupage the inside of the downstairs bathroom door?
materials used
In my usual gung-ho way, I just decided that I knew what I needed (listed below), so if you’ve not done this before yourself but fancy giving it a go, perhaps check online in case I missed out something crucial. Although to be fair, I’ve gone on to decoupage other surfaces in the same way, and they’re all fine.
- Paper Maps
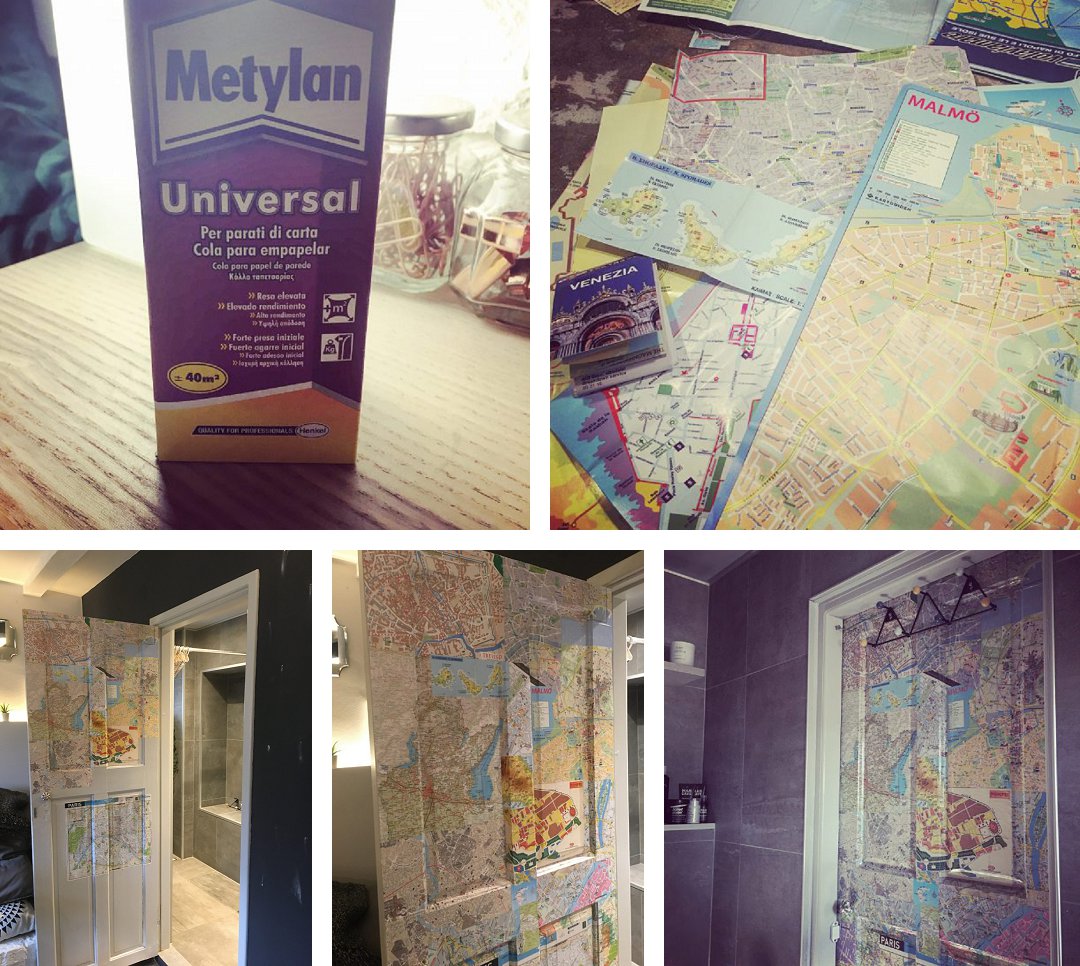
- Wallpaper paste
- Scissors
- Small paint brush
- Clear varnish
- Small sponges (one to smooth out any air bubbles and the other to dab away any errant wallpaper paste)
I decided to use just the maps, cut up, as was finding it too fiddly to try and place tickets, receipts etc in a pleasing pattern as they were all different thicknesses and looked too messy. I laid them out on the table first of all, and could see pretty immediately they weren’t going to work, so made the decision to cut up the maps. This made creating a pattern so much easier. I applied the wallpaper paste (and only make up a small quantity as you don’t need a lot) in sections and so was easily able to slide the map pieces to the edges of the door, so there was no messy overhanging. The panels were a bit more tricky, but I quickly realised that by scoring a line in the corner of the piece to be used, I achieved a neat fold. It did quite lot longer than I thought it would, but once all secured in place, it looked as I had wanted it to and so was worth the effort. Because the door is a bathroom door, and so obviously affected by steam and moisture, I applied four coats of clear varnish. It was completed a couple of months ago, and all of the pieces are still firmly secure. No peeling or coming away, so the more coats you can apply, especially in a room like a bathroom, the better.
Our downstairs bathroom is quite small and there isn’t really the space for magazines etc – and to be honest, I couldn’t stand the clutter. So, for those who like a bit of reading matter in the small room, there’s a door full of maps to be explored.
I have since done a bit more decoupage on a few other surfaces and have to say that I definitely found the pages of a book to be the nicest to work with. I would never normally destroy a book, so chose a book that we had a couple of copies of. And one that I thought would get more reading if it was randomly decoupaged on the back of a door…
