We’re at the stage in our house renovation, where we can now be quite a bit bolder in terms of decor. We’ve taken on an Istrian stone house, which in parts, is over 200 years old – and possibly more – so there is a wealth of history and tradition attached to it. Houses in our part of Istria, fall into three categories – the traditional stone dwellings like ours with tiny, shuttered windows, modern hacienda style houses with multiple balconies and often painted in deep pinks, oranges and reds, and ultra modern cube style buildings, usually white or grey on the exterior and with floor to ceiling glass walls. We definitely don’t want to adversely change the exterior of the house – although next year, Project Garden will be a different story – and so when you approach it, it does look like many other houses in the area. Although, we were so lucky that the previous owners had done all of the structural work, including a new roof, repaired stonework and new aluminium guttering, so it is in excellent condition and looks rather smart from the outside.
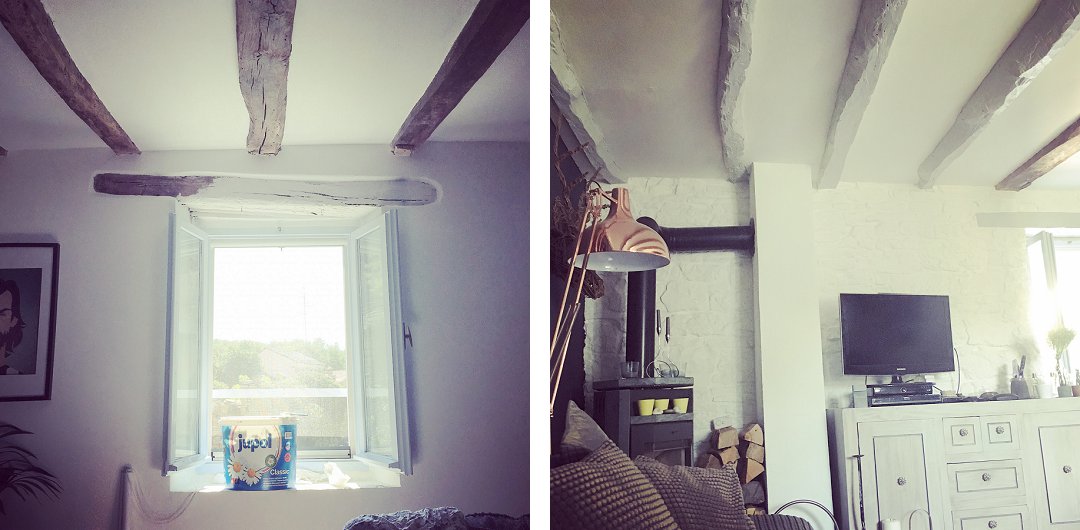
Inside, it’s taken nearly a year, but all rooms are now white washed. We knew we didn’t want a traditional Istrian stone house internally, and so early on the decision was taken to paint the exposed stone walls. We have seen interiors where the stone walls have obviously been sand-blasted and cleaned up and these do look lovely, but our walls were not in this state and so the house seemed dark. With the exposed wooden beams, it was a bit country-cottagey and definitely not what we wanted. Although it’s been a labour of love – those Istrian stones don’t half soak up the paint – we’ve finally got a house which is much lighter and feels so much more spacious. So, you’d think we’d be happy and stop there and sit back and enjoy our new lighter, brighter rooms…
wrong!
All white is all fine and good – but we realised that we were going to have work a bit harder to get that contemporary look we were after indoors. If *everything* was white – flooring, furnishings etc – we could probably have achieved that Scandi minimalism, but we’re living in a home, not a styled shoot, and the amount of cleaning that we’d need to do to keep our Scandi dream going, plus the additional expense of new furnishings, meant this was a non-starter. So, we’ve gone for the less expensive option – pops of colour. I’ve been scouring Pinterest for inspiration and pinning like mad, and I kept coming back to these images, in particular…
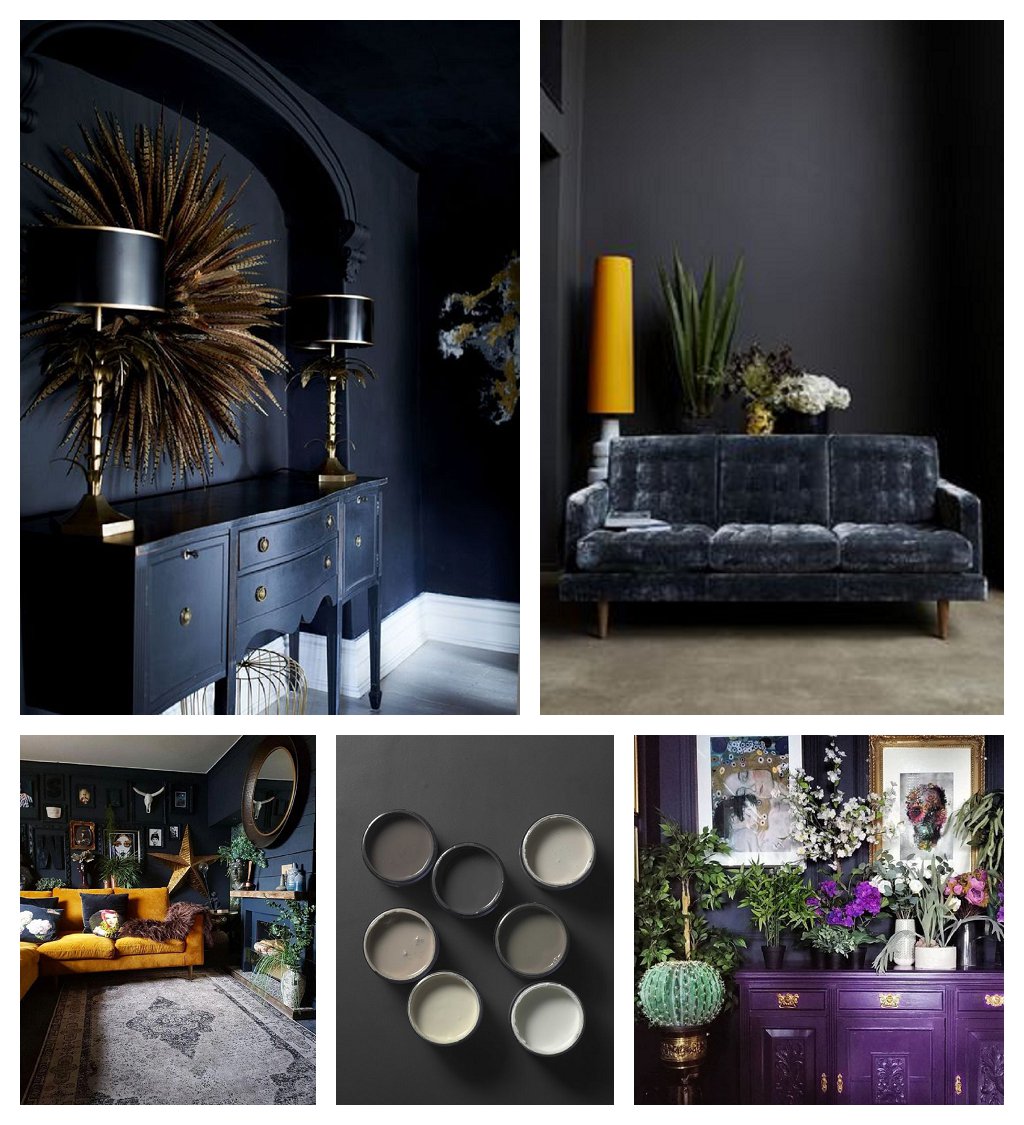
Our living room, although it has a low ceiling and the two windows are quite small, is large and I felt sufficiently big enough to take a very, very dark wall. Thankfully, I didn’t have to do too much arm-twisting and the only decision was what colour to go for. Having found the equivalent of B&Q out here, it’s easy to get paint mixed and we are becoming quite well known on the mixing counter. Although you can get familiar brands like Dulux, the range of colours doesn’t seem as extensive as we’re used to and so we always now opt for the mix option. This paint, in coverage and texture, is very similar to Farrow & Ball – and at a fraction of the price, we’re being won over. One coat was all it took to cover a large expanse of wall, and now that it is finished, we couldn’t be more delighted with our feature wall!
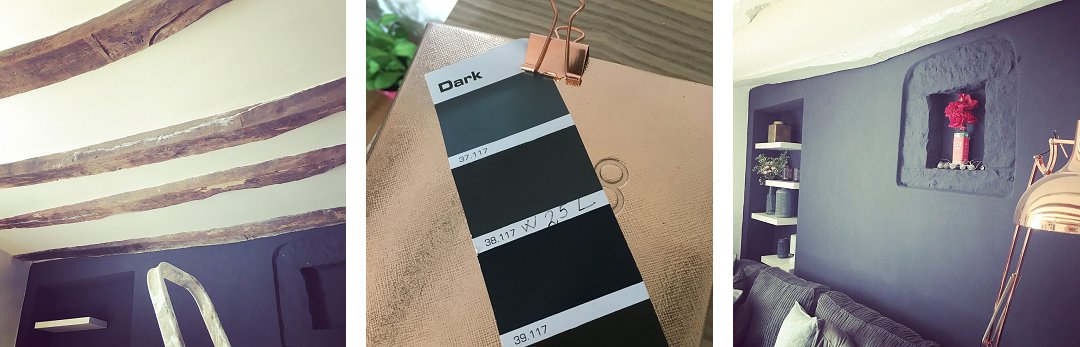
As well as the ceiling beams, the windows have big, thick beams above, to support. The wood used isn’t the best – it looks in places, as if it has been used previously to cut other pieces of wood on, as there are deep gouges. So, we’ve decided to also deal with these and in the process, make the windows seem larger. As with the beams, the wood around the top of the windows has been treated for woodworm – you can never be too careful with these critters – and undercoated and top coated in the beautiful calming matt grey used on the beams upstairs. Eventually all of the beams throughout the house will be done in the same way, but we’re having to be realistic about the amount of time it takes and so have set a target of two beams a day…
So, the living room is *almost* there – the floor still needs to be painted and then we need to deal with the issue of the open plan staircase, as well as finishing the ceiling, but we feel massive progress has been made over the last week. It’s also very gratifying to stand back & see our own handiwork, rather than that of a builder. And, DIY, without the accompaniment of a hammer drill is blissful…